Scrap Metal Recycling

As I’ve been renovating my home, I’ve been saving all the metal to sell it for scrap. I had no idea how much money I could make, but for the sake of the environment and proper disposal, it should be recycled. Also, if I made $5 from the scrap metal, then that was $5 I didn’t have before. After saving all the metal from Phases I and II of my home renovation, this is what I had accumulated.
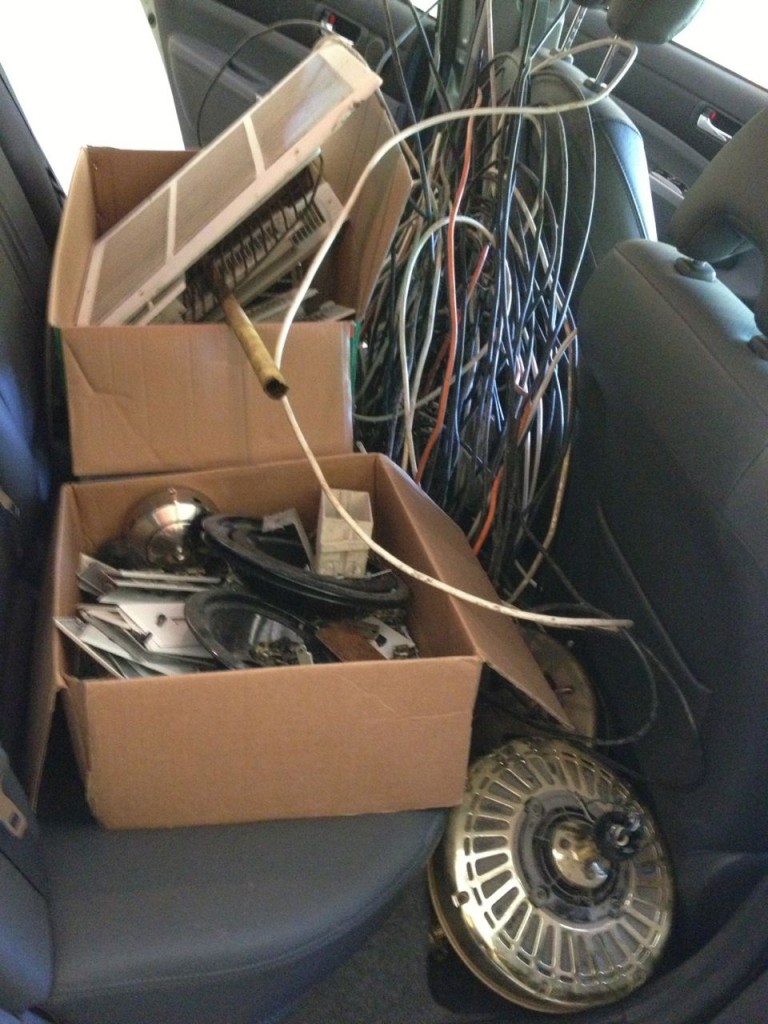
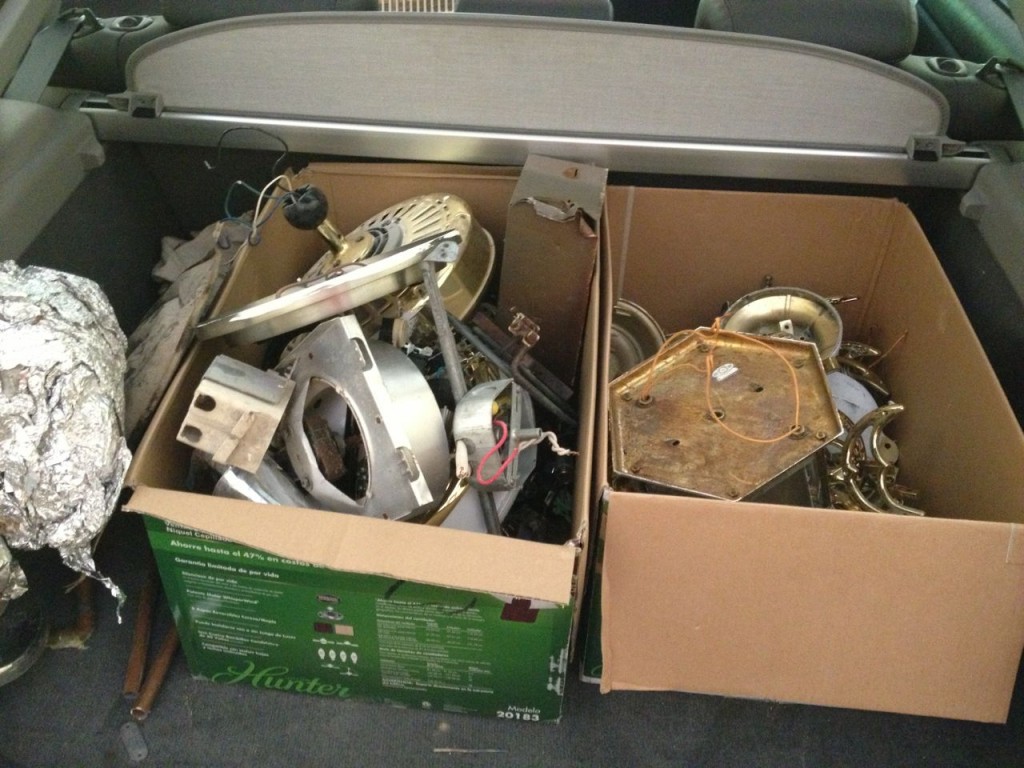
metal scrap metal scrapThe ferrous metal (magnetic) included all the nails from pulling out drywall and molding, various screws, electric outlet and light switch plates, vent covers, ceiling fan parts, appliance parts, and much more. I also had a bunch of brass doorknobs and light fixtures. I had copper from electrical wire, piping, and coaxial cable. Finally I had four overhead fans and various other metal parts.

What was the results of selling this metal? I made $76! I am really happy with this. The majority of the money came from the ceiling fans and the various brass parts. Clearly copper prices are still high.

I’m going to add this to the list of reasons why it’s great to do-it-yourself. I carefully saved all the metal, separated it, and then sold it. I have never seen contractors do this. At times, electricians and plumbers might save copper, but they will sell it for their own profit. My electricians actually tossed scrap copper wire into the trash, and I went back and pulled it out. [It was a clean trash bag.] It literally pays to do-it-yourself.

 

What Not to do with Metal Covers

Geeky Girl Engineer’s Home DIY Tips for Morons

All houses have numerous cover plates for wall openings such as electrical outlets, light switches, and vents. The cover plates can be fancy or plain and come in various materials. Vent covers are normally metal, but specialty ones come in different materials. For two floor vent openings in my family room, I bought unstained white oak covers that I then had stained and sealed to match the hardwood floors in that room.

Wooden vent cover stained and sealed to match the hardwood floor

Wooden vent cover stained and sealed to match the hardwood floor

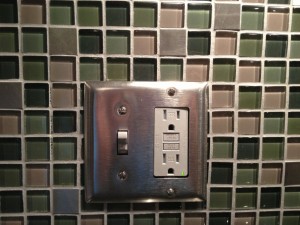
Light switch and electrical outlet covers are normally plastic but can also be various materials and colors. In my kitchen, I used stainless steel light switch and outlet covers to match the stainless steel tiles in the backsplash and the stainless steel appliances.

Stainless steel light switch/outlet cover which matched stainless steel tiles

Stainless steel light switch/outlet cover which matched stainless steel tiles

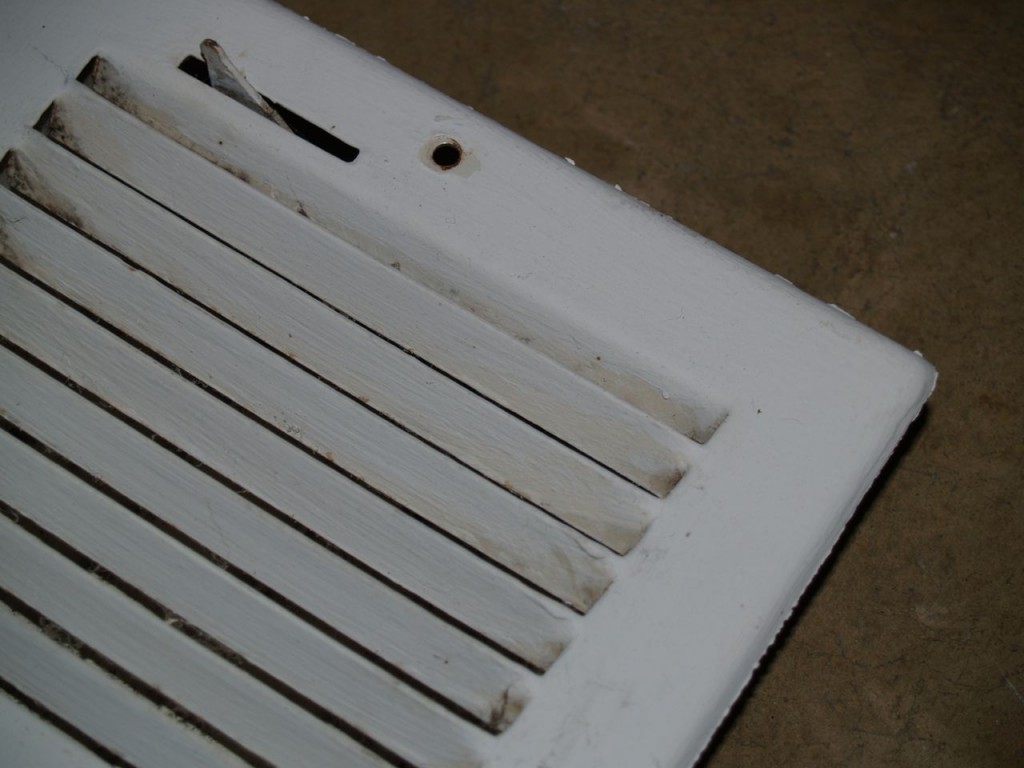
Thus, you don’t have to use the standard type covers. You can buy fancier ones to coordinate with your decor. You can also buy covers that are specially made to be painted or wallpapered so that they really match your walls. However, these are special ones. You can’t, or rather you shouldn’t, paint any metal cover. If you paint metal, it needs to be primed properly, and if you want the paint job to look nice, it needs to be applied carefully, preferably it should be sprayed on for a really nice, smooth coat. Otherwise, you get this:

Improperly painted vent cover

Improperly painted vent cover

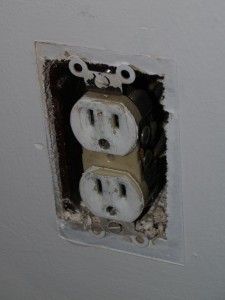
I’m not sure if the photo really shows how bad it looks. The paint is chipping all over. Brush marks can clearly be seen, and in some places, the paint pooled, making the coat very uneven. Most importantly, if you refuse to heed my advice on this, please, please, take the covers off before painting them. Don’t paint them while they are on the wall. If you paint them while on the while, this happens:

Outlet after cover that was painted while on wall was removed

Outlet after cover that was painted while on wall was removed

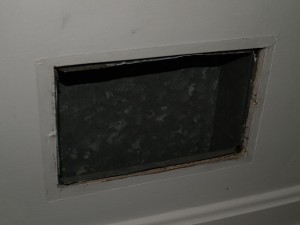
See the lovely lines where the cover was? That is due to a thinner coat of paint where the cover covered the wall. Here is a similar outcome with the vent cover.

Vent after cover that was painted while on wall was removed

Vent after cover that was painted while on wall was removed

Closeup of vent after cover that was painted while on wall was removed

Closeup of vent after cover that was painted while on wall was removed

The very worst part was that the paint had flowed underneath the cover and essentially glued the cover to the wall. I had to use a flat-head screwdriver to pry the covers off the wall. In some places, it didn’t come off cleanly.

So please, don’t do this. Your house’s future owners thank you.

Hacking a Chandelier

As part of my home renovations, I have been installing new light fixtures, including several from ELK Lighting’s Elysburg line. I wanted to use a three light chandelier in the downstairs foyer by the front door and at the second floor landing at the top of the stairs. The only problem is that they hang 22 inches from the ceiling (at their shortest), and since my house has 8 foot high ceiling, this means the chandelier is hanging a little low for an area where people are going to walk. As with all chandeliers, it came with chain to allow it to hang lower, but there is a limit how short it can be. Thus, I decided to hack the chandelier to make it even shorter. Here is the chandelier at its shortest as designed.

top of the chandelier before

top of the chandelier before

Chandelier before

Chandelier before


The way the chandelier connects to the outlet box is pretty standard.

Outlet box crossbar holds screw pipe

Outlet box crossbar holds screw pipe

Screw collar loop attaches to clip ring to canopy nut

Screw collar loop attaches to clip ring to canopy nut

The simplest way to shorten the fixture seemed to be to eliminate the screw collar loop, clip ring, and canopy nut by somehow connecting the light fixture screw directly to electrical box’s screw pipe. The problem of course is they are two different diameters and threading size. I considered using a bolt that was the same size as the fixture screw, in place of the screw pipe, then just connecting them using a coupling nut. However the light fixture screw is a M10 x 1.0, and after a half hour of internet searching, I couldn’t find a single vender for that size coupling nut. Another method that I thought of later, was to bring the light fixture screw directly to the box crossbar using a nut, then drill holes through the canopy and use screws through those holes to hold the whole fixture up. The problem with that is that I was a little weary of drilling holes in the canopy in case I messed up, and also, I would need decretive screw caps to cover the screws, and I didn’t know how to find those.

What I did, was searched to aisles of Home Depot in search of something I could use to connect the pieces somehow, and I finally came up with the following solution. These are the materials I used. I used the chain that came with the chandelier, a nut to fit the light fixture screw, and a crossbar adjustment kit I found in the electrical aisle. I bought the crossbar adjustment kit solely for the piece that in the photo is outside the package it came in. I have no idea what the piece is, but it looks like to two very strong washers held apart in a parallel manner by a bar.

Materials for chandelier hack

Materials for chandelier hack

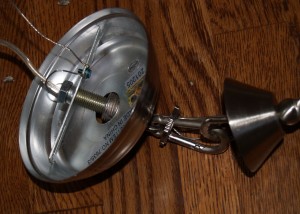
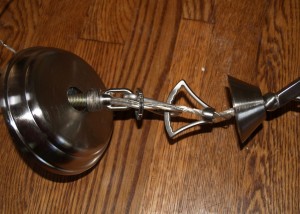
Here’s what I did. I put the parallel washer thingy piece on chandelier screw, then used the nut to hold it on. I then cut one of the chain links in half and used it to connect the top part of the parallel washer thingy to the chandelier’s screw cap. [You will note that as an engineer, I sometimes use highly technical terms like “thingy”.] I had to use a pipe wrench to bend the cut chain link into a closed loop. It’s rather strong.

My hacked way of connecting the light fixture to the screw cap.

My hacked way of connecting the chandelier to the screw cap.

The finished chandelier now looks like this. I was able to shorten the entire chandelier by about two inches. Not that much, but enough that hopefully less people will hit their head.

Chandelier after

Chandelier after

Top of the chandelier after

Top of the chandelier after


So that’s how I hacked the chandelier. If anyone out there has any suggestions for a better way I could have done it, that does not involve welding, I would love to hear it. Please leave a comment with suggestions.

What not to do with drywall

Geeky Girl Engineer’s Home DIY Tips for Morons

This is freshly installed drywall.

Guest room after drywall and new window

Guest room after drywall and new window

Drywall is that stuff you paint and hang things on. It is also known as gypsum board because the interior of it has gypsum in it. In bathrooms, green board is used because it is moisture resistant, but it is not moisture proof. It is called green board because it is green. Yes, home buildings supplies have very creative names. It is seen below in my guest bathroom as I was tearing it out for renovations.

Downstairs bathroom deconstruction

Downstairs bathroom deconstruction

Drywall is screwed or nailed to studs. It covers up the insulation, studs, wires, pipes, and everything else that goes behind a wall. Fairly simple, right? Evidently not so much for the morons who “renovated” my house at one point before I bought it. Here is the room that is now my guest room when I was tearing things down to renovate.

guest room deconstruction

guest room deconstruction

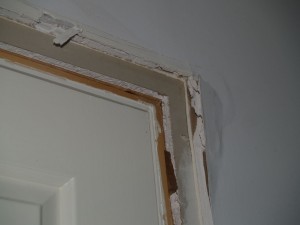
Look at the wall on the right that still has the drywall. See the brown outline around the door? Here is an up close photo of it.

Guest room deconstruction. Two layers of drywall for unknown reasons.

Guest room deconstruction. Two layers of drywall for unknown reasons.

That outline is due to a second layer of drywall that was unpainted and revealed when the door trim was removed. Here is another look at it.

Guest room deconstruction. Two layers of drywall for unknown reasons.

Guest room deconstruction. Two layers of drywall for unknown reasons.

So let’s just be clear: there is absolutely no point to two layers of drywall on one side of a wall. One layer of drywall is all you need. In fact, if you add a second layer, then the electrical outlets and light switches don’t fit through properly. I have tried to come up with a logical reason for the two layers of drywall. Best I can come up with is that they noticed the mold on the drywall on another wall in the room and assumed it was from moisture from the adjoining bathroom. Therefore they decided to put up a second layer of drywall to stop the moisture. This makes no logical sense, and the drywall wouldn’t stop moisture from coming through the wall. Assuming this is the reason, they entirely missed the reason for the mold anyway. The mold was due to the fact that behind the drywall was furring strips on cinder blocks. The cinder blocks formed the exterior wall. The two exterior walls of this room are underground, hence the cinder blocks, and there was not enough moisture protection to prevent moisture from the ground coming through the cinder blocks which then would gets to the drywall.

However, I really don’t know why they put up a second layer of drywall. The mold is simply a guess. When I tore down both layers of drywall, I didn’t notice anything wrong with the covered layer of drywall that would explain why it was covered. The summary of this is, there is no reason for two layers of drywall. It is a waste of drywall, and it is stupid.

Geeky Girl Engineer’s Home DIY Tips for Morons

I have been renovating my current house for two years now, and I realized before I bought it that it had been built and originally owned by smart, caring home owners, but it was later owned and “renovated” by morons. Therefore, in order to help and possibly stop morons out there, I have decided to start a new, sporadically reoccurring series of posts called “Geeky Girl Engineer’s (GGE’s) Home DIY Tips for Morons.” First, a few disclaimers though as to why you should either ignore or not ignore anything I write.

  • I am not a licensed contractor of any type. I am also not a home renovation expert.
  • I however have owned and renovated three homes. Much of the work I did myself.
  • I am a licensed professional engineer (PE), but I am by no means selling or marketing my services as a PE. Also, I am an environmental engineer, so I am more knowledgable about wastewater and hazardous waste and not so much about structural engineering such as one needs when designing and sometimes renovating a house. I hired a licensed structural PE to help with a portion of my current house’s renovation because I demolished a structural wall.
  • As an engineer, I have been known at times, to adhere to the engineer’s adage which is:
    1. If it doesn’t move and it’s supposed to, use WD-4.
    2. If it moves and it’s not supposed to, use duct tape.
    3. If those don’t work, use a hammer to bang the crap out of it. This may not solve the problem, but it will make you feel much better.
    4. If all else fails, use C-4.
  • OK, I totally made up number 4. I have never actually worked with explosives, which is disappointing. Actually, that is not entirely true. I have used picric acid in a dilute solution before to measure creatinine in urine. However it was always in solution and kept in a plastic container and never at risk of exploding.
  • As a female, unlike some but not all males, I read the directions. I even read the directions when it is something from IKEA and the directions involve a strange cartoon man, and no matter how well you follow the directions, you always have leftover: three screws, four washers, two nuts, and five wooden dowels. No matter if the piece does not involve wood, there will still be wooden dowels included. Also, I now have a fine collection of Allen wrenches.
  • I know what I can and can’t do. I also know what I shouldn’t do. I know when to call in professionals. As a chemical engineer, I have the book knowledge to design a petroleum refinery, but I don’t have a clue how to change the oil in my car. I leave that to the professionals, who can also recycle the oil. I fully understand fluid dynamics, pipe sizing, friction factors, municipal waster and waster design, etc. However, I still use a professional plumber for tasks larger than changing o-rings or existing faucet heads, etc.
  • I am a natural blond.

So, while many might be able to learn something from this series of posts, before you attempt any type of home do-it-yourself (DIY) tasks, please try to figure out if you are in fact, a moron. Consider the follow questions:

  • Has anyone ever told you that you are a future Darwin award winner or that you almost won a Darwin award?
  • If you have an electric outlet with two holes, but your plug has three prongs, is your solution to cut the third prong off the plug?
  • Do you believe building codes are silly and not in the least useful?
  • Have you ever seen something you did or something very similar to something you did on There I Fixed It? Or are you confused as to why some things are on that site because they look perfectly fine to you?
  • Do you think that when a female is raped, her “body has a way to shut that whole thing down” to avoid getting pregnant?
  • Have you ever opened a box containing electronics or some other non-food item, found a little packet and thought “oh nice, it came with a snack,” only to be disappointed when it said “don’t eat”?

If you answered yes to any of the above questions, you might be a moron. If you are going to do anything more complicated than changing a light bulb in your home, you might want to consider calling in a professional. Actually, you may want to consider if you are even capable of changing a light bulb. After all, someone had to be the inspiration for all those “how many _____ does it take to change a light bulb” jokes. Please consider carefully. Your future self, and any future owners and occupants of your home will thank you for it.

There is the introduction. Stay tuned for tips based on the incredibly stupid things I have encountered in this house. Contact me if you have questions. Contact me if you have tips or photos of really stupid things done at your house that you would like to share with the morons out there as something not to do. I can promise that if you ask me a question, and I don’t know the answer, I will not make up an answer, but I may be able to refer you to some sites with actual valuable information.

Short Term Radon Test Results

Previously I wrote that I was testing my house for radon. I got the test results back this week, and the test results came back as an average radon level of 2.9 pCi/L. The good news is this is less than the 4 pCi/L action level. The bad news is this is still elevated above average house level of 1.3 pCi/L. This test involved collecting radon over four days. At work, I am currently working on a project that involves looking at the indoor air variability due to radon or volatile organic compounds intrusion from the soil and groundwater. Thus, I know better than most how variable indoor air concentrations can be. They can vary a lot. Therefore, before deciding what to do, I have considered the following items:

  • The test was done in winter under proper closed house conditions. Closed house conditions means keeping the doors and windows closed except for normal entering and exiting the house through the doors. This is not an issue in the winter because it is cold. This is also one of the reasons winter is one of the best time to perform the test, but it also means that the test will lead to higher results than if more open house conditions are maintained. When the weather is nice, I like to open the windows and doors, so that would generally mean at least during those times, the radon concentrations in my house should be much lower.
  • The test was performed over four days. As I stated, indoor air concentrations can vary a lot, and in terms of those fluctuations, four days is relatively short term. Even ignoring the seasonal effect of closed versus open house conditions, the long term average radon conditions could be much higher or lower than 2.9 pCi/L. The reasons are not fully understood, but exterior temperatures and precipitation can affect it. A long term test over several months or even better a year, will give a much better understanding of the average concentration. If the results had been 1.3 pCi/L or less, than given the conditions, I would probably not be at all worried that the long term concentrations would be higher.
  • The EPA recommends that the test be performed in lowest habitable portion of the house. As such, I placed the test in the guest room for that and other reasons stated previously. However, I am almost never in the guest room. I don’t have guests that often, and the door to that room remains shut most of the time. Thus the only air exchange in the room is via the ventilation ducts and a little underneath the door. Furthermore, my bedroom and all the common areas of the house (kitchen, living room, etc.) where I spend most of my time are upstairs and should have lower radon concentrations than the guest room. Therefore, even if the results from the guest room do accurately represent average radon concentrations, they are borderline for taking mitigation action and probably represent the highest levels in the house. While I don’t want to expose my guests to undue risks, especially since my guests are generally people I like or love, do I want to mitigate based on the results from this room?
  • Finally, I’m a scientist, and I believe in validation and replication. This was one test result, and home test kits are generally not considered the gold-standard of any type of test. There is no doubt at least of some amount of inaccuracy with it.

Therefore, I have decided to test the house again, but this time for a longer duration. I have also decided to run two tests simultaneously. I plan to place two testers in the house, one in the guest room again and one upstairs in my master bedroom. I have ordered a long term home test kit that can be used to test between 90 and 365 days. I plan to run the test over an entire year to get a much better indication of what the long term average radon concentrations are in the house. Also, by testing both the guest room and master bedroom, I can better understand what my average exposure is both in terms of the average annual concentration and in the rooms where I spend the vast majority of my time. I will also add that while the guest room is a guest room now, as it is bedroom, legally and real estate-wise speaking, and thus in the future it could be a normal bedroom if my life changes or if I sell the house. Therefore I still consider it important to know what the long term radon concentrations are.

Check back in a year, and I will let you know what happened and how I am proceeding.

Testing My House for Radon

I’m testing my house for radon, and you should also. Winter is the best time to test your house for radon, which is one of the reasons I am testing it now. What is radon, and why am I testing for it? Keep reading.

What is radon? It is an odorless, tasteless, invisible gas that also happens to be radioactive. It is produced naturally from the decay of uranium, which occurs naturally in soil across the United States, and other countries and continents. The United States Geological Survey (USGS) has this neat map showing uranium soil concentrations across the US. Due to its radioactivity, radon is a carcinogen. In fact, it is the second leading cause of lung cancer after smoking. Radon gas is pretty much everywhere, both outdoors and indoors. Like all carcinogens, there is no safe level of exposure. You can’t completely avoid exposure because it is naturally occurring, but it is best to avoid it if you know it is present.

The US EPA estimates that the average home has an indoor radon concentration of 1.3 pCi/L, this means pico Curies, a unit of radioactivity, per liter of air. If your indoor air is above 4 pCi/L, then they recommend you fix your home. I’ll get to what fixing your home means next. Finally if the indoor air concentration is between 2-4 pCi/L, then they recommend you consider fixing the house. It is in that range that the concentration starts to get high enough above background that you might want to take action.

What happens if the radon concentrations in your house are high? First, don’t panic, your house can be mitigated to reduce the radon concentrations. You can hire a professional to install a mitigation system in your house. A mitigation system can either prevent radon gas from entering the house, or it can remove it from the house once it gets in. For example, one type of system sucks or pulls gas from beneath the house and then pipes it safely above the house where it can disperse into the atmosphere. Mitigation systems can be very effective and will greatly reduce your risk of lung cancer due to radon exposure.

Is your house at risk? As shown in the USGS map, some areas have higher concentrations of uranium in the soil than others. Areas with higher soil uranium concentrations will generally lead to higher radon gas concentrations. Also, houses with a crawl space will generally have less radon infiltrating the house than houses built on a slab or with a basement. The crawl space can allow the radon to dissipate before rising into the house. Houses with cracks in their slab are more susceptible because the cracks serve as a pathway for the radon to rise into the house. Also, pipes and conduits such as for wires from the house to ground can also allow radon to enter if they are not properly sealed.

So how do you find out if elevated levels of radon exist in your house? It’s fairly easy. Many states regulate the testing of radon, so you may try contacting your state radon department if it has one. Most of the time, you can go to your local home improvement store and buy a test kit for about $20. That’s what I did. The test kit I bought included two little containers that detect radon. The test kit had certain specific directions for the test containers such as they needed to be at least three feet off the floor, at least three feet from an exterior wall, etc., and they needed to be open for four days. The test containers were supposed to be placed six inches from each other. I presume you get two that are supposed to be placed in the same location for replicability. So here are the high tech test kits.

Both radon detectors placed for testing

Both radon detectors placed for testing

Yes that is a tape measure in the photo because it said to place them six inches apart, and I’m an engineer. Now be quiet. The detectors should be placed in one of the lowest habitable rooms of the house. My house is built into a hill such that the front door on the first floor is ground level, and the back door of the second floor is also ground level. I chose to place the detectors in the guest room, which is on the first floor and in the back exterior corner of the house. The back wall and 3/4 of the side wall of the guest room are underground exterior walls, and thus this room would be one of the most susceptible to radon infiltration from the ground. The room that serves as my office and workout room is next to the guest in the front exterior corner of the house. Two of its walls are also exterior, but only about 1/3 of its side wall is actually underground. However, there is a crack in the slab about two feet long in the office, so I considered whether the test kits should be placed in this room. [Due to the extensive renovation I’ve been doing on this house, I know where all the cracks and openings are.] That crack could serve as a major route for radon to enter the house. However, I ultimately decided that the guest room would be more susceptible to radon infiltration because of the amount it is underground.

After choosing in which room to place the detectors, I then found a good location that was far enough away from an exterior wall and above the floor. I then proceeded with the testing protocol. I unscrewed the containers and let them sit for four days. Whew, that was exhausting. I deserved a drink after initiating that test. Here is one of the detectors unscrewed. It’s quite simple looking.

Radon detector open to run test

After I let them sit for four days, I screwed the caps back on, filled out the form that came with them, and mailed them into the lab. It cost $30 to have them tested, so with the cost of the kit, the entire thing cost me $50. I consider $50 a small price to pay to make sure I am not unknowingly breathing in a carcinogen everyday. I’m currently waiting for the results from the lab, and I will update my blog when I get the results.

One final note, I said at the beginning of this post that winter is the best time to test for radon. The reason for this is winter tends to be the time that the radon concentrations in a house would be at the highest. When the weather is nice, people tend to open windows  for ventilation instead of using the AC or heater, and people just tend to open doors more often to go outside for whatever reason. Thus in the winter, the house is more closed off, and radon concentrations can build up due to less exchange of the indoor air with the outdoor air. Where I used to live in south-eastern part of US, I probably had windows open more often in winter, as I constantly used the AC in the summer, so this might not hold true. That and the fact that indoor air concentrations can vary day to day, is why experts recommend that if you get high levels detected with a short term test, you consider doing a longer term test such as over several months, to determine what the longer term average is. The test kits do have false positives, especially at lower concentrations, so if you test your house, and it comes back high, once again, don’t panic. Test your house again, this time with a longer term test, and see what the longer term concentration is, and then determine if you need to take action. However, don’t remain ignorant about the risks. Test your house; it’s important and could save your life.

For more information:

A Curtain Rod from Door Knobs and a Wooden Dowel

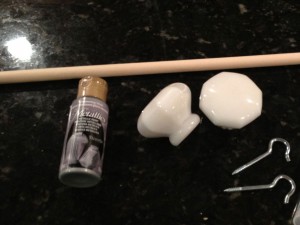
Here are my starting materials: two antique milk glass door knobs, a wooden dowel, two wall hooks, and silver paint. Not pictured are store bought curtain clip rings, Liquid Nails, and the curtain, which is actually a tablecloth.

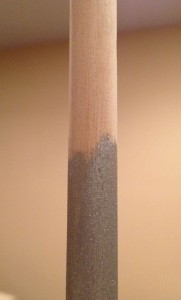
I painted the dowel. Then I put the curtain rings on the dowel. I used Liquid Nails to glue the dowel into the two antique milkglass doorknobs, which conveniently I bought without the rods that attach them to the door mechanism. The only problem with the way I created this curtain rod is that the curtain rings are now permanently on the rod, unless I want to break the dowel to remove them.

After everything had dried and cured, I attached the rod to the wall using the wall hooks which simply screw into the drywall and studs. [Wooden dowels come in multiple diameters, so I picked the diameter that best fit into the door knobs. Similarly, I bought wall hooks that best fit snugly around the dowel.]

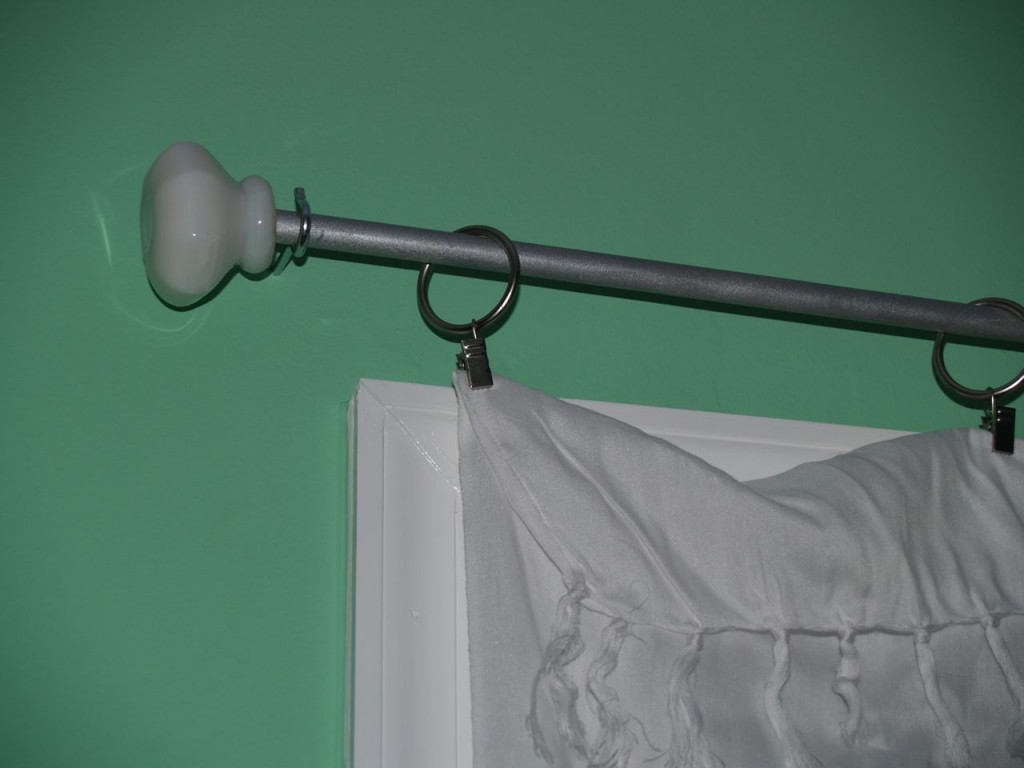
For the curtain, I used a hand painted piece of fabric that my sister gave me, which I think is from Bali. I am pretty sure it is supposed to be a tablecloth, but it fit my window perfectly, and it was too pretty to never have on display. Below is the finished window treatment that is pretty and VERY unique.

Changing a Lighting Fixture

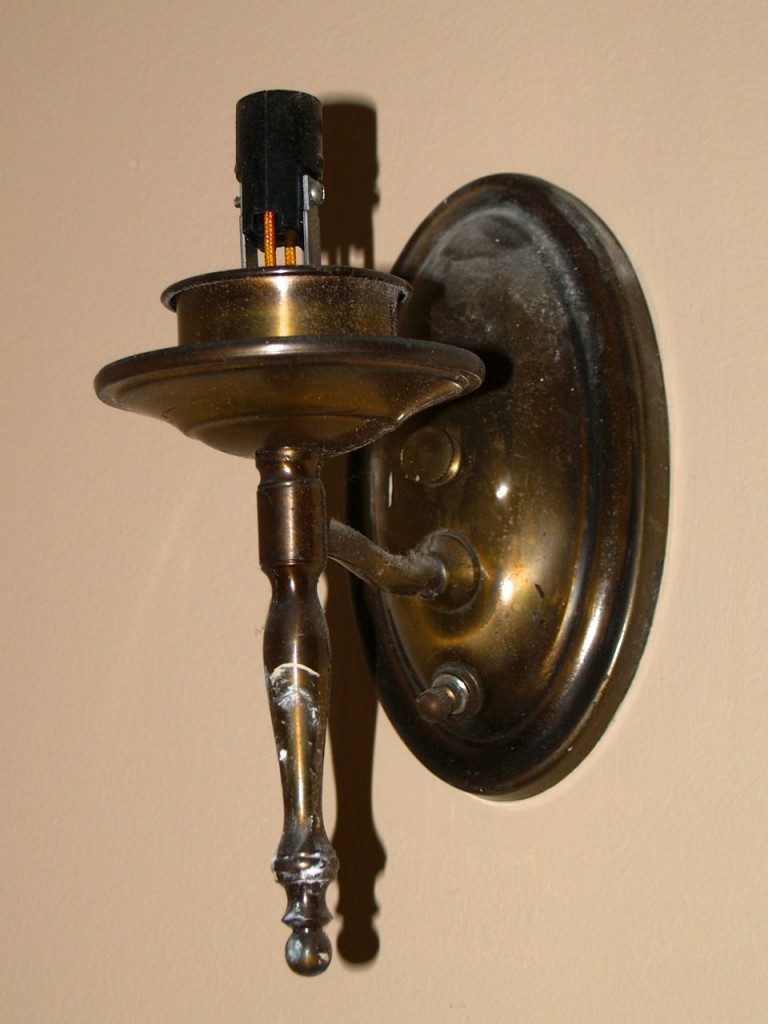
I will do all sorts of things around the house, but I admit that doing electrical work sometimes scares me. I think it is the issue that if you do it wrong, you could kill yourself or catch your house on fire, but no pressure! Really most of the work is not that difficult. I still leave the big stuff to professionals, but little tasks like changing a lighting fixture can be done easily by yourself. First thing you need to know is turn off the fixture by the breaker. Not electrocuting yourself is a good thing. So here is the light fixture I removed, and now you understand why I replaced it.

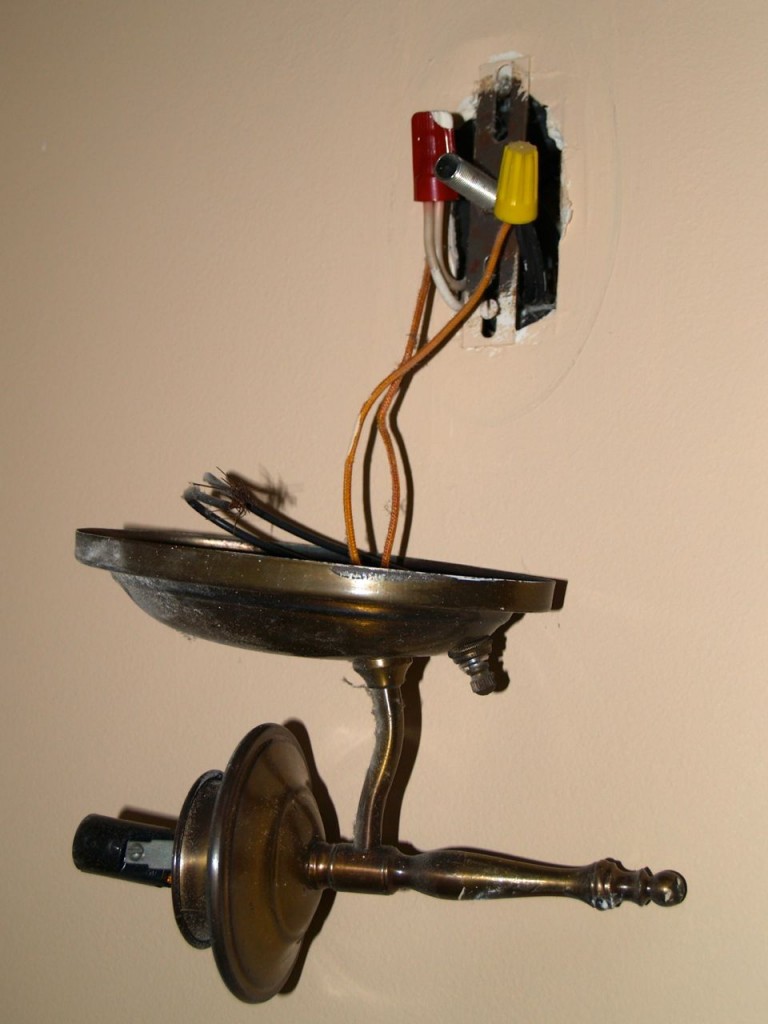
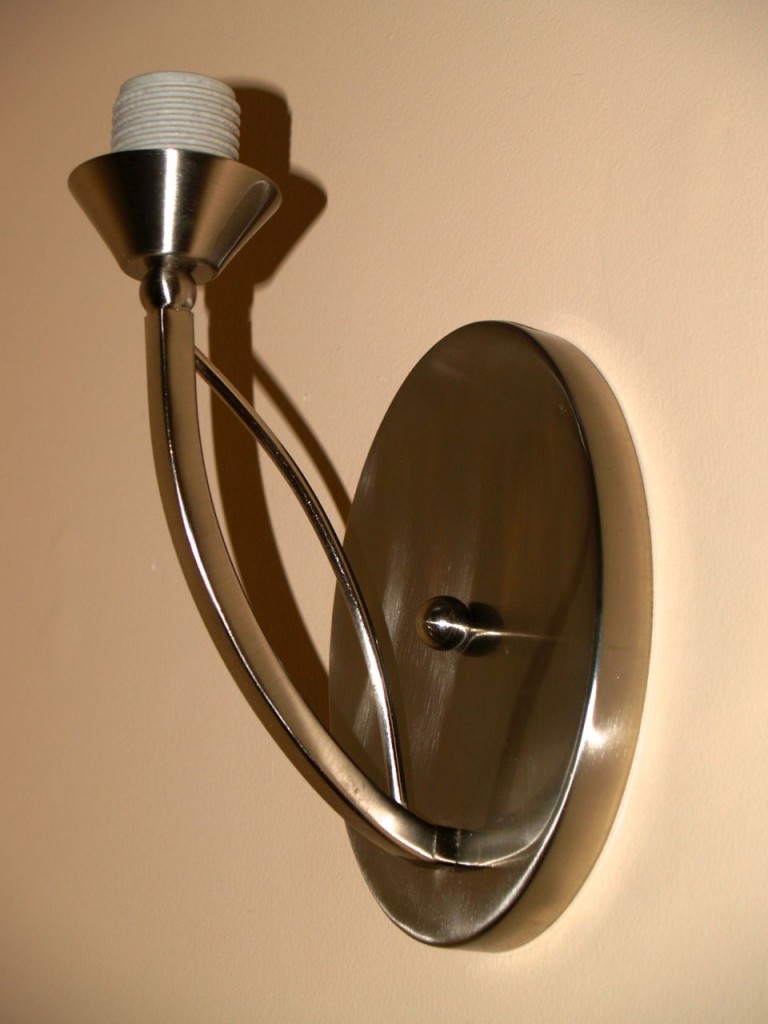
Like a lot of fixtures, this one was attached to wall via a large screw. Remove the nut in the middle of the sconce, and the sconce can be removed.

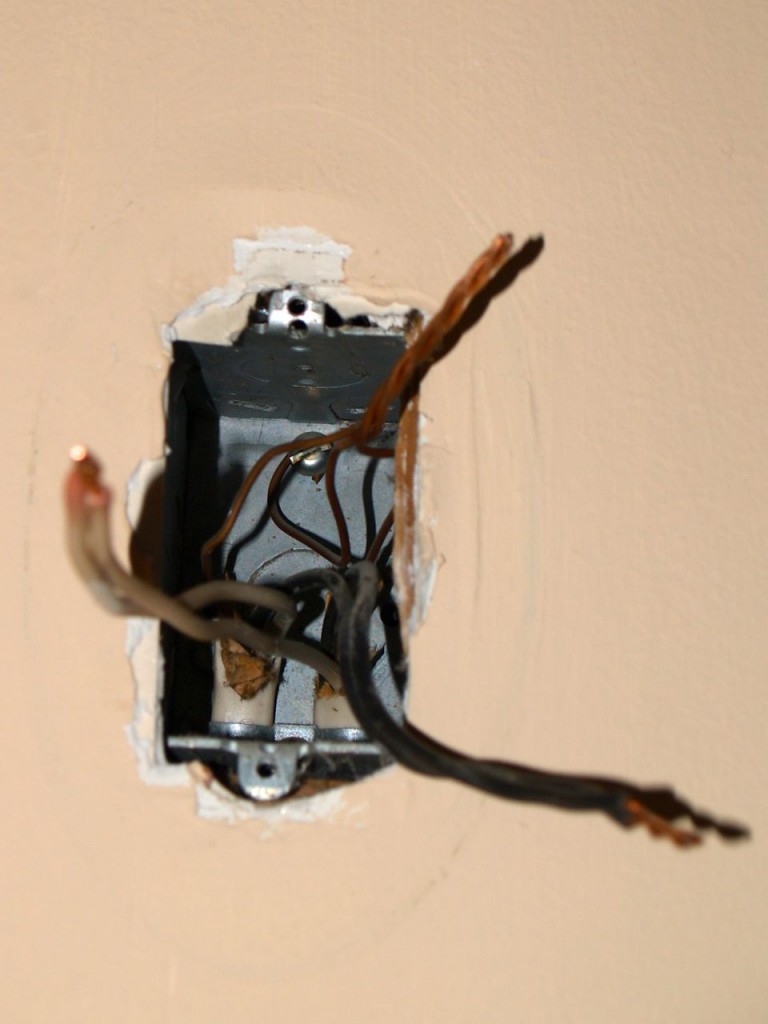
Then unscrew the wire nuts and remove the old sconce’s wires, and the sconce can be removed from the wall. Then remove the old mounting bar from the outlet box by the removing the screws that attach it to the outlet box.

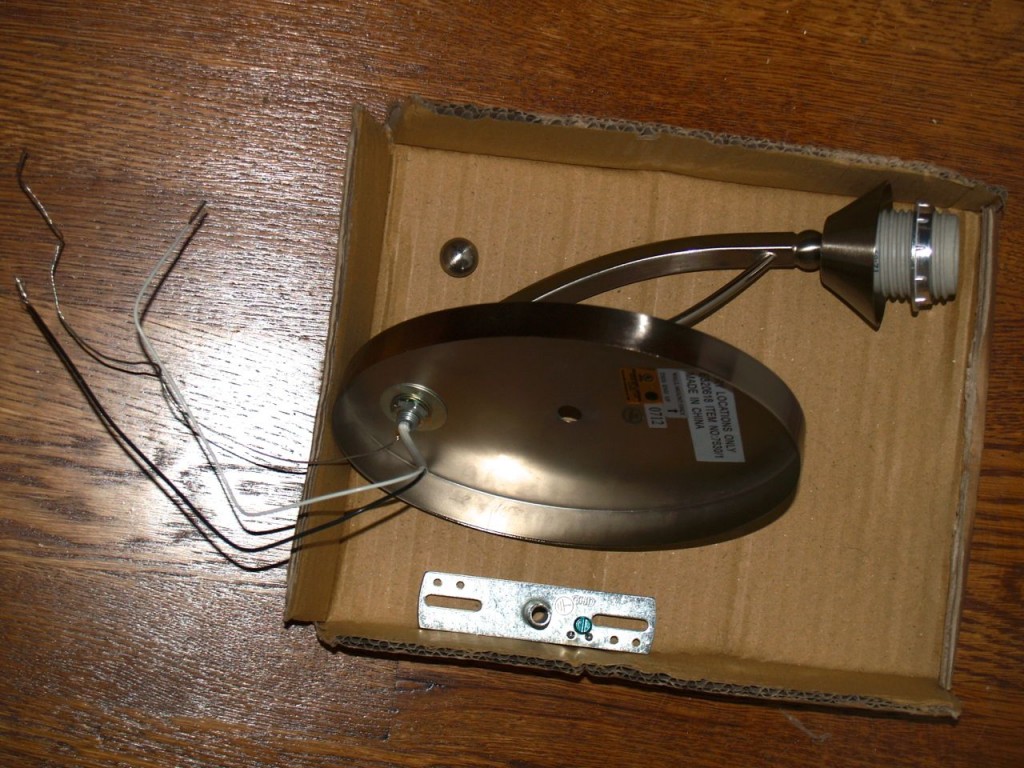
Here is the new fixture. Note that it has a black wire, a white wire, and a bare grounding wire. It came with a mounting bar that has a green screw on it. That is the grounding screw.

Install the new mounting bar. The fixture grounding wire needs to be attached to the outlet’s grounding wire and also the mounting bar’s grounding screw. This fixture’s instructions said to attach the outlet’s grounding wire to the grounding screw, then attach the fixture’s grounding wire to the outlet’s grounding wire. Because the grounding wire in this outlet box was already wrapped around a screw in the back of the box, there was not enough wire to do this. So I wrapped the fixture’s grounding wire around the mounting bar’s grounding screw, then wrapped the fixture’s grounding wire to the outlet’s grounding wire and secured with a wire nut. Then I attached the fixture’s white wire to the outlet’s white wire, and black to black, and secured with wire nuts.

Here is an up close view of the wiring attached to the grounding screw.

I then shoved all the wires back into the outlet box.

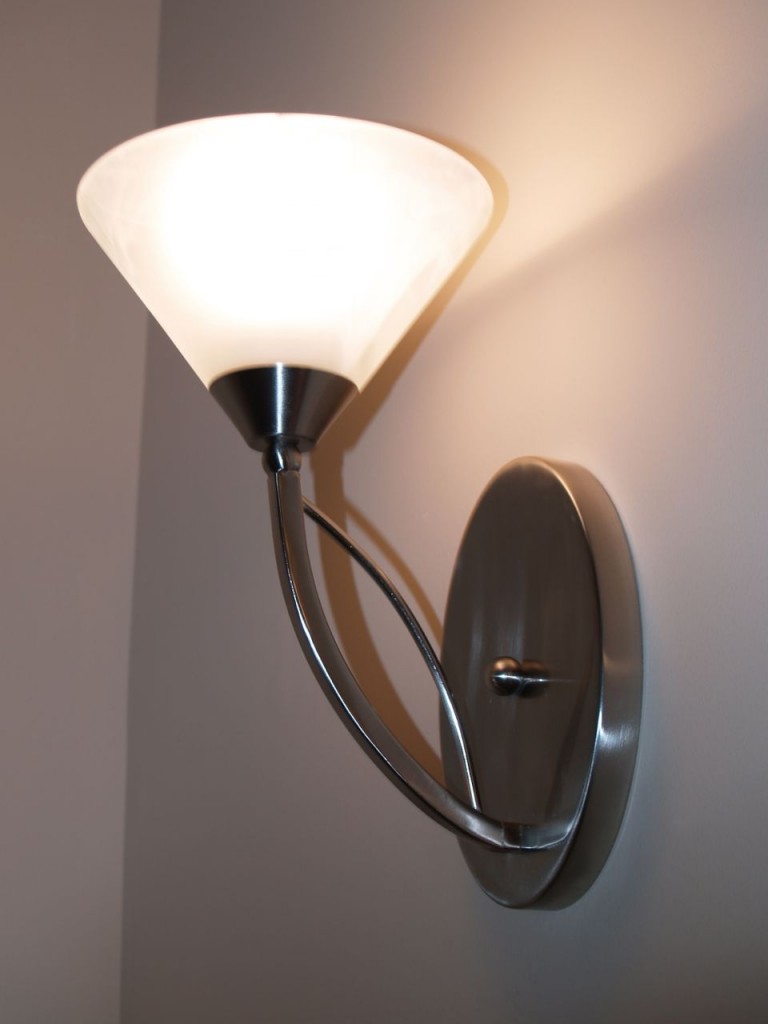
The sconce is then attached to the wall via the large screw in the middle of the mounting bracket and secured with the decorative nut.

The glass shade is then attached, and in the case of this fixture, secured with a metal ring that came with the fixture. Add a light bulb, and ta-da, and new working, beautiful light fixture.


Women Don’t Need Pink Tools

Evidently, Bic has decided that women can’t use normal pens and has decided to market a pen specifically for us. “Bic for Her” they call it because we need more pink crap. [I am not the only person who finds this demeaning and stupid. They have been inundated with sarcastic reviews on Amanzon.] I tweeted my indignation about this, and I asked what else do they think women need especially for us. You know, pink stuff. Do we need special hammers and power drills? I was quickly informed that the pink insanity does not stop with pens. There really are tools marketed especially for women, and yes they are pink. There are Little Pink Tools, which quite frankly make me want to hurl. There is also Tomboy Tools, which seems to be almost anything as long as it is pink. As if women can’t or won’t use something if it is not pink.

To be clear, I actually like the color pink. I use it in doses in my home decorating, and I have plenty of pink clothes, shoes, and jewelry. It is not my favorite color though. Pink does not mean something is “girlie,” and something does not have to be pink to be feminine. I am sure plenty of little girls love the color pink, but not that many women do. Women don’t need pink things just like girls don’t need pink legos or any other pink toy just for them. You know what kind of legos little girls like? They like legos, plain and simple. We could do a lot to end gender stereotyping if we stop shoving pink frilly stuff at girls and “manly” toys like guns and trucks at boys. If a girl likes pink and frilly stuff then great, but don’t assume just because she is a girl that that is what she wants and wouldn’t want to play with trucks and other stuff. And vice versa for little boys.

My sophomore year of college I moved into an apartment with several roommates. While moving in, I needed some basic tools. I think I was putting together a desk or something. I went to Walmart, and I bought a toolkit called Do-It-Herself. Yes, it was actually called this, and all the tools had baby blue handles, except for tools like the socket wrench, which were pure metal. I didn’t buy it for the silly name, and I certainly didn’t buy it because everything was matching baby blue. I bought it because it was a toolkit with a nice selection of basic tools that came in an organized, easy to store carrying case. I actually still have many of those tools, including the pliers, socket wrenches, and screwdriver. I still have some of the screwdriver bits too, but of course the philips bit has been replaced numerous time. It was a nice toolkit that fit my needs at the time. Looking back, I guess I should be happy that it wasn’t pink because evidently companies have decided that’s what we really want.
I am currently renovating the third house I have ever owned. I have renovated all my houses. With each house, the renovations have gotten more intense, and I have done more and more of the repair and renovation myself. Over the years of home ownership, I have bought more tools and replaced old ones or upgraded to better ones. Years ago, I bought a power drill and small drill bit case with bits of about ten different sizes. It served most purposes. Then years later, I bought a drill bit case with about 30-40 different sizes of bits. Last year I bought a circular saw, reciprocating saw, and a rotary tool. I’ve rented those before, but if you do enough renovation, it is cheaper in the long run to just buy them. You can also buy higher quality power tools than you can rent. Also when you rent, you have to buy your own blade anyway. And no, none of the tools I have bought since that original toolkit have been baby blue or pink or any other girlie color. I don’t buy tools because of how they look. I buy, or try to buy, tools that will last, that will work well, and that are reasonably priced. I would never buy a pink tool, partially because it is stupid, but also because if the tools is being sold because it is pink, then it is probably not being sold because it is a good quality, reasonably priced tool.
In short, women don’t need pink tools! We need good quality tools with easy to understand directions. We want them reasonably priced and easy to use. In the case of power tools, we want them to come to come with safety features, so we or anyone else who uses them doesn’t injure themselves. In short, we need exactly what men need.

For the record here are my tools, or almost all of them at least. You will notice a few baby blue ones from my original, aforementioned toolkit. However, not a single pink one among them.

My manual and power tools