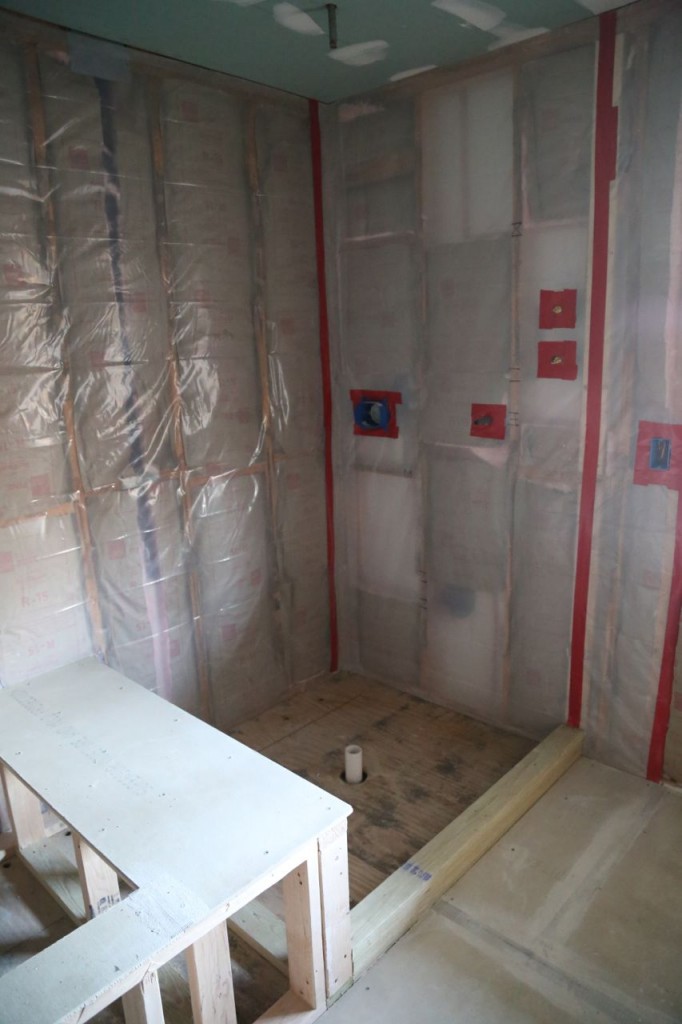
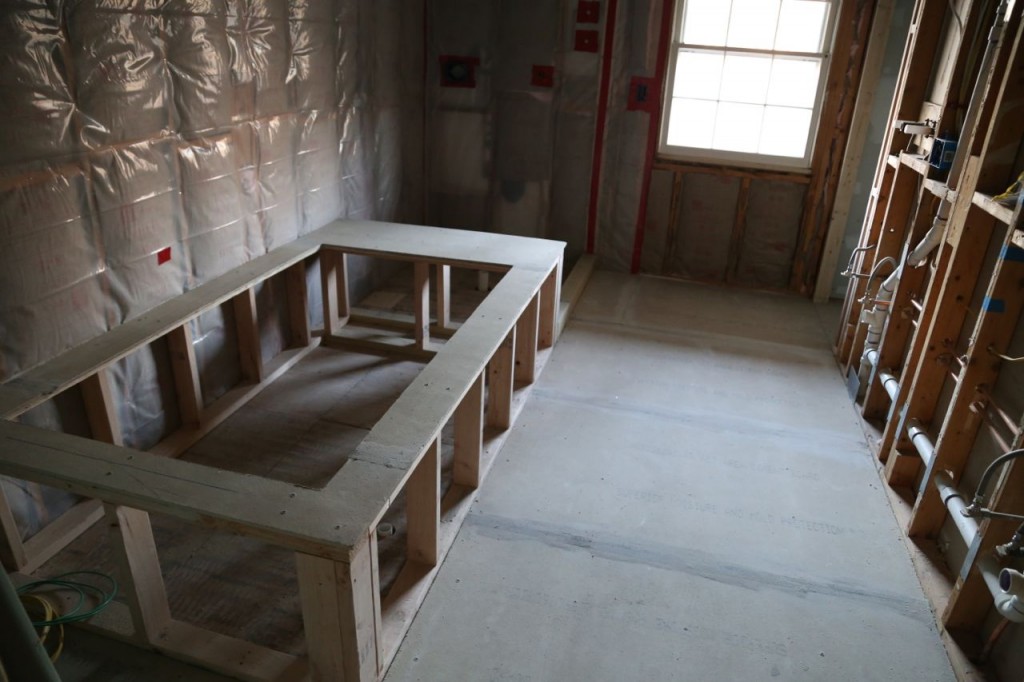
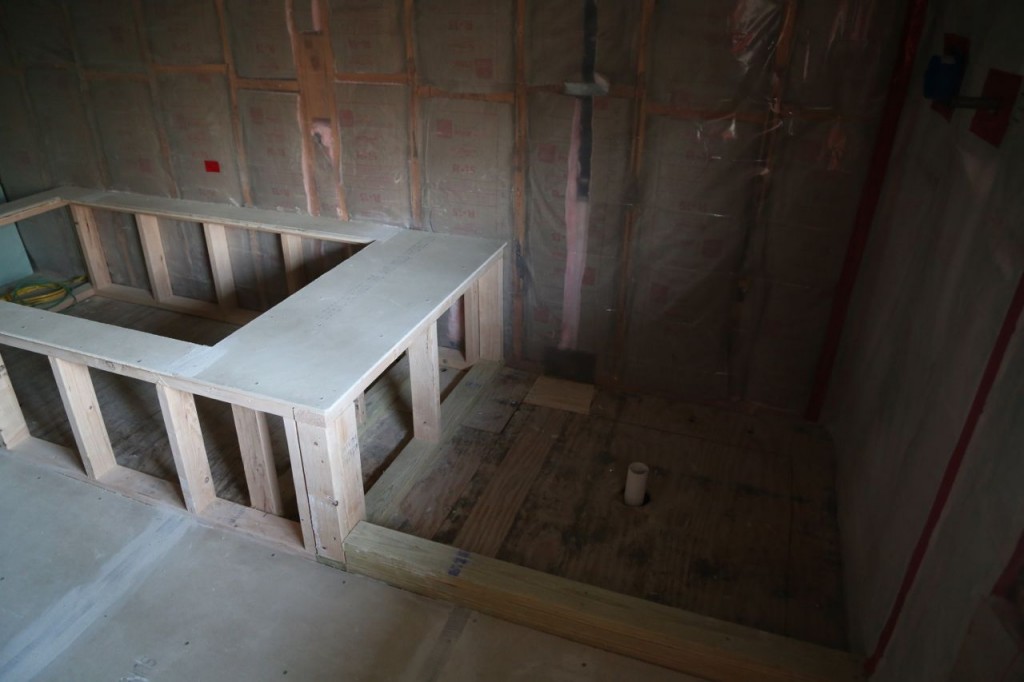
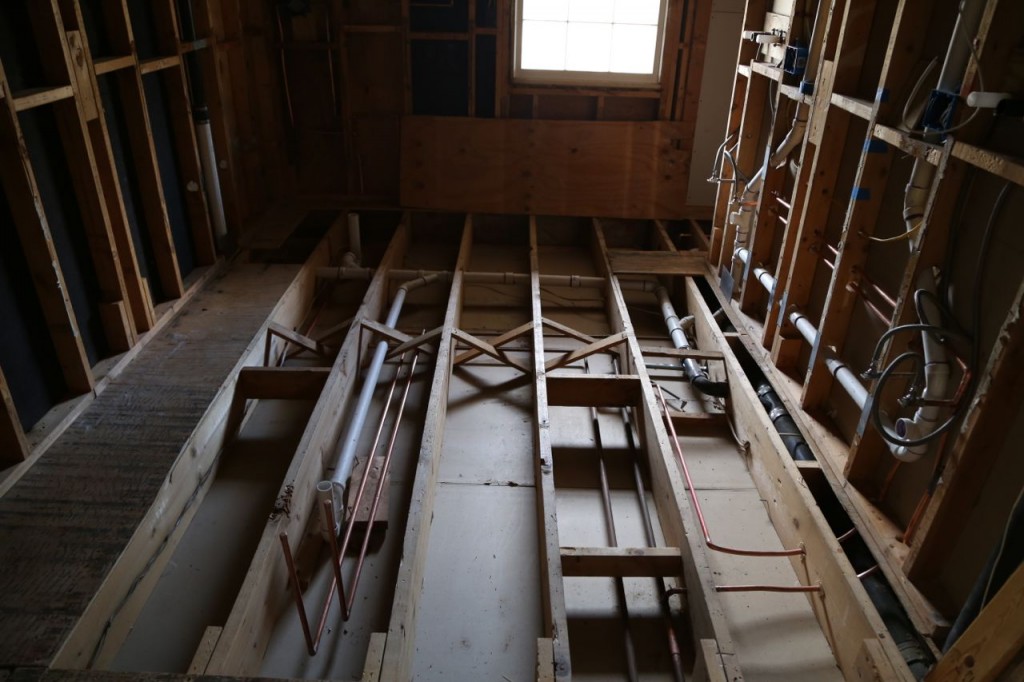
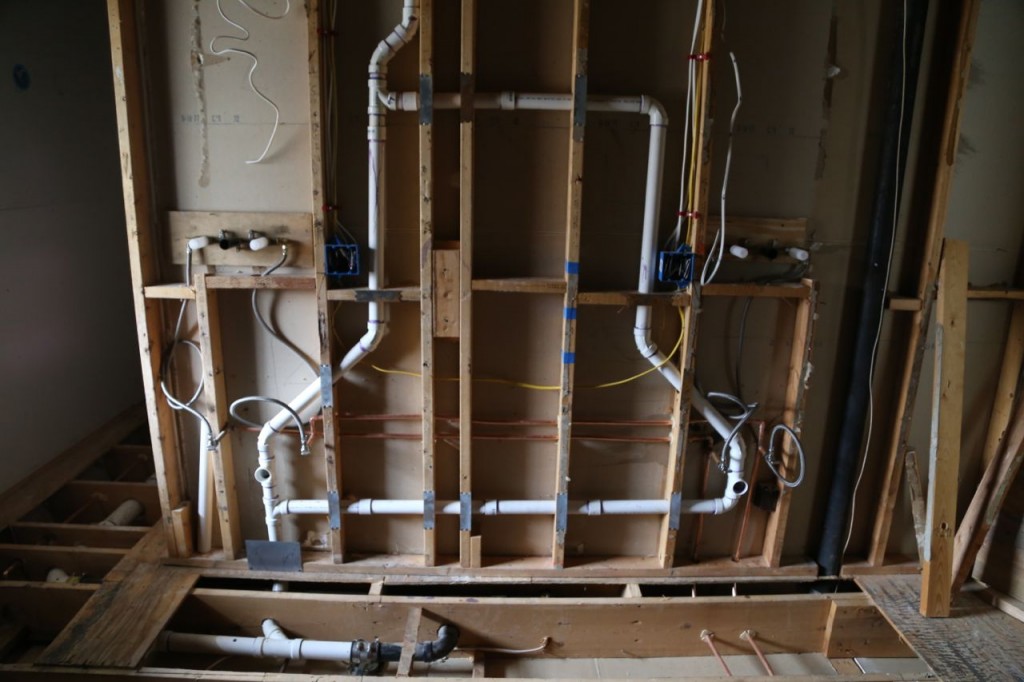
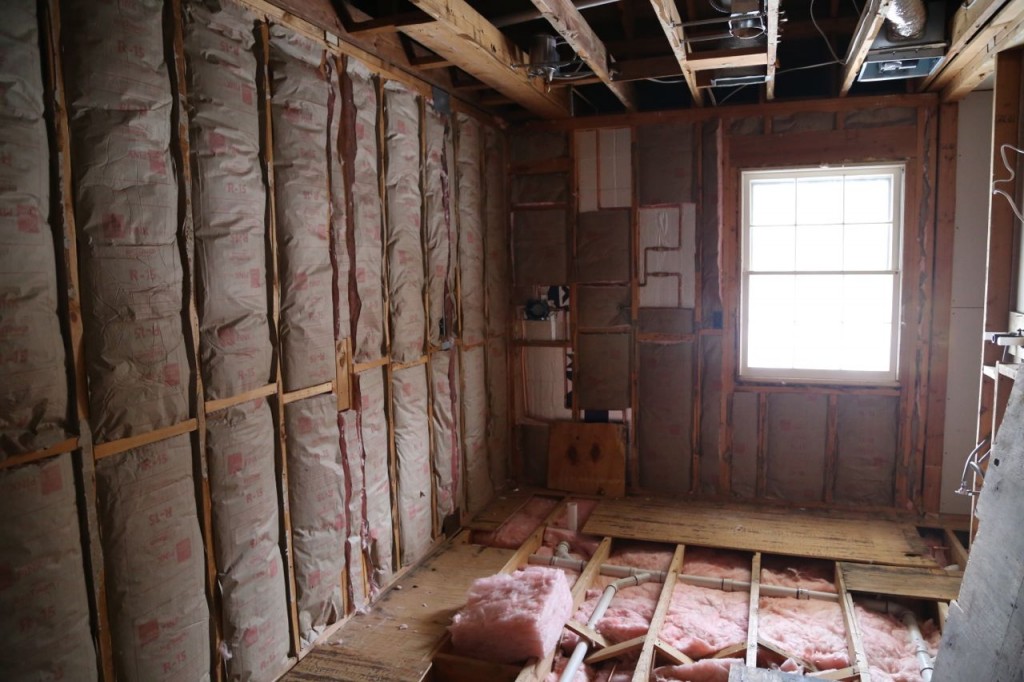
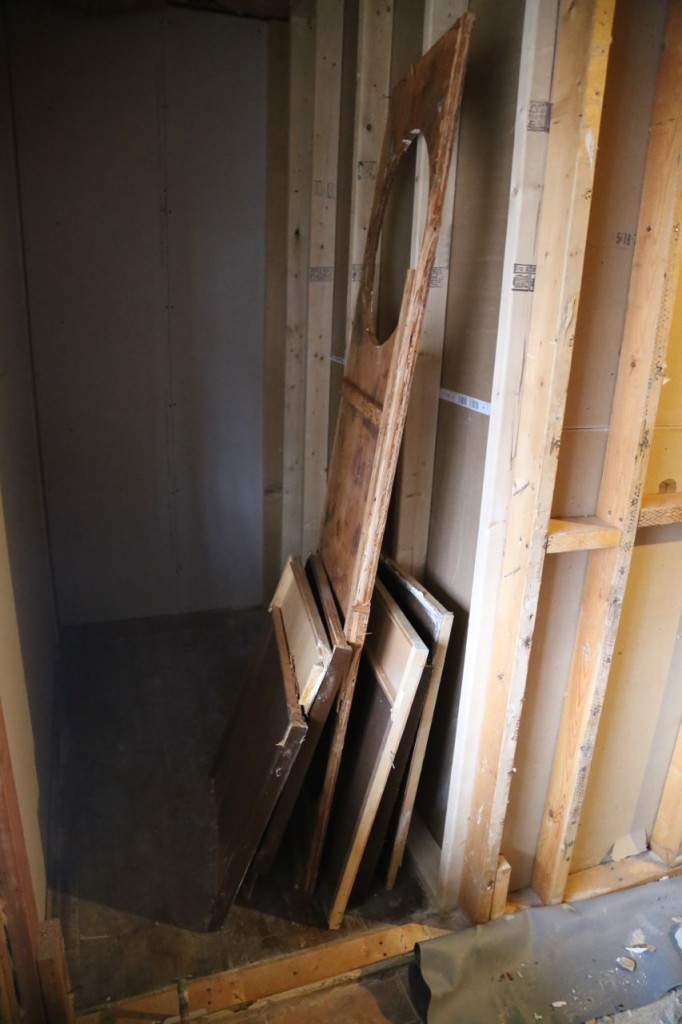
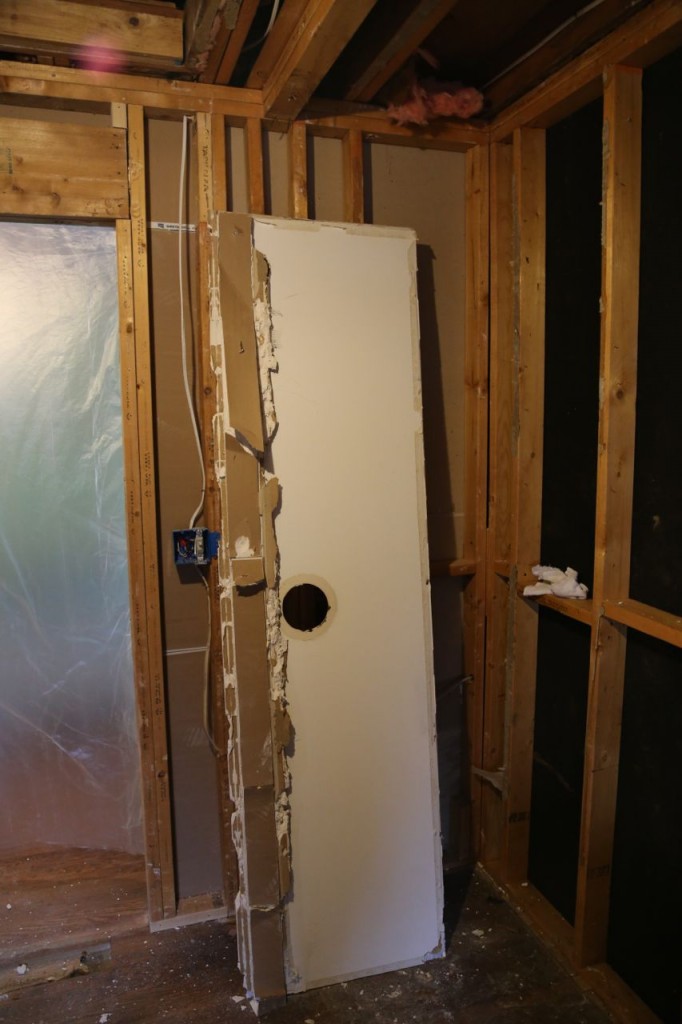
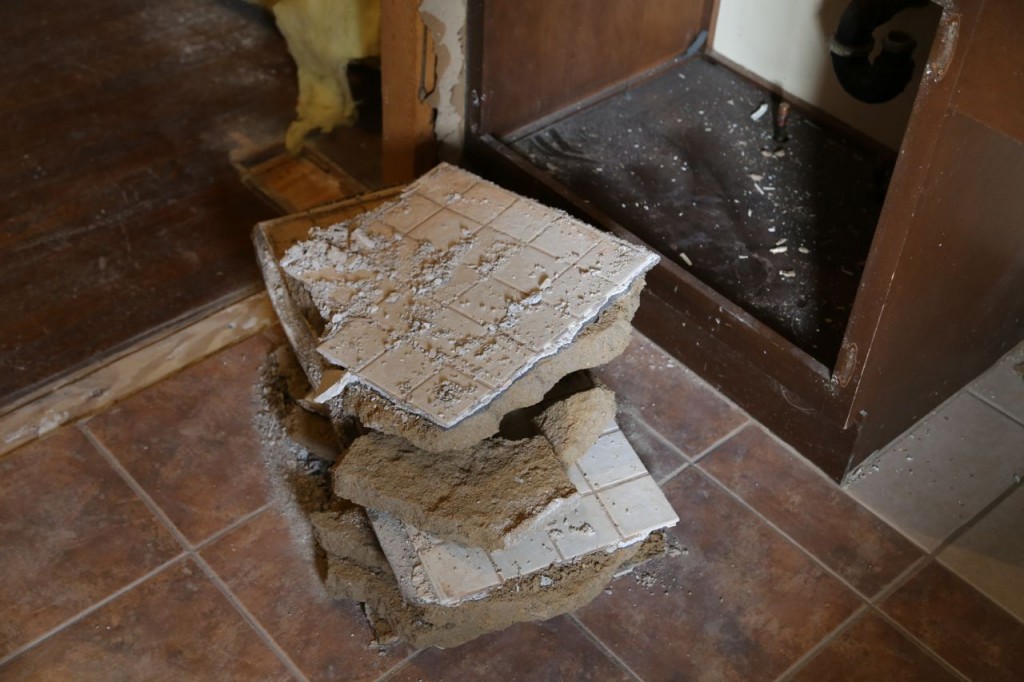
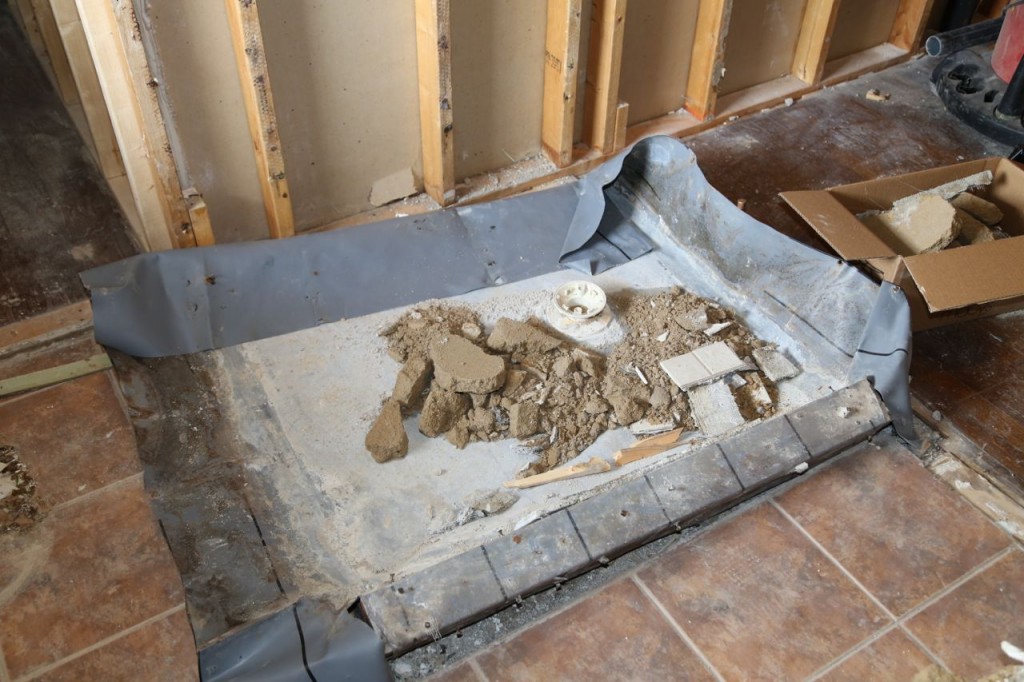
Framing of the master bathroom is now complete. Both doors have been framed. The tub platform has been built, and the shower has been framed. I now once again have a ceiling, and drywall has been placed on some of the walls. Hardi board has been placed on the floor. Things are moving along.
Tag Archives: home renovation
Master Bathroom Reconstruction Begins
Deconstruction is finished in the master bathroom, and now the reconstruction has started. (Photos of deconstruction and reconstruction can be found on Home Renovation Phase 3.) The new pipes and values have been installed, which includes fittings for the toilet, two vanity sinks, the bathtub, a thermostatic valve for the shower, and an overhead and a hand held shower head. All the new wiring and recessed electrical fittings have also been installed, which includes recessed overhead lights over the aisle, the shower, and the bathtub, vanity lights over the sinks, and wall sconces in the toilet area. Two new exhaust fans have also been installed, one in the main bathroom area and one in the water closet area (because code required it), and the HVAVC crew have run new pipes to vent the fans to the exterior.
After the rough-ins were inspected, I installed insulation in the cavities of the exterior walls. In the shower area, this was a little difficult because of the pipes. I used foil-backed foam, which unfortunately only has an R-value of 6 behind the pipes. Between the foam behind it, and leaving the space in front of the pipes uninsulated to get heat from the bathroom interior, hopefully the pipes will not freeze. I also installed insulation in the floor at the suggestion of the plumber and inspector. The insulation is mainly to help sound-proof the area to the bedroom below.
Phase 3 Deconstruction Continues
I did more deconstruction this weekend, and all that is left to demolish is the flooring, a few interior studs, the stud headers, and the shower pan. I am turning it over now to the carpenter to remove all of that. I realize now that this phase of renovation should not have been done during the coldest time of the year. Because of the condition of the drywall that made up the ceiling and all the reconfiguration that was needed, I removed all ceiling drywall. I also removed the attic insulation above it as nothing would be there to support it, and I need to put in better attic insulation anyway. This means though that this area is at the same temperature as my attic, which is freezing, and I am going to have an awful electric bill next month. I have a plastic sheet securely hung in the doorway to the bedroom, but still it not a really good air barrier.
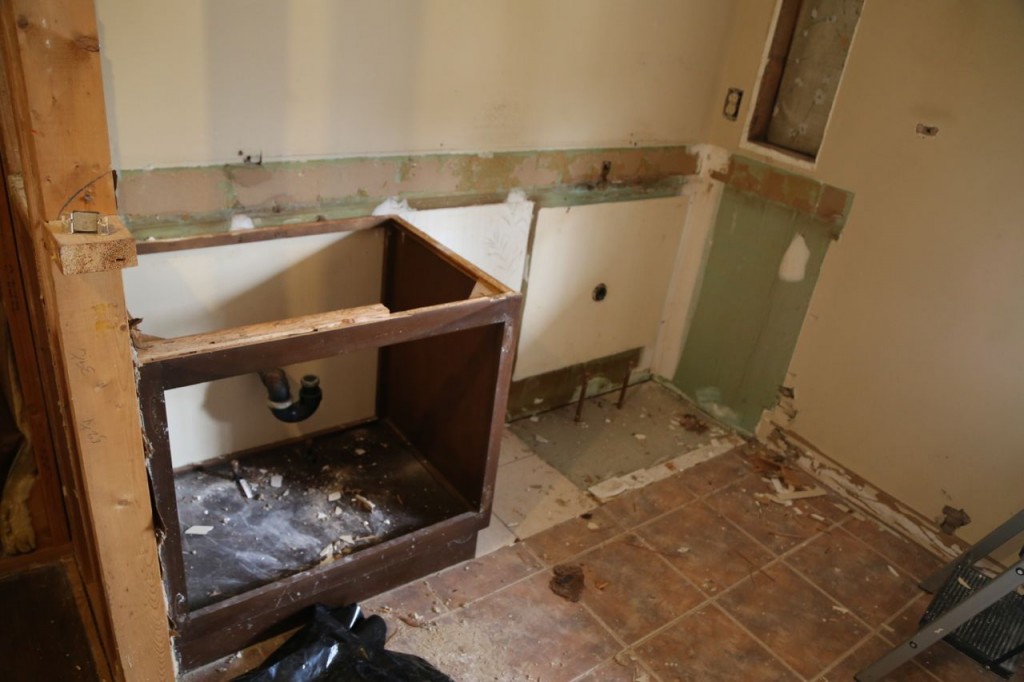
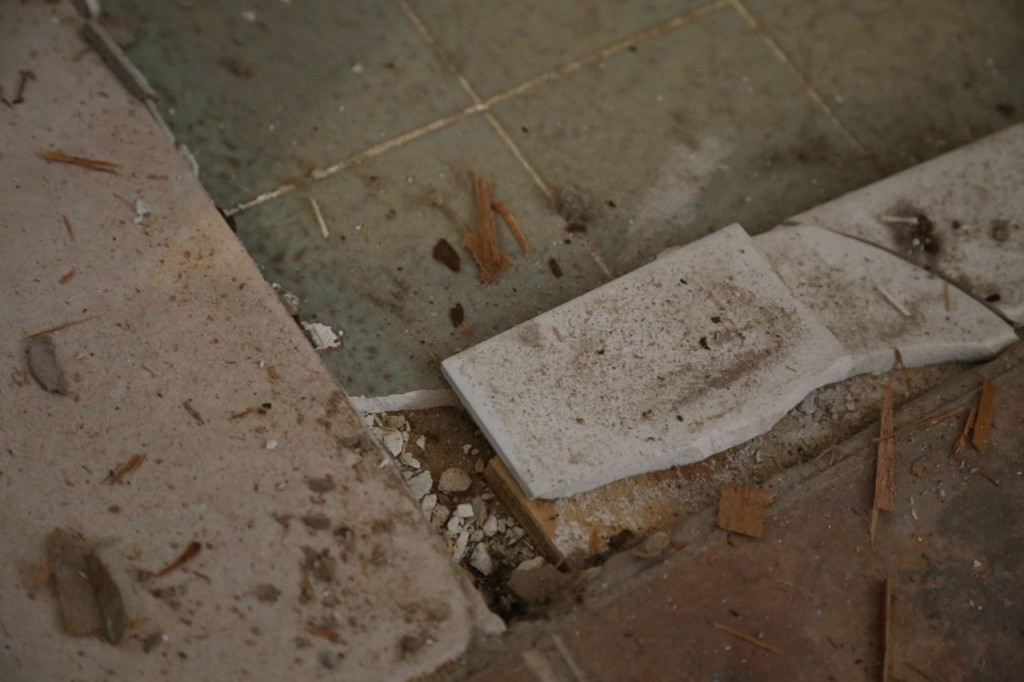
I removed the vanity by hammering the crowbar in-between the plywood sheet that made the counter base and the layer of plywood it sat on. The glue that held it cracked fairly easily, and I could the lift the whole thing out. After doing that, the rest of the vanity was fairly easy to disassemble with a bit of hammering and pulling. It was not all that well constructed. Once I removed the vanity, I discovered that the original floor in the bathroom was tile that matched the vanity countertop tile. That was interesting and a nice touch on the original design. I don’t have a clue why they removed that tile, added another layer of subfloor, then put new tile on top.Then again, I have no clue why the later home “renovators” put insulation in the three walls that made up the side of the shower because the shower was completely interior to the house. Oh well, it is almost all removed now, and soon all of it will be replaced.
More photos can be found on Home Renovation Phase 3.
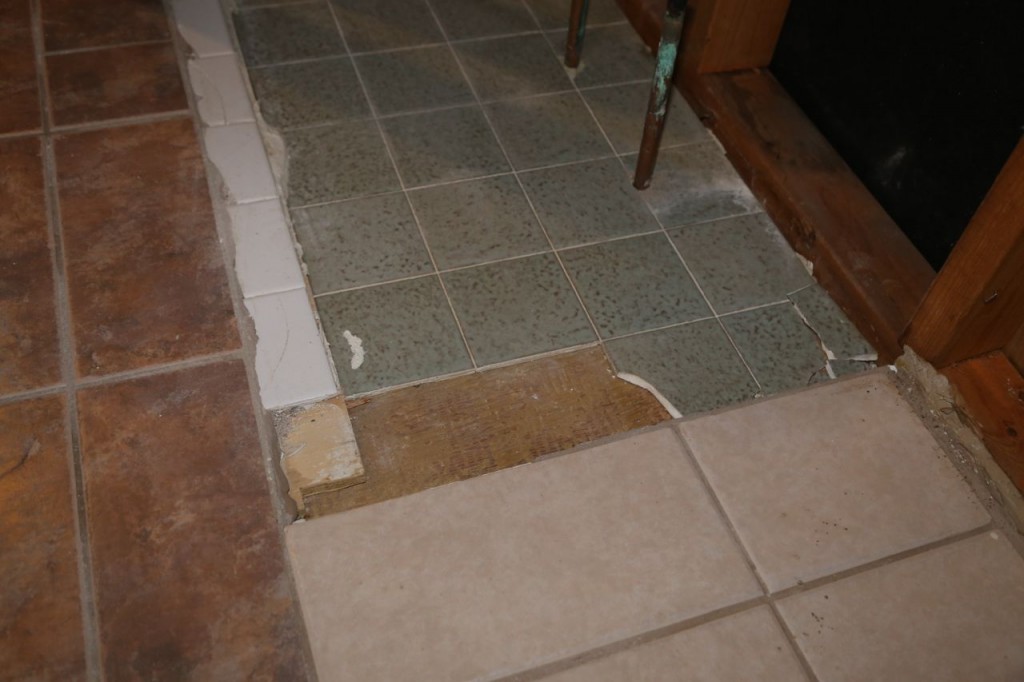
All the various tile flooring in the bathroom. The aqua square tiles were underneath the vanity and match the countertop. The large off-white ones were in the space between the two vanities.
Master Bathroom Demolition Continues
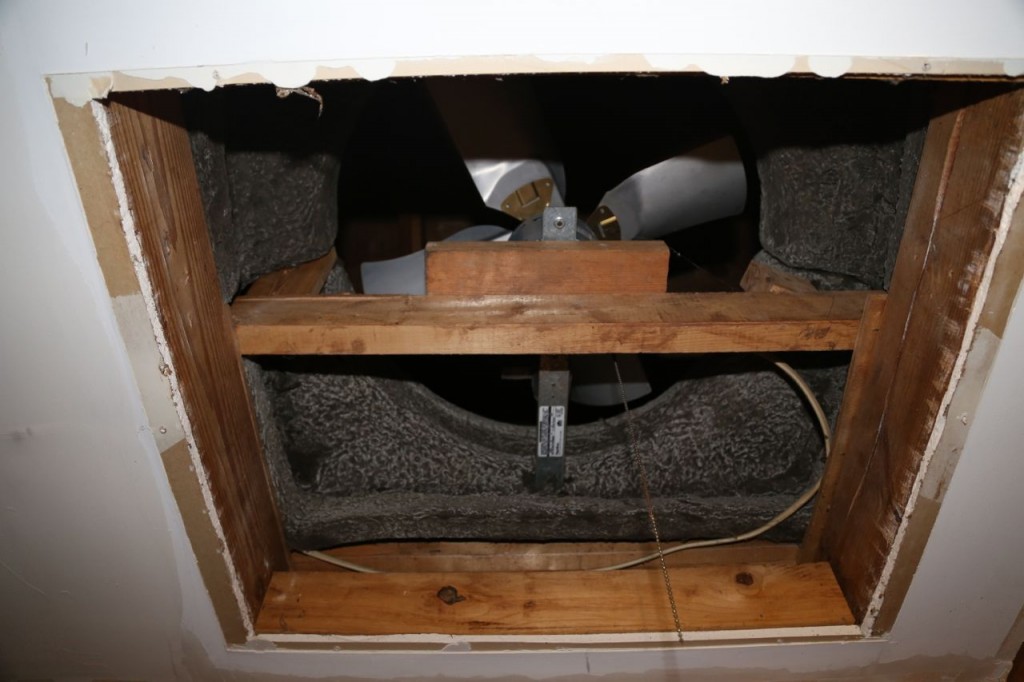
For demolition of the old master bathroom and closet to continue, I needed a friend or two to help. Mainly there were some tasks I needed to do, that at the very least, I needed someone to catch or guide something being removed. Therefore, I asked a bunch of friends if they might help me do some demolition, and I would pay them with beer, wine, and pizza. Turns out, I have a bunch of friends who were so excited about destroying parts of my house, they probably would have done it without the food and alcohol payment. So yesterday, I had a demolition party. I got confirmation of what I already knew that I have some wonderful friends who did not disappoint and put in a lot of hard work. I also learned that when my friend James has a hammer, he is really good at demolition, and it is probably best for your own safety to leave the room. I am lucky enough to have a friend, Danielle, who is a whiz with all things home repair, who along with Aaron disconnected and removed the whole house fan. They disappeared into the attic, and next thing I knew, they were was a big whole in my ceiling where the fan had been. For hours, some were demolishing, some were cleaning up the debris, and some were transporting the debris downstairs. Erin and Mark did so much demolition that according to Erin, the next day when Mark pulled out his wallet, drywall came out of it. At one point, Renee and Brandi decided that there were too many people in the destruction zone (there were) and that they should make bread using a leftover can of beer of a brand that no one liked. I had people in my kitchen making bread and later cooking the pizzas, people in my attic working on wiring and removing things, and people in my construction area destroying things. I, in general, tried to stay out of people’s way, directed them to things, removed debris, and did a little deconstruction. I have no idea if this makes a good host, bad host, or just a laissez faire host. I know I thanked you in person, but to Danielle, Aaron, Erin, Mark, James, Brandi, and Renee, thank you so much. You are wonderful friends and a wonderful help with my renovation, and I hope you had fun.
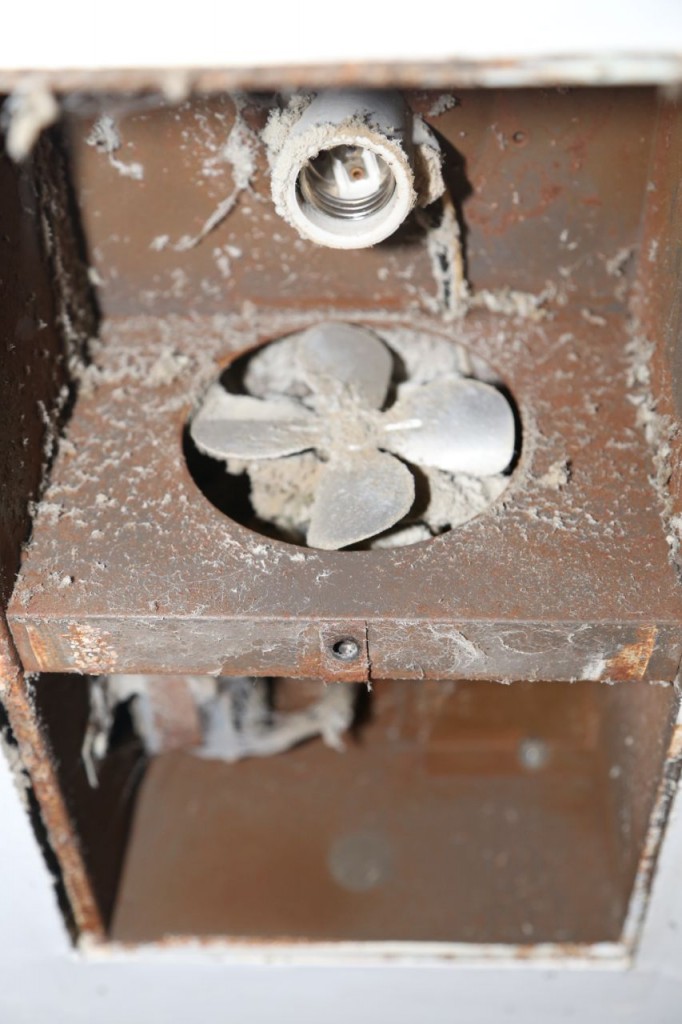
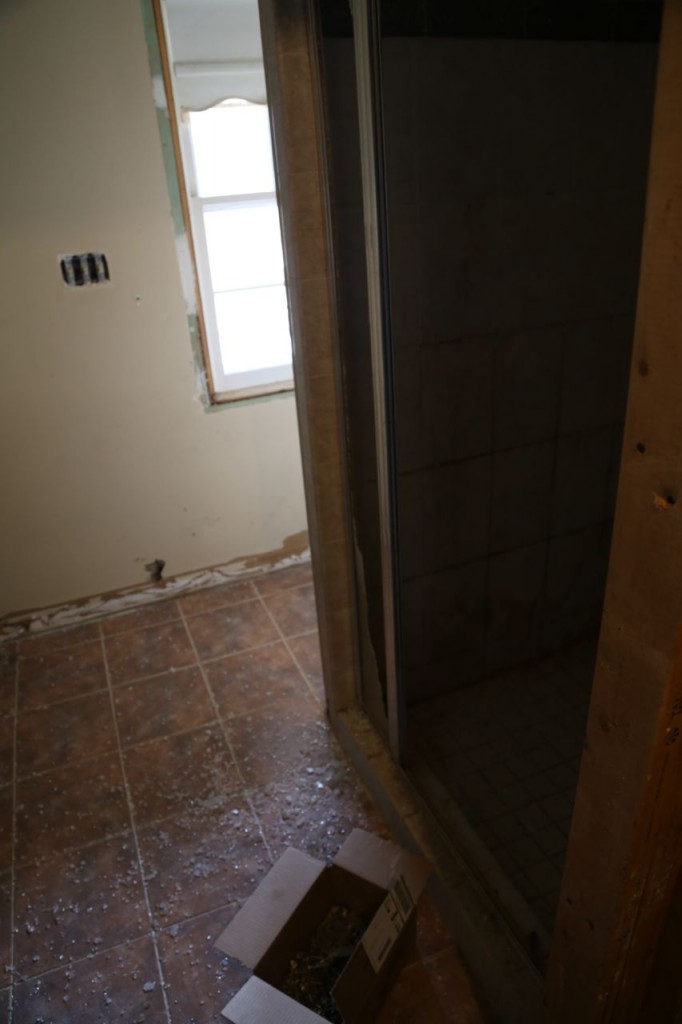
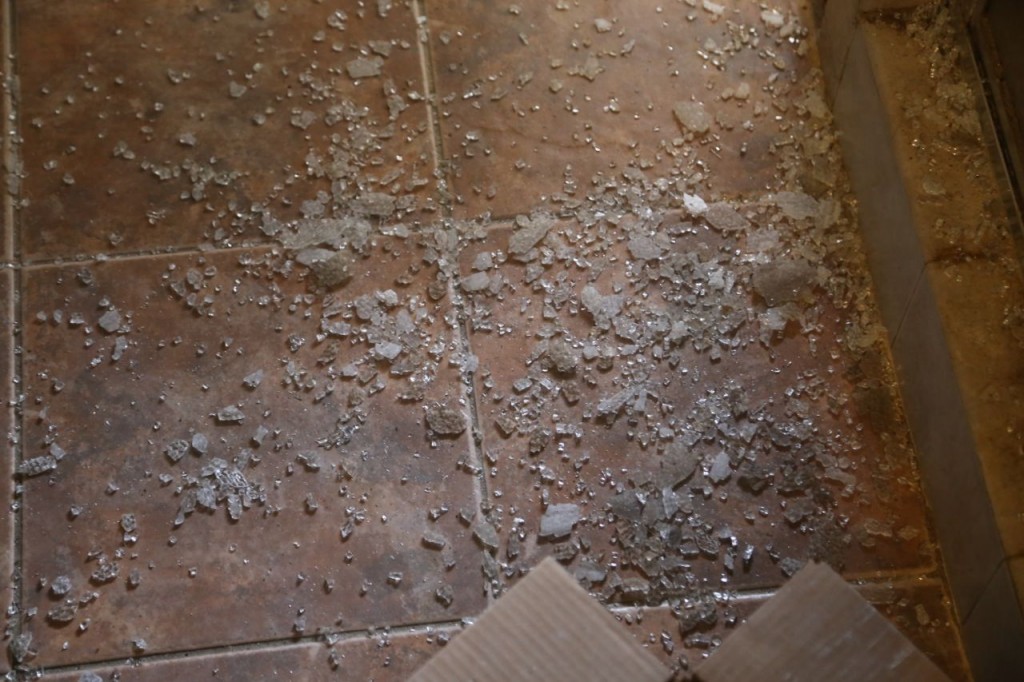
Demolition is not fully complete, but a great deal of progress was made. It is amazing how much bigger and better the space looks after removal of the interior walls, particularly the shower walls that were blocking all the light from the window. In my opinion, the space was designed really badly before. I mean really, why would you put the toilet right in front of a large front-view window and then build a wall in front of the window that blocks all the light? Some photos are below, and more photos have been added to the Phase 3 page. The shower’s glass wall and door removal did not go completely as planned. The door was removed in one piece, but the glass side panel broke during removal. However, the glass was safety glass, and this actually ended up making it easier to remove. It also was kind of good because I can keeping all the metal to sell for scrap, and this will make it easier to sell the metal frame. We generated a lot of debris. I have been able to get rid of some of it, mainly the lumber and the vanity top tile using Freecycle and thus keeping it out of the waste stream.
Home Renovation Phase 3 Demolition Begins
Home Renovation Phase 3 has begun. Phase 3 will be the master bathroom and possibly a few other minor things. I will be replacing the front door during this phase, but I’m not sure other than that. The master bathroom and the old master closet that is next to it will be taken down to the studs and subfloor and then reconstructed to form one large bathroom. Also, during Phase 2, I created a 3 ft by 6 ft dead space behind the new master closet, and that dead space will now be opened up to be a new water closet as part of the new master bathroom.
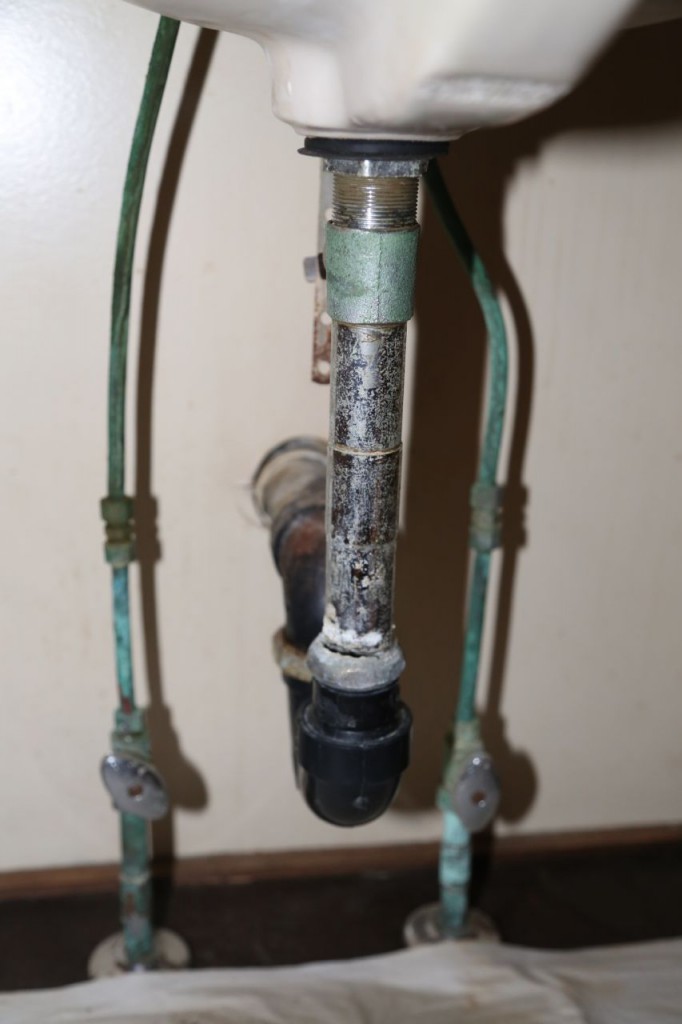
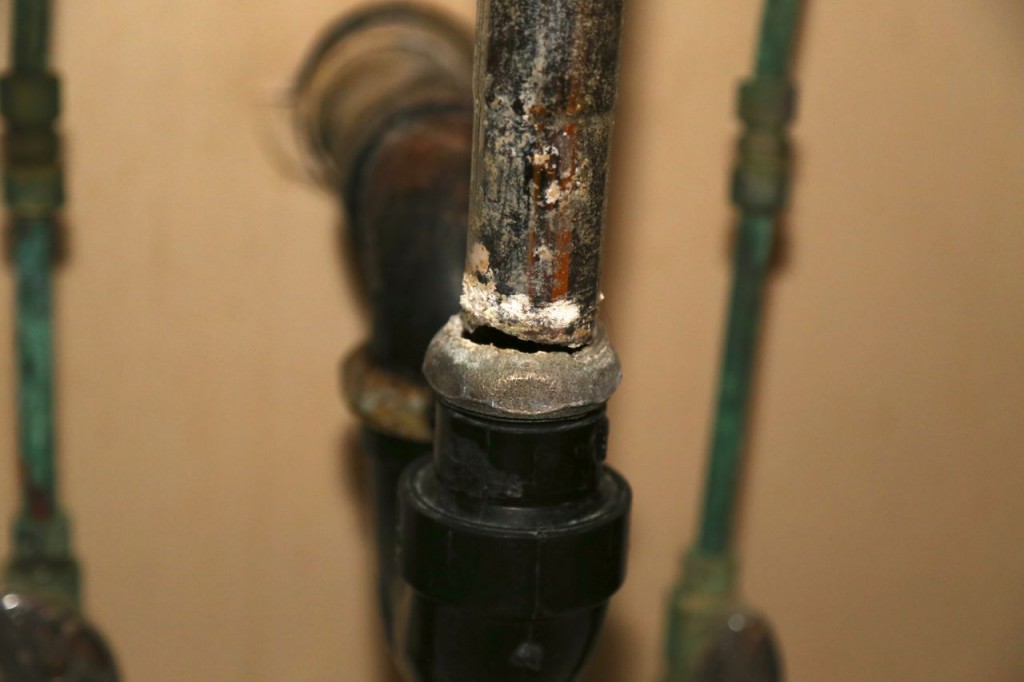
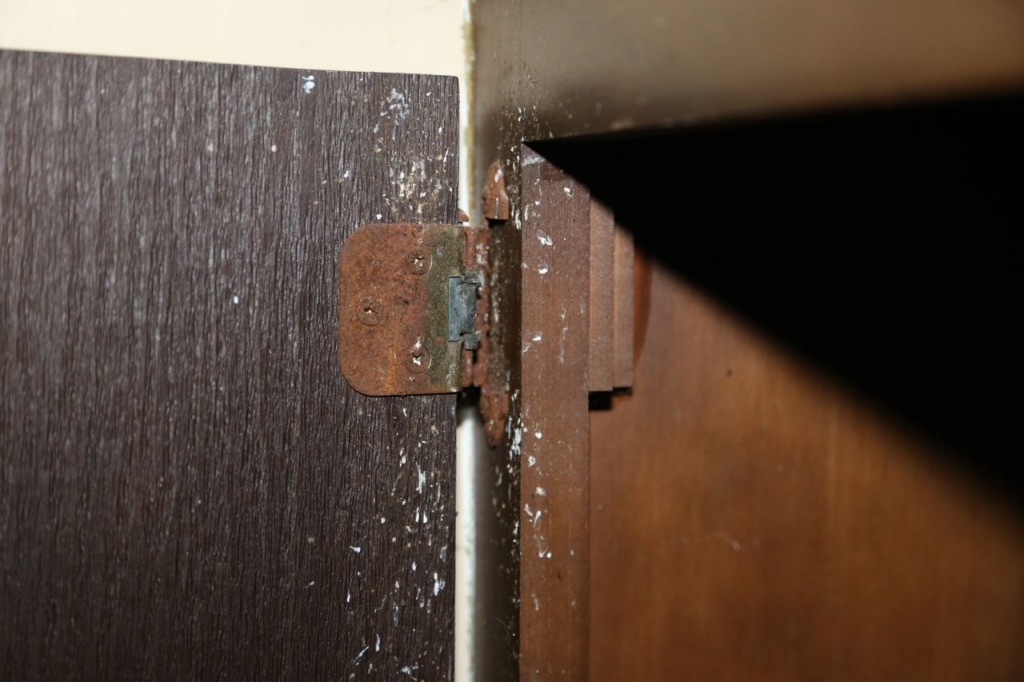
Currently, I am still in demolition mode. I will be posting photos of the renovation as it progresses on the new Home Renovation Phase 3 page. Currently the page only has the before photos, but below are a few photos from demolition that demonstrate the state of the bathroom.
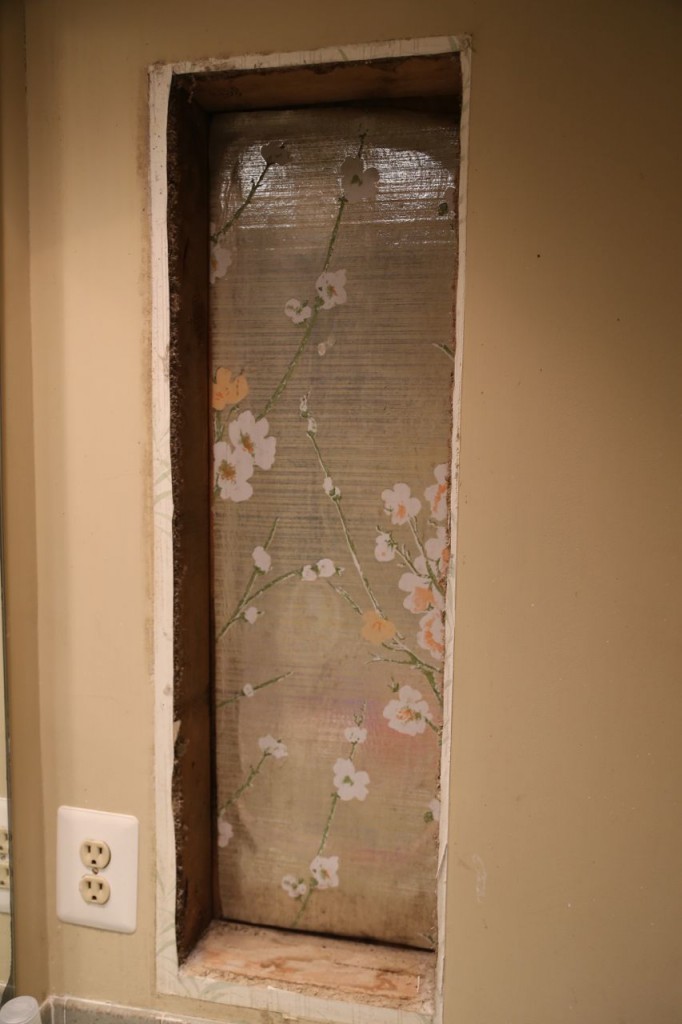
Once the medicine cabinet was removed, lovely, shiny, 1970’s floral wallpaper was revealed. Why it was behind the medicine cabinet, I have no idea.
Warning: Engineer Renovating Her Home
Sometimes I think I should come with a warning label: “Warning: Micromanaging, long-term planning, detail obsessed, anal retentive, constantly questioning engineer.” At the very least, when it comes to home maintenance and renovation, I should warn people of that. In truth, I think some of my personality traits that can probably be annoying at times, also make me a good engineer. Engineers have to think both short and long term. We have to look at both the big picture and all the tiny details. Sometimes, in my personal life, I am just not sure people are prepared to deal with those traits. I am not actually saying I would change myself if I could; I’m just saying sometimes people are unprepared to deal with someone like me.
I am currently planning for Phase 3 Home Renovation. I actually started planning for it during Phase 2. I changed the layout of the second floor of my house during Phase 2, and part of those changes were to prepare for Phase 3. One of my overall goals with my home renovation was to create a nice master bedroom closet and bathroom with a tub. The original closet was two reach-in closets that barely had enough space for two people, and the original master bathroom was tiny. It had two sinks on a small counter space, a small shower only stall, barely any storage space, and a toilet. I really wanted a nice whirlpool tub and more space. The master bedroom is next to the living room, where I had wanted to open the space up with the dining room and kitchen. Therefore, while planning for Phase 2 where I renovated the living room, dining room, kitchen, and family room, I drew, redrew, and kept redrawing the configuration of the second floor until I could have an open layout with the common rooms and also a nice master closet and bathroom that I wanted. In the final plan, I stole a six foot wide space the length of the living room from the living room and used that space to form a new master closet and a new water closet (for the toilet) that will connect to the new master bathroom. That new space was created during Phase 2. I also moved the doorway to the old master closet and bathroom to prepare for Phase 3. The door needed to be moved to fit the new bathroom configuration. I moved the doorway during Phase 2 because Phase 2 was when I was having all structural work done, and the doorway is in a structural wall. I created a 3 ft by 6 ft dead space behind the new master closet, between my master bathroom and living room that will become the water closet.
Thus, I planned the new master bathroom when I was planning Phase 2, even though the bathroom would not be constructed until Phase 3. Now I just need to get the details planned. The cabinetry will be constructed by a custom cabinetry company, so that is no issue. Much to my surprise, main problem I have found has been finding a bathtub. I really want one with both a whirlpool and air massage, i.e. one with both a water pump and air blower. Finding one with both is not that difficult for dimensions I have, but finding one with the pump and blower on the left side of the tub is. Evidently, everyone is supposed to configure their bathrooms to have them on the right side. [In case you are not familiar with these types of tubs, you have to have access to the pump and blower in case they need service.] I am dumbfounded quite frankly that everything is configured for things on the right. With the vast majority of tubs, I can’t simply rotate the tub 180° because the drain has to be in a location that the plumber can reach to hook it up to the piping. Rotating most tubs would cause the drain to be in a location that the plumber simply wouldn’t be able to reach. After much searching, I finally found a tub where the manufacturer custom makes all tubs and with several models, they can reconfigure it to put the pump on the left side. Now I need to know the access size that is required for their tubs because I am planning to have tall cabinet to the left of the tub platform. The bottom of the cabinet will essentially have a false side that will give access to the pump and blower. The cabinetry company said they can figure out how to do it; they just need the dimensions. Therefore today, I’m on the phone with the plumbing supply salesperson who is helping me find a tub. I’ve got it narrowed down to one brand, and I’m asking a bunch of questions. I’ve downloaded the specifications and other information from the manufacturer’s website, but I still can’t find the exact access size that is needed. The salesperson finally says he is just not sure, so he is going to conference call me with a guy from the manufacturer. It was perfect, and the manufacturer guy went through all the details I needed. He said once I am finally ready to order, it would be best to get a specifications drawing and mark it up to show exactly where my cabinet will be and how much access I am leaving, and they can move the pump and blower a bit to give the best access. Now I need to take their specs sheet and mark it up and send it to the cabinetry company so that they can do the same.
This is why I don’t use general contractors. I hire all the contractors: carpenters, plumbers, electricians, etc. I buy almost all the supplies, or at least the supplies that affect the design and aesthetic. I micromanage everything, and when I have used general contractors in the past, I generally drive them crazy. There is no point to me hiring a general contractor because I micromanage everything so much I am not getting my money’s worth from them since the point of having a general contractor is that they manage all the sub-contractors and details. Also, I do a lot of the work myself, so I don’t need a general contractor to manage me. I plan long term ahead to make sure everything will work. I try to plan for every single detail. I will if necessary demand that I speak to the actual person on the factory floor to get the detail I need to know that affects the next detail. I will repaint a wall three times until I get the color I want, but I’m not going to tear up tile, so I want the space planned out correctly from the beginning. I call the county’s building permit department and speak to the inspectors myself to make sure I know what code requires, and sometimes I demand that contractors do things that go beyond code when I don’t think code is enough. In most of my renovation work, I tear a room down to the studs and subfloor because in this house, I just don’t trust anything that was done beforehand. Sometimes it is just easier to start all over anyway. Yes, I should come with a warning sign.
Household Hazardous Waste Disposal
Previously I wrote, or ranted, about stupid smoke detector design, and at the end of the post I mentioned that smoke detectors have a small amount of radioactive material in them, and thus they should be disposed of properly. I didn’t say specifically how because it really depends on where you live. I live in Virginia, and I have since learned that there is no place in Virginia to dispose of them. My county’s website says they have no way to dispose of them and to try to return them to the manufacturer, but if you can’t find any other way to dispose of them, they can be thrown away in the trash. I contacted Kidde, the manufacturer, and they said they will accept them, you just have to mail the smoke detectors to them. The customer service representative I spoke to said just put “for disposal” on the package, and they will take care of them. I actually had a total of three to return because I had the malfunctioning one plus two ones I had originally bought before I had the hardwired ones installed. So last month, I mailed three smoke detectors back to Kidde. It cost me $6.15, but I now have a clear conscience. This may seem a bit much to some people, but I am an environmental engineer. My career has mostly been dedicated to cleaning up and properly taking care of human and hazardous waste. It has also been about dealing with contamination when waste was not taken care of properly, so there is no way I am going to improperly dispose of waste unless it is completely impossible not to do so.
Here is a fun quirk of United States environmental law, my smoke detectors are non-hazardous because they were used in my house. Those same smoke detectors, if used in a commercial or other non-household setting, are hazardous. Hazardous waste in the US is regulated through the Resource Conservation and Recovery Act (RCRA, pronounced rick-ra). Under 40 CFR §261.4(b)(1), “household waste, including household waste that has been collected, transported, stored, treated, disposed, recovered (e.g., refuse-derived fuel) or reused” is considered to be non-hazardous and exempt from RCRA regulation. There are a bunch of reasons why this exemption is in RCRA, but how you treat your legally-not-hazardous, but technically-hazardous, household waste comes down to a bit of just because you can do something, doesn’t mean you should. However, disposal of household waste is also governed by state and local regulations. Just because federal laws allows you to dispose of household hazardous waste in the trash, does not mean your municipality will because they are the ones who actually have to deal with the waste.
Most people know that fluorescent bulbs contain a small amount of mercury, and thus if you ever break one indoors, you should open the windows and leave the room while the mercury volatilizes. It is because of this mercury that most (or possibly all) municipalities and/or waste disposal companies state that fluorescent bulbs should not be put in the trash. The vast majority of trash in the US is sent to landfills and the rest to incinerators, and mercury does not belong in either of these type of disposal facilities. Also, and just as importantly, the bulbs can easily be broken during transfer from your trash can to the truck, while in the truck (especially if it compacts), at the transfer station, at the disposal site, and all the places in between. If it breaks, the workers can be exposed to the mercury, and thus it is not just about protecting the environment but also the workers.
There is more household waste that is technically hazardous. Aerosol cans can become explosive if punctured. Various cleaning, home maintenance, and vehicle fluids routinely used in household are hazardous to the environment. Conversely, both prescription and over-the-counter (and for that matter illicit) unused drugs should be disposed of in a seal container and put in the trash. Putting unused drugs in the trash is far better for the environment than putting them down the drain where they will eventually get into the waterways. Wastewater plants are not designed to remove chemicals like drugs, but that is a post for another day. [I suppose if someone is trying to dispose of their illicit drugs it is most likely because the police are raiding their house, and they are really not thinking about the environment but about jail, but I still don’t want to drink water with trace amounts of cocaine because some druggie upstream of my water treatment plant was trying to evade arrest.]
The point of all this is, think before you toss something in the trash. Spend a little time on your municipalities website, as most now have them, educating yourself on what can and can’t be thrown in the trash and where things that can’t be thrown in the trash can be disposed. While you are at it, educate yourself on what things can and can’t be recycled in your area. There may be a recycling market in your area for something you didn’t even realize.
Useless Installation Directions
Today I installed two new wall mounted light fixtures on my front stoop to replace the old ones. The lightbulbs had burned out in one of them, so I decided to change the light fixtures sooner than I originally had planned. Yes, changing the entire light fixture because the lightbulbs burned out, is a little extreme, even for me, but truthfully the old one was so thoroughly rusted, I could not get it apart to change the bulbs. I wanted new light fixtures that would be more modern and allow for more lightbulbs, so more light would be produced anyway.
I’ve installed six light fixtures already, two wall mounted and four hung from the ceiling, so these two should not be a big deal. I keep forgetting just how useless all directions that come with these things tend to be though. Yes, as a female, even when I am sure of what I am doing, I still tend to read the instructions. I’m funny that way.
Why are the directions so useless? First, the one type of direction I would like for them to have, they almost never have, and that is how to change the lightbulbs. I’m serious about that. I’ve lost track of the number of fixtures where I’ve uselessly unscrewed various finials and nuts in hopes of separating some piece that inevitably is welded together to try to find a place that is large enough to reach the lightbulb. The new light fixtures I installed today are no exception. I unscrewed several finials only to realize a piece was welded. I finally realized it is possible just to stick my hand through the bottom opening and carefully swing the light piece to change the lightbulbs, but I have to be careful. Another annoyance with these fixtures is that the glass sides are held in such a way that during shipping, some of the slipped out of place. Part of the reason I was unscrewing finials was to figure out the best way to get the glass sides back into place. Again, I ended up doing it really carefully and slowly through the bottom.
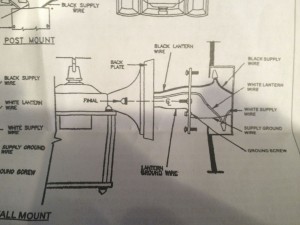
The second reasons most of these directions are useless is that evidently companies can only afford to print one set of directions for their entire line of fixtures. Below is the single piece of paper that came with these fixtures.
One sheet of paper for five different types of fixtures. Seriously? Does it really cost that much money to print a different one depending on the actual fixture in the box? Perhaps if they did, YOU COULD ACTUALLY READ THE DIRECTIONS. Here is a close up of the directions that, in theory, pertain to my fixture.
Yes, on the back were written directions also, but they can be summarized as 1. Turn off breaker. 2. Black wire to black wire. 3. White wire to white wire. 4. Ground wire to green grounding nut. These are of course great, and you, of course, can get them from anywhere on the internet. The best part of all of these directions is that they are somewhat wrong. If you look at the drawing above, the fixture hangs from a crossbar that is mounted to the wall box. This is completely standard. HOWEVER, this is the crossbar that came with my light fixture.
Needless to say, this threw me for a loop. I figured out the reason for it fairly quickly. Crossbars are always mounted to the wall vertically, but the new light fixtures required a horizontal mount. Thus one bar is to mount to the box, and the other attaches to the fixture. Great, no problem, but it really would have been nice if, oh I don’t know, THE DIRECTIONS HAD MENTIONED THIS IS LITTLE CHANGE FROM STANDARD. Even better, one of the fixtures had the screws on the wrong bar. That is, in one of the boxes, the screws needed to mount the fixture to its crossbar, were screwed into the other crossbar. Yes, I did figure out after several frustrating minutes that it does make a difference which crossbar goes to which. It affects the way the crossbar sits in the box and hides behind the fixture.
These directions weren’t even the worst ones that I have seen. The chandeliers that I installed had really useless directions. This is mainly because like all fixtures, they came with the standard directions of black wire to black wire and white wire to white wire. The problem was that the chandeliers did not have either a black or white wire. They had silver wires with clear coating. One had a little sticker labeled “N”, and the other had a little sticker labeled “L”. I just looked at these things wondering WHAT IN THE FLYING FIG IS N AND L? I know what black wire, white wire, bare wire, and even red wire from the wall are. So now there is N and L? Being the chemical engineer I am, I’m think of black as the “hot” wire and white wire as the “cold” wire, so why aren’t they labeled H and C? Ten minutes of internet searching later, I find out “L” means live or line, depending on your source, and thus connects to the black wire, and “N” mean neutral, and thus it connects to the white wire. However, most importantly, WHY THE HECK COULDN’T THE INSTRUCTIONS THAT CAME WITH THE DAMN FIXTURE SAY THAT?
The light fixtures I installed today did however have completely unneeded directions. Below is a photo of the back of the fixture.
The top sticker on the lower right has the completely unhelpful directions “Wall Mount Only [up arrow] This End Up.” Now if you only saw the fixture like this, those might actually be useful directions. However, if you look at the whole fixture, you would notice that the interior of the fixture where the lightbulbs screw in, hangs from the top of the fixture. Therefore, anyone with a passing understanding of GRAVITY would figure out that that end has to be up. So, I’m so glad they put that sticker on there.
Let me be clear, these directions are for do-it-yourselfers like myself. A professional electrician doesn’t need any of them. Thus, why are the directions so damn crappy? Are they to discourage do-it-yourselfers? Do they actually think these directions are helpful? Exactly how much would it cost to print different and readable directions for each type of fixture? Exactly how much would it cost for the design and/or manufacturing department to keep the department who creates these completely unhelpful directions informed when they change important aspects of the design, like using wires labeled N and L instead of black and white wires?
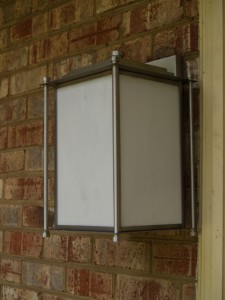
I did eventually get the new fixtures installed, no thanks to the directions. They look lovely, and no duct tape was required, just persistence and experimentation. Each fixture holds four lights as opposed to the old fixtures, which held two, so now there is more light produced. I think they might look slightly modern for the house, but I am planning to eventually replace the front door, and then I think they will work better. Also, the house really needs to be painted, but they has to wait a bit. WIthout further ado, the old and new light fixtures.
Smoke Detector Stupidness
Last night at 3 a.m. my smoke detectors went off. There really is nothing like being awakened from a dead sleep to that extremely high pitched chirp and a female voice saying “fire, fire.” I, of course, immediately got out of bed and went in search of this supposed fire. There was none to be found. However my smoke detectors assured me there was. I then had to go through the house and pull all five of them from their wiring and in some cases pull out the batteries because pushing the button would not hush them. At 3 a.m., that was so much fun.
When I bought this house it did not have any smoke detectors. It had two wall mounted holders for smoke detectors, one in each the downstairs and upstairs hall. There were none in the bedrooms, and there was no wiring for interconnected ones. I decided early on that as I renovated the house, I would install interconnected wired smoke detectors and bring the house up to current code, even though it was not required. I’m an engineer that way. During Phase 2 of renovations, because the ceiling downstairs had to be opened to install a structural beam, the house lost grandfather status, and interconnected wired smoke detectors now became required by the County. No problem. I was already planning to do it. When it came time to install them, I decided to get combination smoke and carbon monoxide detectors. I had to buy all new ones anyway, so I might as well go for full protection.
This leads me to last night and my need to rant. My detectors are Kiddie brand. I mention the brand because there is an oligopoly of sorts on household fire alert and response equipment. All of them seem to work the same and have the same flaws. Modern houses generally will have interconnected smoke detectors so that if one detects smoke, all the detectors will go into alarm. There should also be one detector in each bedroom and in each hall. Interconnected fire detectors and their location are not universally adopted building code requirements for new construction but are a good idea. If you have a large house, it is possible for one to go in alarm and not awaken a sleeping person in another part of the house. Research has also shown that children do not necessarily wake to a smoke detector at all, in particular the tone. This is partially the reason why voice alarms have been added, but with children, personalized voice alarms with the parent’s voice may be needed to insure children are awakened.
If my detectors detect fire, they set off one set of chirps and say “fire, fire.” If they detect carbon monoxide, they set off another set of chirps and say “carbon monoxide.” If the battery is low, another chirp and “low battery.” Then there is some complicated series of chirp sequences to denote if it was previously in alarm, has malfunctioned, needs replacement, etc. that NO ONE COULD POSSIBLY DISTINGUISH THE MEANING OF AT 3 A.M. Mine were definitely yelling fire last night. As I ran around with a stool trying to figure out what the problem was, the hush button was not working at all. At one point, one of them said carbon monoxide, but I have no idea which one because they are all blaring at me at 3 a.m. The units also have some complicated series of LED blinks to denote in which mode (or possibly mood) it is. This is great, but they are IMPOSSIBLE TO UNDERSTAND AT 3 A.M. Also, as far as I could tell or at least understand, there was no way to figure out which specific detector set off the alarm and thus which one was malfunctioning. Maybe the LED is supposed to tell me this, but I couldn’t figure it out when all I wanted to do is stop the awful noise being blared at me.
Thus if any person who happens to work in smoke detector design happens to read this, these things are too complicated to understand when there is some malfunction or inaccurate alarm. I appreciate the voice that says fire, carbon monoxide, or low battery tells you what the supposed problem is. That makes it much easier to understand than which series of chirps are being blared. However, if you are trying to track down a malfunction, it is impossible. Stopping the blare seems to be impossible short of removing all sources of power. For interconnected detectors, I want and need to known which one started the alarm. I can’t figure out the problem if I don’t know that, ESPECIALLY WHEN IT IS 3 A.M. WHICH IS EVIDENTLY THE ONLY TIME DETECTORS HAVE A FLASE ALARM OR LOW BATTERY.
That ends my rant. While I’m on the subject of fire detectors though, please remember to change the battery every six months. Also, please remember when the detector itself needs to be replaced, never throw it in the trash. Smoke detectors contain a small amount of a radioactive substance. They are perfectly fine to have in your house, but they should not be disposed of in a landfill. Find an appropriate place to dispose of them. [Update: Please see my post Household Hazardous Waste Disposal on how I eventually disposed of my malfunctioning smoke detector.]
Master Closet Shelving
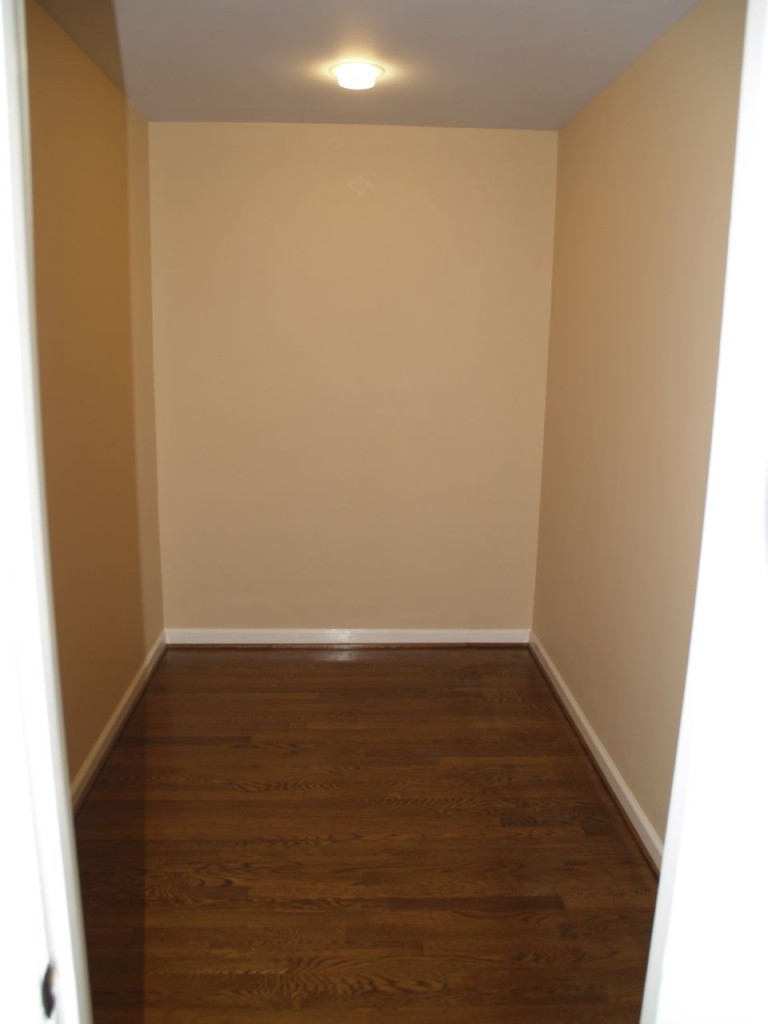
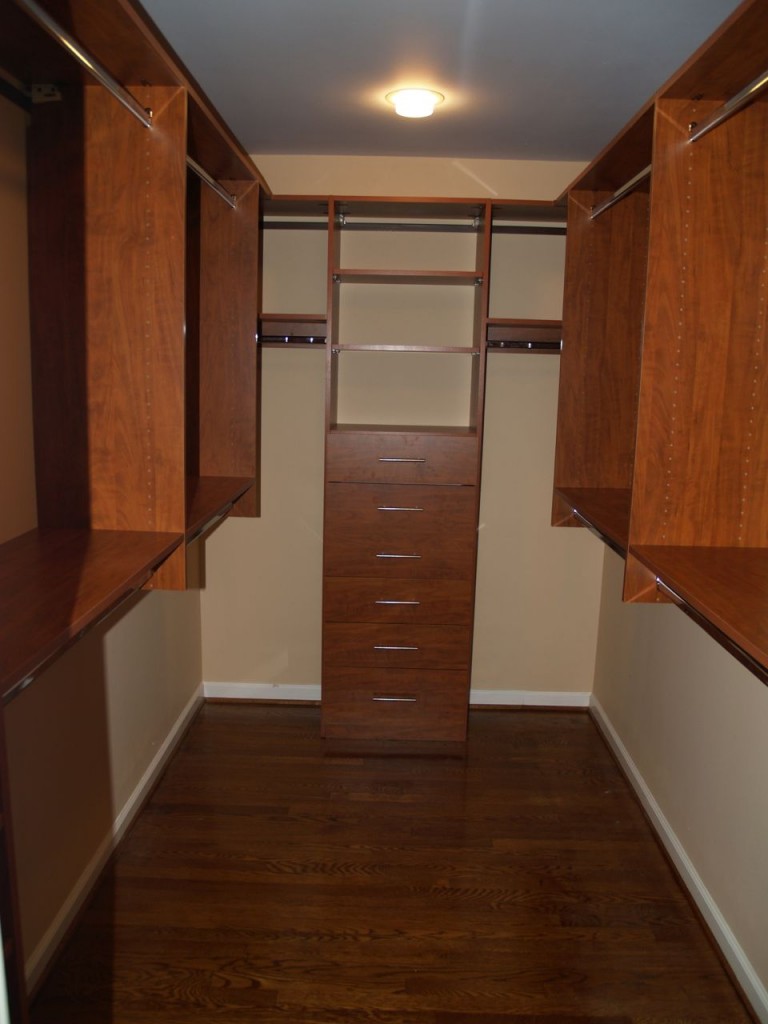
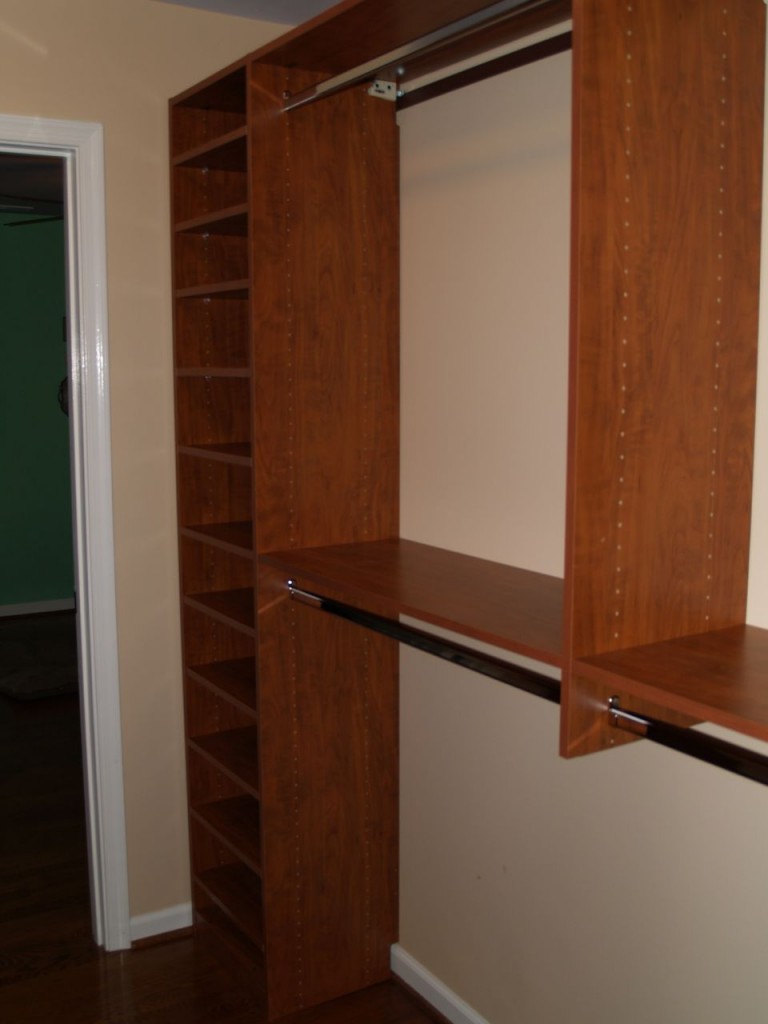
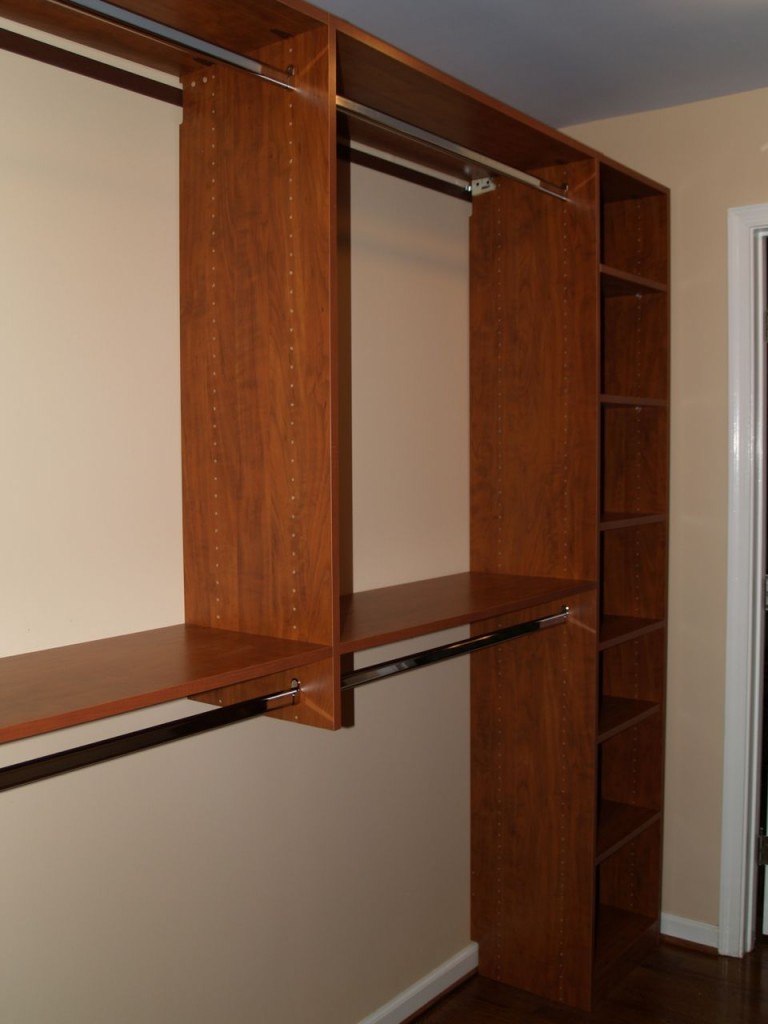
As part of Home Renovation Phase II, I stole space from the living room to create a walk-in master closet. The master bedroom had a small walk-in closet that led to the very small master bathroom. In Home Renovation Phase III, planned for sometime next year, I intend to create a nice size master bathroom using both the old master bathroom and closet. Thus, during Phase II, I created the new master closet. It is not spacious, but it is workable and has plenty of storage room for two people. It includes tall hangings, double hangings, shoe shelves, clothes shelves, and drawers. It is 124 inches long and 72 inches wide. That leaves the standard 24 inches for hanging areas on both walls and a 24-inch aisle. I bought the components from Closets To Go, and the color is Sunset Cherry. I really like the way it came out, but I would like to have a conversation with whoever wrote the assembly directions. Why is it so impossible for companies to actually check their assembly directions for accuracy? Also, there were a few issues that I solved using the engineer’s standby of fixing it by taking a hammer and banging the crap out of it.
With the master closet completed, Phase II of my home renovation is finally done 13 months after it was started. Yes, it took a long time, but I did much of the work myself.

