Speaking to High School Students

I was asked to speak at The Washington Youth Summit on the Environment (WYSE) to a small group of the delegates about my career as environmental engineer/health scientist. The delegates are high school students. I’ve never done anything like this before, and I can’t remember the last time I’ve spoken to a group of high school students about anything. I was told to talk about my career and talk about specific projects on which I’ve worked. I prepared a few slides on the basics of risk assessment as that is the general field in which I work now and then quite a few slides on my dissertation and a few slides on the project I am currently working at work. I wasn’t sure what to expect. Would they be interested in this at all? Would my slides be interesting or too far over their heads? I took out what I thought were the more advanced and complicated slides and just focused on graphs and photos. I wanted to focus on the big picture.

Part of my problem with giving this presentation was, the more educated you become, the more you take for granted what other people know. At least, I have that problem. I have had so much math education including three semesters of calculus, differential equations, linear algebra, probability, statistics, and biostatistics, that I’m flabbergasted when I meet people who can’t do or understand basic algebra or understand what a square root is. Certainly, you can make an argument that this is a sign of the failure of the US education system, but people’s education level is what it is. If you want to explain something to someone, than you have to be able to explain it to them on their level. These are high school students, and I can’t expect them to know information that is not taught until college or after. Thus, I have a group of high school students that I need to talk to about the work that I do and the work I did to earn my Ph.D. I am not entirely sure how to do this. I don’t quite frankly remember what I knew in high school. I have no idea what these students know. I don’t want to bore and confuse them by talking at so high a level that they can’t understand me, but I don’t want to insult them by explaining things they already know.

I am really not sure how I did. The one thing I am fairly sure about is that I babbled and rambled a few times. I am really not the best speaker. I am not a bad speaker, but I do much better if I have a set text that I am reading or very specific things with high points written on slides. I didn’t do that for this talk because I wanted to be able to change what I was saying once I got there and started getting questions. They did ask me questions. They asked me great questions in fact. However those questions made me realize just how much I know and forget that other people don’t know. That is in no way meant to be an insult to these students. I was really impressed with them. Like I said, they asked great questions. Also, they were very polite and politely listened even when I am sure I started to ramble. I really appreciated their attentiveness, and I loved their questions.

For example, one of the first questions I got was on one of my first slides, which had the word epidemiology on it. I was asked “what is epidemiology?” This is probably where it hit me that I had no idea what they knew. It didn’t really dawn on me that some (or all) would not know what that word meant and what that science field is. Again, that is not an insult to them. If anything, I was annoyed with myself for not considering when I learned that word. I am glad I was asked the question. It gave me a chance to tell them about John Snow and the London cholera epidemic. I am fairly sure all epidemiology courses are legally required to start with a discussion on John Snow and the London cholera epidemic, so I had fun telling them about it.

I can’t remember all the questions I got, but I got quite a few. I loved this because that meant the person asking the question was listening and engaged. When I describing issues related to soil and groundwater contamination, I got a very simple question as to how these chemicals get into the soil and groundwater. I LOVED this question. I can’t describe all the reasons why I loved this question, but one is because I am an engineer, and I get frustrated when people think we build things and then no maintenance is ever needed. Bridges in the US keep falling down, and the American Society of Civil Engineers gives our infrastructure a D+ grade. One of the reasons is lack of maintenance. I got to explain to the students about maintenance and inspections and things simply not being designed or built to last forever. I also explained how decades ago, people used to just dump chemicals in the ground or water and never think of the consequences.

I also got some questions of how to find out more information on different topics and things I discussed. They wanted to know more. As I always want to know more, how could I not like these students? I hope some of them already have or are now on the internet reading more about the topics I only lightly discussed. Maybe one day I will meet them again professionally.

Solar Impulse

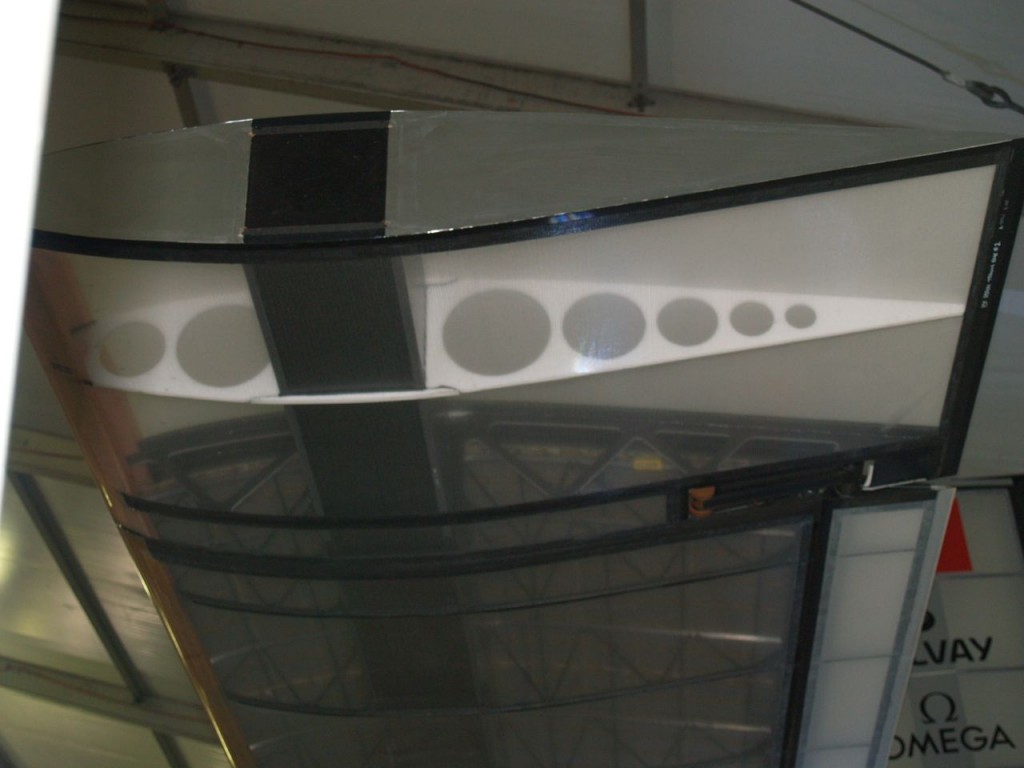
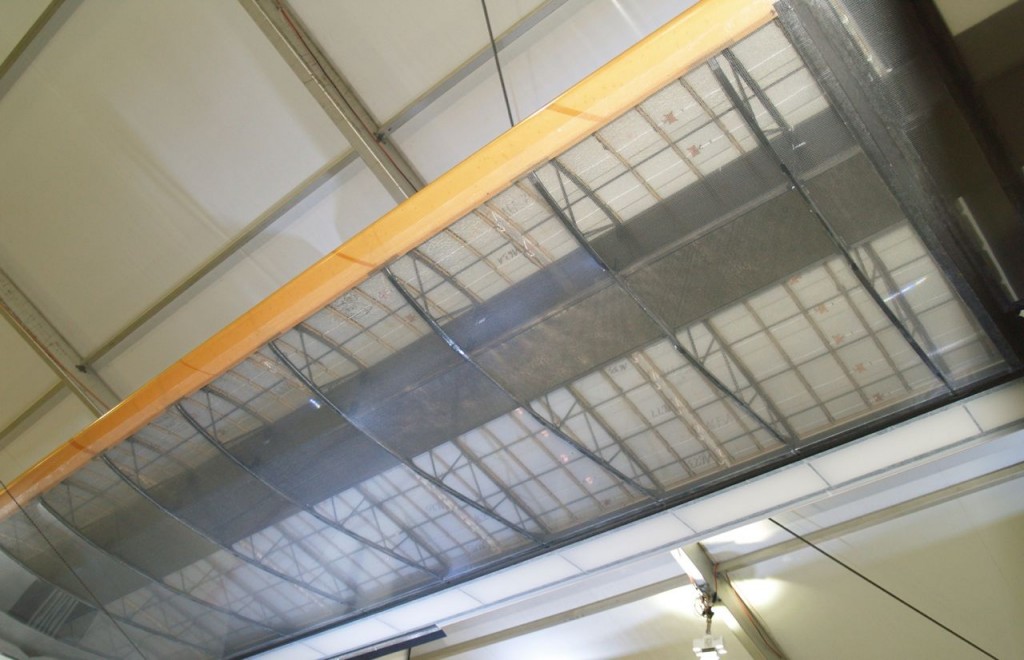
Solar Impulse, the solar powered plane that can store enough energy to fly through the night, is currently at Udvar-Hazy Center. The plane is a marvel of engineering both from the standpoint of being able to collect enough solar energy during the day to power itself all day and through the following night but also from the standpoint of being light enough in weight that it needs very little energy to keep it flying. I went to see it while it was open for public viewing Saturday, and from an engineering perspective, it is just beautiful. When viewed in person, you can see how the plane is covered in high strength fabric. In the back stabilizer, you can see the internal structures that give the stabilizer its shape. It is just an amazing vehicle. Note: If you click on any of the photos, it will open up larger in a new page to allow a better look.

front panorama of Solar Impulse

front panorama of Solar Impulse

Side panorama of Solar Impulse

Side panorama of Solar Impulse

Solar Impulse cockpit and middle two propellors

Solar Impulse cockpit and middle two propellors

view down the wing span

view down the wing span

Tail and stabilizer

Tail and stabilizer

View of stabilizer from side showing internal support

View of stabilizer from side showing internal support

View from below stabilizer showing internal supports and photovoltaic cells above

View from below stabilizer showing internal supports and photovoltaic cells above

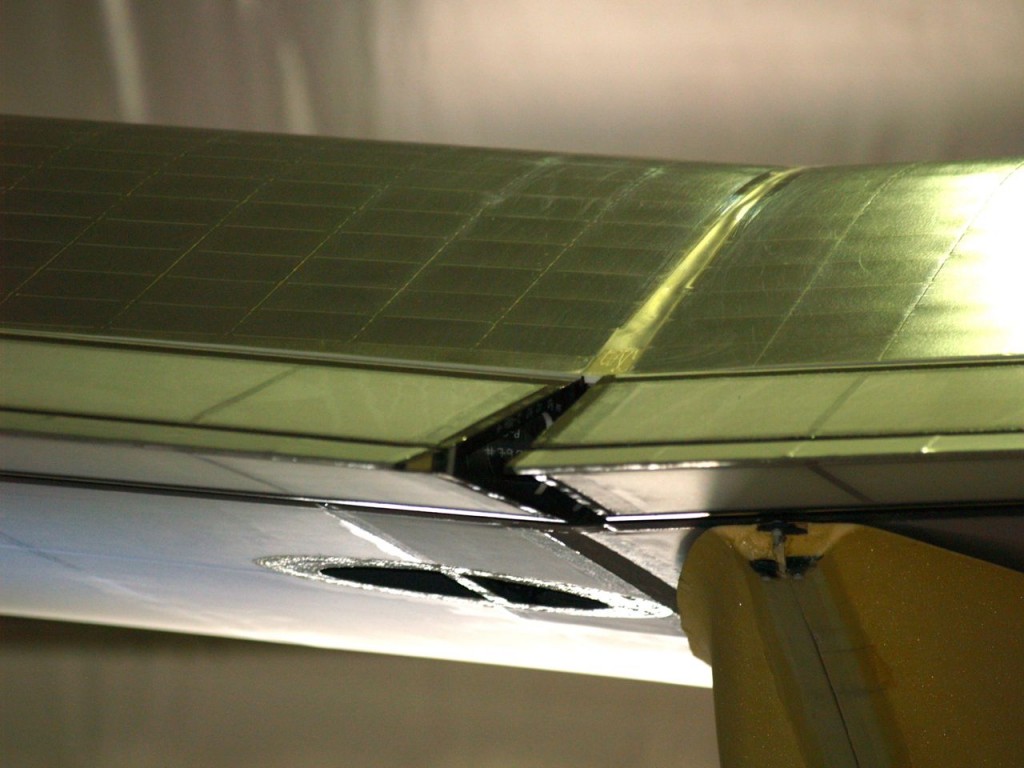
Solar Impulse wing flaps with photovoltaic cells on top

Solar Impulse wing flaps with photovoltaic cells on top

View between wing flaps using my zoom lens to show wires connecting photovoltaic cells

View between wing flaps using my zoom lens to show wires connecting photovoltaic cells

Giant Shiny Ball Play Thing

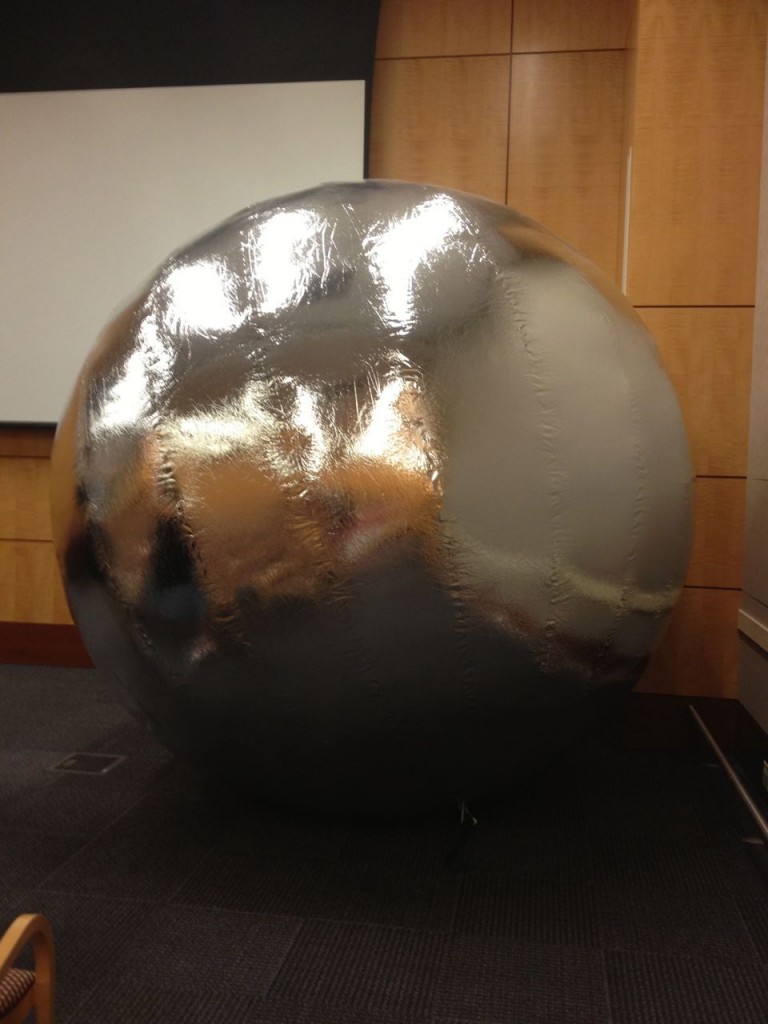
Last night, I went to Cultural Programs of the National Academy of Sciences (CPNAS)‘s D.C. Art Science Evening Rendezvous (DASER). It is a monthly discussion forum on art and  science. They always have interesting speakers, and it is one of the cool things about living in the DC area. Anyway, last night upon walking into the room right before the program began, I was immediately intrigued by this enormous sphere siting in the corner of the room, which I dubbed the Giant Shiny Ball Play Thing.satelloon

I had no idea what this thing was, and there was no mention of it in the program. I envisioned the amazing game of beach ball toss that a large crowd could play with it. The Giant Shiny Ball Play Thing was seriously one of the coolest things I had ever seen, and I wanted one. Sure it was probably about 10 feet in diameter and would never fit in my house. Even if it did fit in my house, putting a shiny inflatable ball in the same house with my cat and her claws would not end well at all.

I finally found out that the Giant Shiny Ball Play Thing is a reproduction of a satelloon. Greg Allen, one of the speakers, had it fabricated as part of his Exhibition Space exhibit. A satelloon is satellite balloon, of course, and I’m going to bet that either an engineer or scientist came up with that name. NASA made satelloons for Project Echo from 1956-1964. I am not going to describe the whole history because Greg Allen has a great summary of the project and the amazing satelloons. If you want even more history, you can read about it straight from NASA. The history is fascinating.

Thus the Giant Shiny Ball Play Thing is really a symbol of some incredible science and engineering history. I still want to play with it though. Also, I took a fun self portrait of myself in the satelloon.

satelloon and meThere, dear readers, now you know what I look like.

Finally, if like me, you can’t get enough of the Giant Shiny Ball Play Thing, Heather Goss created this fun Vine video of it being deflated.

Kilograms Do NOT Measure Weight

I think like many engineers, one of the reasons that I liked the idea of going into engineering was the mistaken belief that a career in engineering meant working with numbers and not having to write. I have never been very good with words. I love numbers. Numbers make sense to me. Words confuse me at times. Also, the English language in general makes no logical sense to me, and I am a native English speaker. [Well, I’m a Southern, so you can go ahead and make an argument against the native English speaker part.] I can’t spell worth crap because of the aforementioned English language illogical thing. This is actually fairly common among engineers. Had my family known the warnings signs, it would have been obvious since I was about 5 years old that I was destined to be an engineer. I have always been good with numbers, and I can’t spell worth crap. Take note parents, as these are the warning signs your child may be an engineer. Also, an early love of duct tape.

I am fairly good with grammar though probably because there are more rules and less exceptions. Partially because of this and for other reasons, at my current job, I often edit other people’s documents not just for science and engineering accuracy but also for grammar, readability, and clarity. I have also been a peer reviewer for a few manuscripts submitted to scientific journals, and previously, I used to edit manuscripts that were about to be submitted to peer review journals. I keep coming across certain words and phrases that are scientifically and grammatically incorrect. There are many grammar style manuals that exist, but I have yet to come across a science grammar style manual. If one exists, I would love for someone to point me to it. So I’ve decided to start writing about some of the most common and inappropriate phrases in the hope that maybe it will stop at least one one person from using these incorrect phrases.

The most common and completely wrong phrase I see is stating that something or someone weighs a certain number of kilograms. Ironically, non-US citizens, i.e. people who live in a country where they use the metric system, are just as guilty of this phrase as US citizens who sort of have the excuse that they live in a country that refuses to stop using the completely archaic and impossible to use if you are a scientist or engineer, English imperial or US customary units. For the benefit of everyone who doesn’t understand why this is wrong, let me explain why it is.

A kilogram is a unit of mass. Mass is the amount of stuff that an object has.

To say something weighs something, you are saying it has a certain amount of weight. A weight is a specific type of force, and because it is a force, weight, like all other forces, is measured in Newtons (N) in the metric system. Weight is the amount of force on an object due to gravity. Therefore, weight is the mass (the amount of stuff) multiplied by the acceleration due to gravity. If you happen to be a person on Earth with a mass of 70 kg, then since the gravitational acceleration on Earth is 9.81 m/s2, you have a weight of 687 Newtons (N). Let’s say you happen to be an astronaut, and the Moon program gets revived, and you go to the moon. Your mass will not change. Your mass will still be 70 kg, but once you arrive at the Moon, your weight will be about 114 N because the Moon’s gravitational acceleration is 1.63 m/s2. While you are on your journey to the Moon in space, there will be no gravity, so you will have no weight. You will be weightless, hence the fun videos of astronauts floating, but you will still have the same 70 kg mass.

To review, a person or an object has a mass that can be measured in kg. A person or an object that is on any celestial body with gravity has a weight that can be measured in N. It is completely incorrect to say that a person or an object has a weight in kg. It is also confusing. Does it mean you have a mass in that number of kg? Does it mean you have a weight in that number of N, not kg? Please, don’t use kg and say weight. Mass and weight are not interchangeable. They do not mean the same thing.

NY Transit Museum

As should be completely obvious from the name of this site, I am in fact a geek. Specifically, I am a geek about about all things science and engineering. I visited the New York Transit Museum on my most recent trip to New York City, and I loved it. I can see how if you are not a geek or into mass transit, you might not enjoy it. The museum is housed, quite fittingly, in an abandoned subway station in Brooklyn.

NY Transit museum entrance

The museum starts with exhibits on how the subway tunnels were built. It does a really good job of portraying the amazing work and hardships the workers endured and how they had to fight for the pay they deserved. We now have modern tools, tunnel boring machines, and much stricter safety standards. They for the most part had picks, wood, concrete, and brute strength. It has some exhibits of the tools used including surveying tools. I took surveying in college, so I went into geek mode when I saw the below exhibit. I used a transit in surveying, but it was a more modern one. [Modern surveying is done with a theodolite, but you have to learn the basics first with a chain, transit, and plumb.] Next to the transit in the photo is a linked chain. It is labeled as a surveying chain. Personally, I think they should label it more properly and specifically as Gunter’s chain, which by the way is 66 feet long, and the tool by which much of United States and other countries were originally surveyed. I had never actually seen a Gunter’s chain before, so I enjoyed seeing one. In surveying I learn to throw a chain and survey with a “modern” chain, which is a steel tape type chain.

surveying tools

It has exhibits on how the subways are powered, including information on electricity generation and transmission.

electricity grid map

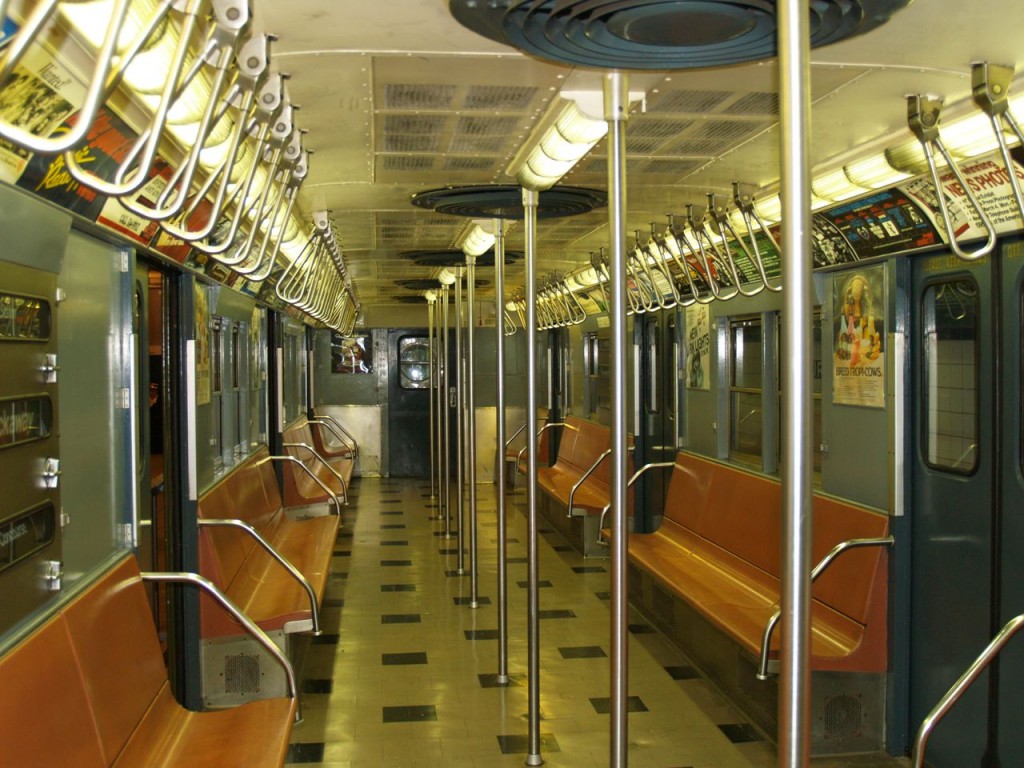
It has a history of mass transit in New York City, including the various forms of mass transit starting with horses. It also has exhibits on buses, and when I was there, it had a special exhibit on the past Miss Subways, which I had no idea had been a thing. They used to have a beauty pageant for everything I guess. As it is housed in an old subway station, on the old station platform, they have several old subway trains from the first models up to modern ones. You can walk through them, which is kind of neat.

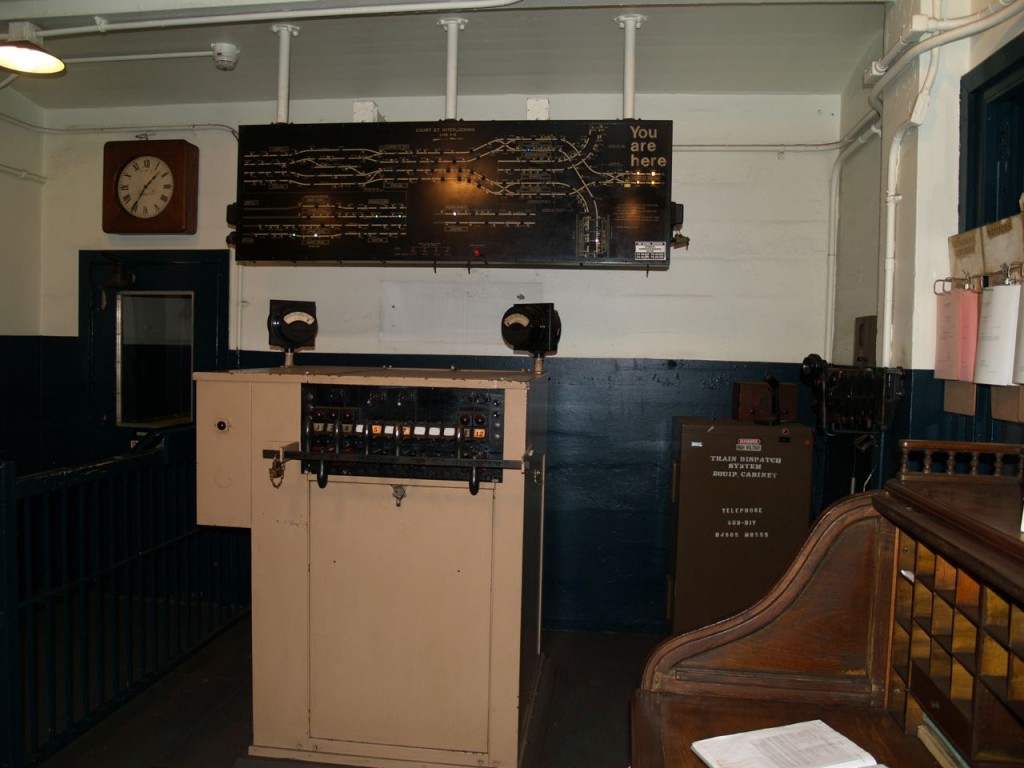
old subway cars old subway cars old subway cars old subway cars old subway cars old subway carsAlso within the subway platform is, what I think they called, a subway switching tower. It was the control area to watch and regulate where the trains were.

subway switching tower

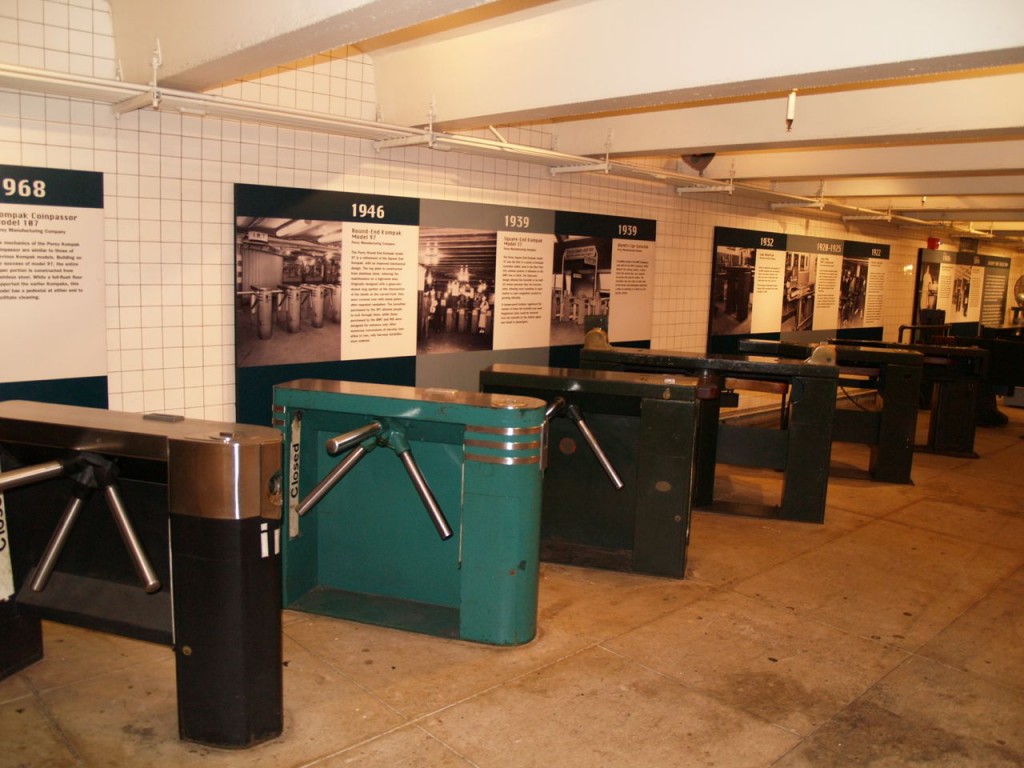
Finally upstairs, they have some exhibits that I am fairly sure you just have to be a geek to love. They have an exhibit of old turnstiles.

turnstilesPerhaps my favorite, is an exhibit of various subway coin slugs that people have used to try to avoid paying the fare. Some were quite inventive. Some were just hilarious.

subway coin slugsThat was my visit to the New York Transit Museum. If you love mass transit, or you are a geek, go check it out when in New York.


Bottling Wine

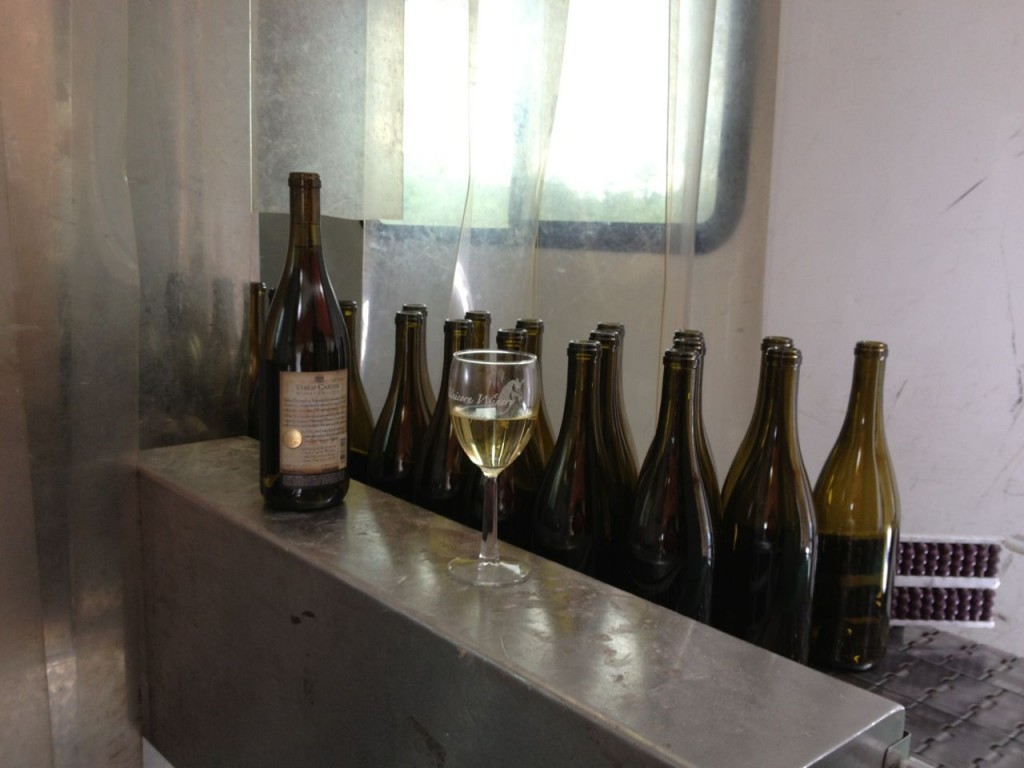
I spent last Friday at the Philip Carter Winery, small winery in Hume, Virginia helping them bottle wine. A couple of times a year when the wine is ready to be bottled, they invite people who love their wine to come help them bottle it. They pay the volunteers for their help with lunch, wine, more wine, and then more (bottled) wine to take home. A friend invited me to join her with this bottling work. It sounded like a great deal to me, not to mention fun, but I didn’t realize how much I would geek out and have fun learning about the bottling operation. I learned that small wineries hire a bottling operation on wheels to come to their winery and bottle their wine when it is ready. An entire bottling operation fits on the back of medium sized truck. It is totally cool in my humble geeky opinion.

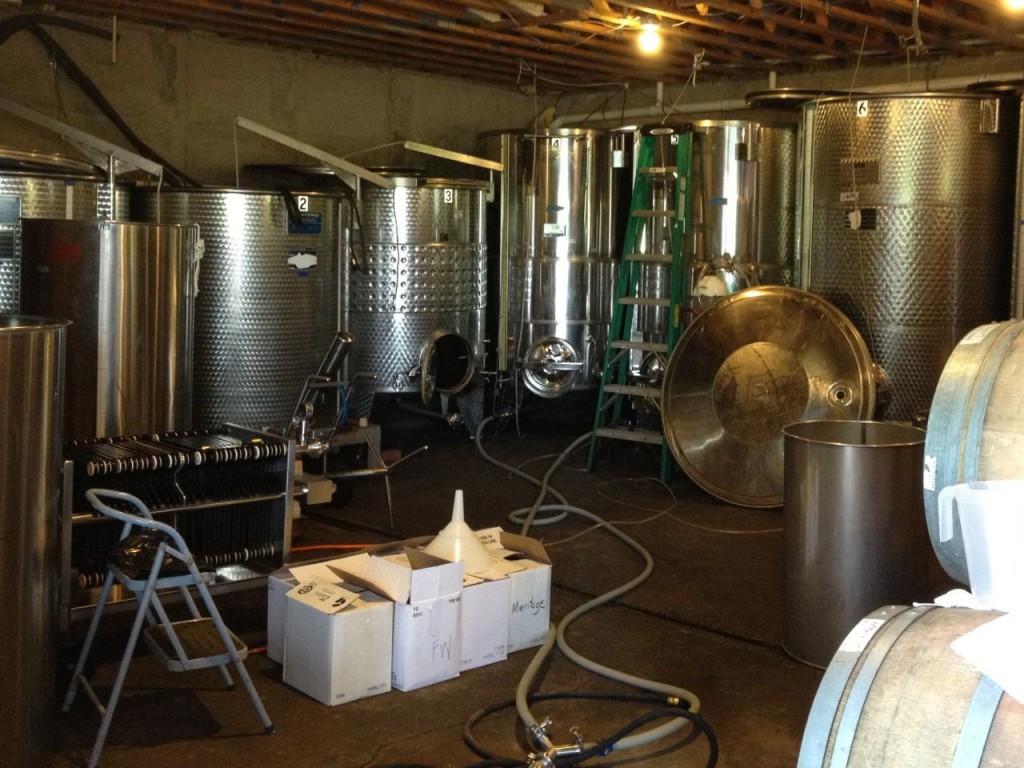
Like at all wineries, the wine is aged in barrels. It is later transferred to stainless steel vats.

vats

Vats of wine, the ones with the attached tubes are being drained to be bottled

Four of these vats were bottled that day. In the morning, two vats of Chardonnay were bottled, and in the afternoon two vats of Cabernet Franc were bottled. When a vat is completely empty, workers make sure all wine makes it from the vat to the bottling operation through the tubing through a highly technical process called “walking the line.” This entails people lifting the tubing up and letting gravity move the final volume of wine towards the pump. “Walking the line” also involves everyone yelling down the line “walking the line” so that the person inside the bottling truck knows the final volume of wine is coming.

Winery employees "walking the line"

Winery employees “walking the line”

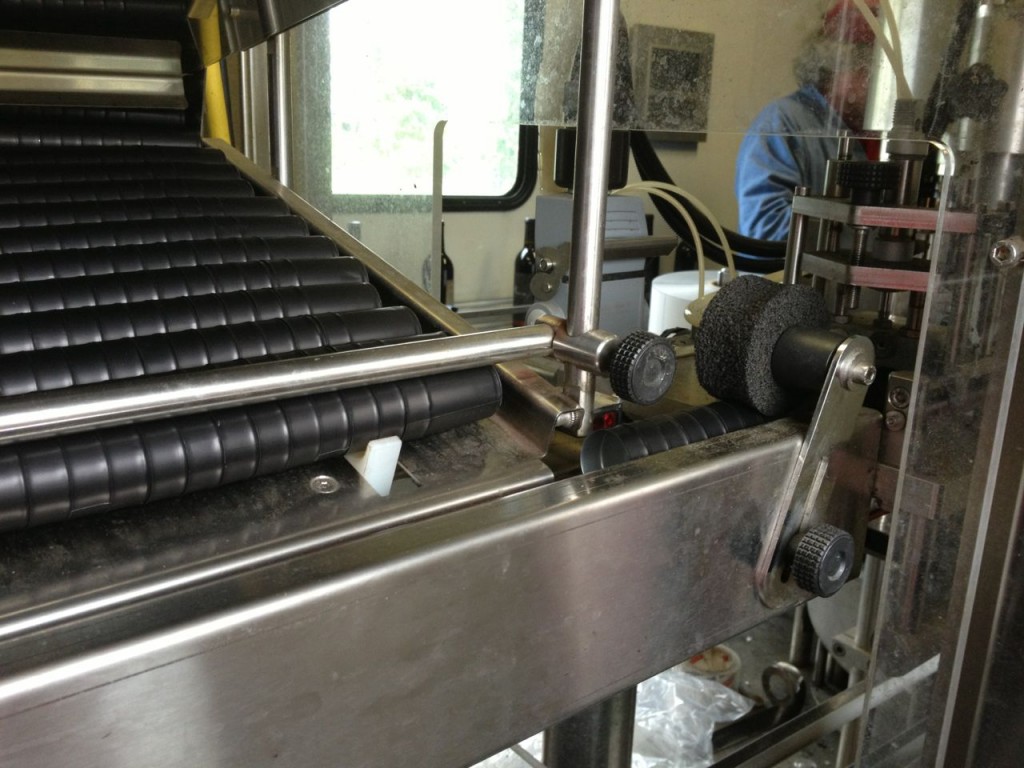
Empty bottles are loaded onto a conveyor belt on the right side of the back of the truck. The people loading the empty bottles generally enjoy drinking wine while working.

empty bottle start

Empty bottles on the conveyor belt to be filled with wine

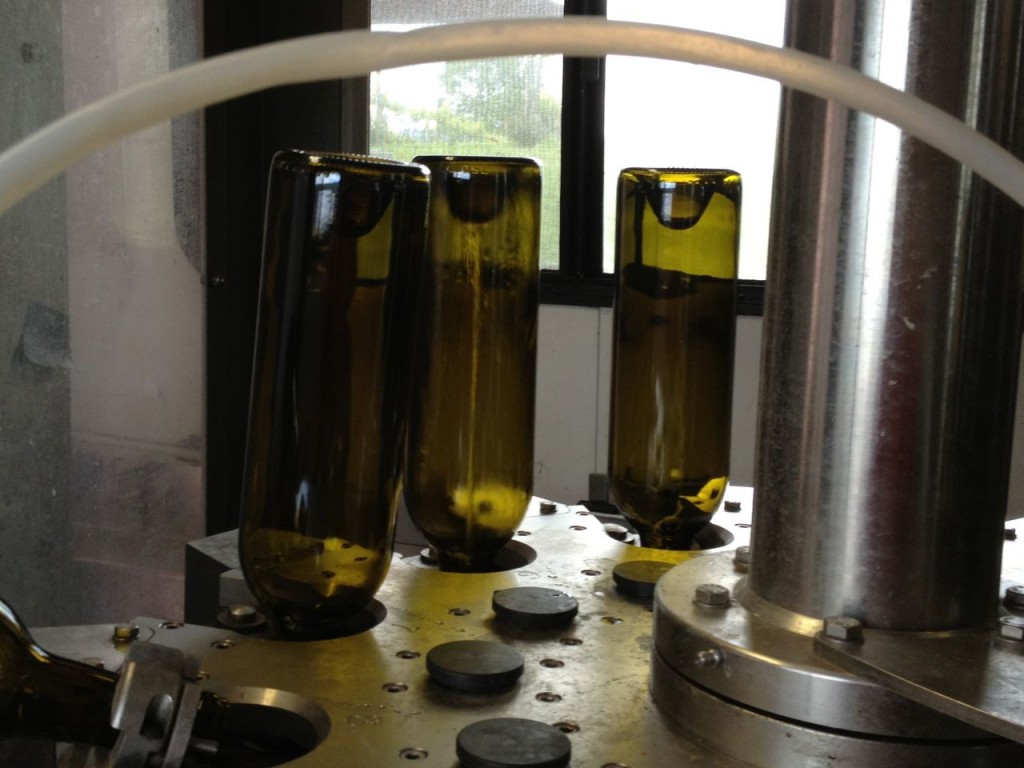
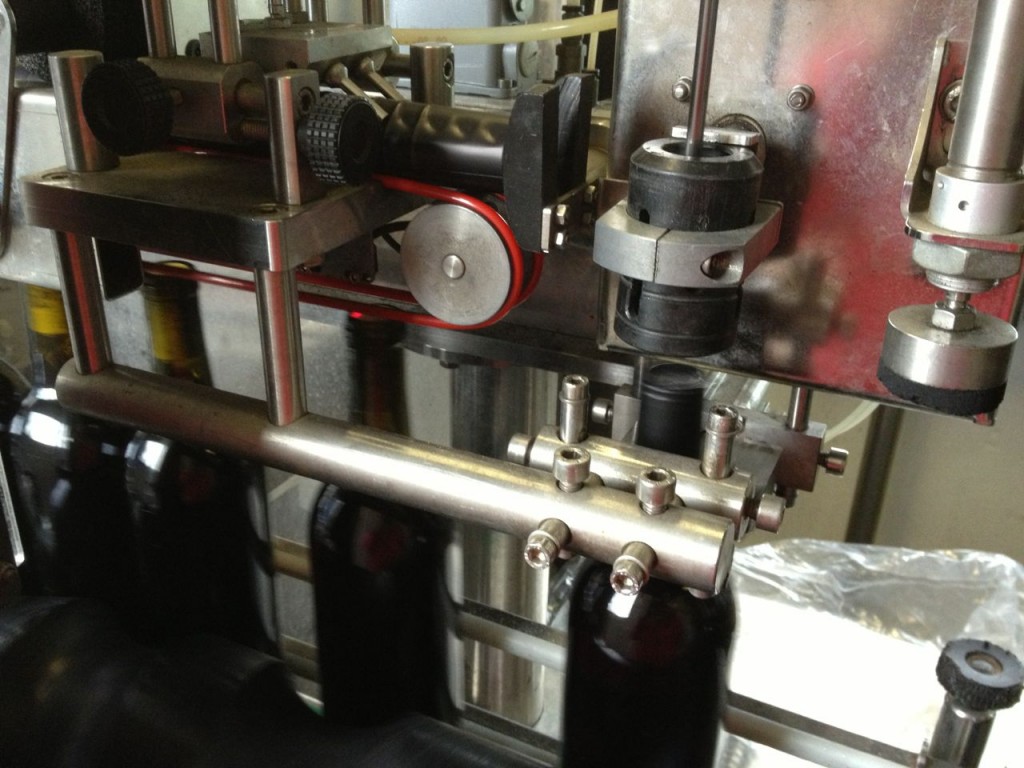
The bottles are first washed. A stream of water is squirted into the upside down bottle.

Water is squirted into the bottle in the middle

Water is squirted into the bottle in the middle

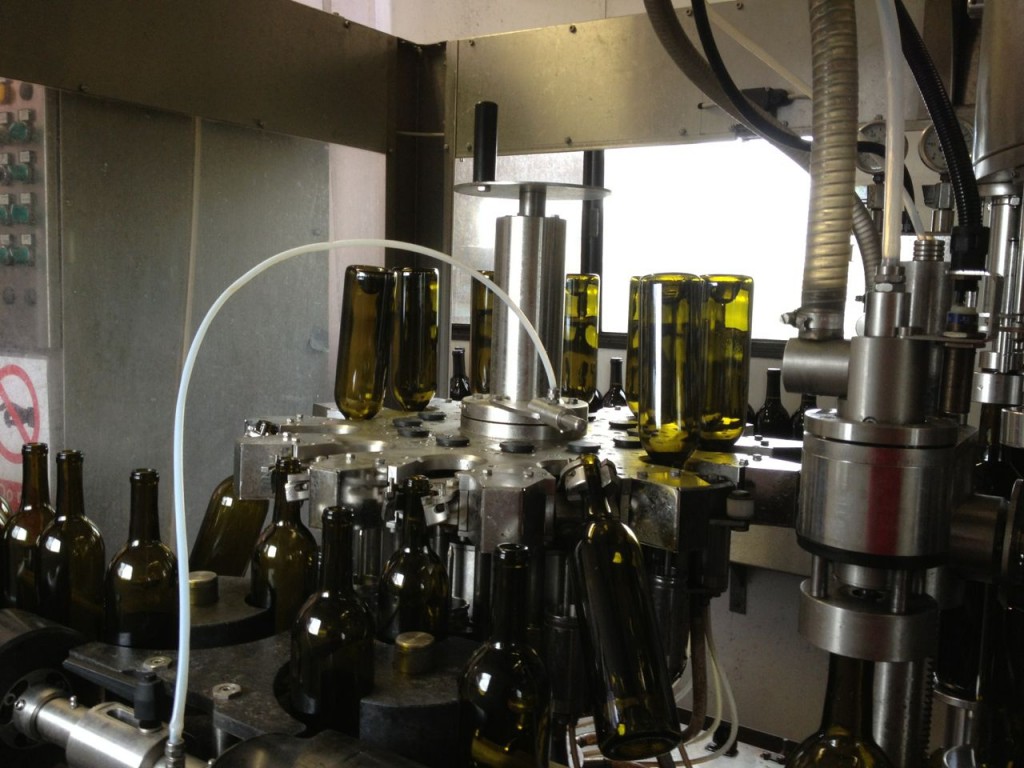
After the water drains, air is blown into the bottles to dry them. The bottles are then turned right-side up, and carbon dioxide is blown into them. Carbon dioxide is heavier than air, so carbon dioxide fills the bottle and forces air out of the bottle. This keeps the bottle free of oxygen before being filled with wine. Oxygen reacts with, or oxidizes, wine causing it to lose flavor.

bottle washer

The upside-down bottles on the left are being washed, and the upside-down bottles on the right are being dried by blown in air. On the far right, the right-side up bottle with the machinery attached to it, is being filled with carbon dioxide.

The bottles are then filled with wine. They are actually slightly overfilled.

Bottles being filled with wine

Bottles being filled with wine

A small amount of wine is then removed from the bottle to make the wine volume exactly 750 ml. Evidently it is easier to make sure the correct amount is in the bottle by overfilling then removing the extra. Then the cork is pushed into the bottle.

Corks in the bin before being placed in the bottles

Corks in the bin before being placed in the bottles

The bottle on the left is having the excess wine removed, and the bottle in the middle is having the cork pushed into it.

The bottle on the left is having the excess wine removed, and the bottle in the middle is having the cork pushed into it.

A laser then checks that the cork is in the bottle, and then the seal is placed over the bottle.

Stacks of seals ready to be dispensed

Stacks of seals ready to be dispensed

A laser (the visible red dot) checks that a cork is in the bottle in the middle, and then a seal is placed over the bottle on the right.

A laser (the visible red dot) checks that a cork is in the bottle in the middle, and then a seal is placed over the bottle on the right.

The seal is then pressed and stretched over the bottle to give a good seal.

Seals are stretched and pressed over the bottle.

Seals are stretched and pressed over the bottle.

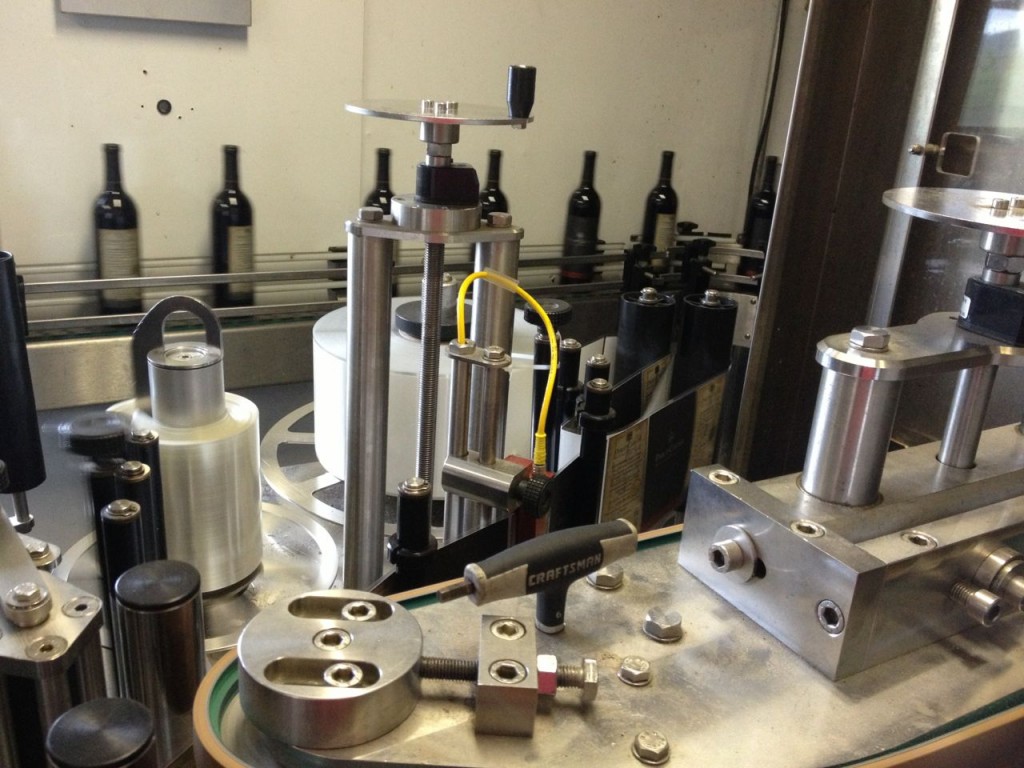
The front and back labels are then placed on the bottle. The front and back labels are on the same roll.

Labels being dispensed from roll

Labels being dispensed from roll

The whole bottling operation machinery is ridiculously compact.

Entire process, in the foreground is the sealer, behind it the corker, then the filler, then the washer in background

The entire process, in the foreground is the sealer, behind it the corker, then the filler, then the washer in background

The finished bottles come out the back of the truck on the left side of the truck, five feet or so from where the empty bottles entered. They are checked by a person to make everything is perfect then put in a case.

Finished, filled bottles leave the bottling operation

Finished, filled bottles leave the bottling operation

The final product from the operation is delicious bottled wine. I want to thank the Philip Carter Winery for allowing me to help, a wonderful day, and all the delicious wine. Also, I would like to thank the operator of the bottling truck (whose name I am horribly sorry to say I don’t remember) for giving me a tour of the truck and explaining the whole process. It was great fun and incredibly interesting.

Two of the final products from that day and my reward for helping to bottle the wine

Two of the final products from that day and my reward for helping to bottle the wine

Geeky Girl Engineer’s Home DIY Tips for Morons

I have been renovating my current house for two years now, and I realized before I bought it that it had been built and originally owned by smart, caring home owners, but it was later owned and “renovated” by morons. Therefore, in order to help and possibly stop morons out there, I have decided to start a new, sporadically reoccurring series of posts called “Geeky Girl Engineer’s (GGE’s) Home DIY Tips for Morons.” First, a few disclaimers though as to why you should either ignore or not ignore anything I write.

  • I am not a licensed contractor of any type. I am also not a home renovation expert.
  • I however have owned and renovated three homes. Much of the work I did myself.
  • I am a licensed professional engineer (PE), but I am by no means selling or marketing my services as a PE. Also, I am an environmental engineer, so I am more knowledgable about wastewater and hazardous waste and not so much about structural engineering such as one needs when designing and sometimes renovating a house. I hired a licensed structural PE to help with a portion of my current house’s renovation because I demolished a structural wall.
  • As an engineer, I have been known at times, to adhere to the engineer’s adage which is:
    1. If it doesn’t move and it’s supposed to, use WD-4.
    2. If it moves and it’s not supposed to, use duct tape.
    3. If those don’t work, use a hammer to bang the crap out of it. This may not solve the problem, but it will make you feel much better.
    4. If all else fails, use C-4.
  • OK, I totally made up number 4. I have never actually worked with explosives, which is disappointing. Actually, that is not entirely true. I have used picric acid in a dilute solution before to measure creatinine in urine. However it was always in solution and kept in a plastic container and never at risk of exploding.
  • As a female, unlike some but not all males, I read the directions. I even read the directions when it is something from IKEA and the directions involve a strange cartoon man, and no matter how well you follow the directions, you always have leftover: three screws, four washers, two nuts, and five wooden dowels. No matter if the piece does not involve wood, there will still be wooden dowels included. Also, I now have a fine collection of Allen wrenches.
  • I know what I can and can’t do. I also know what I shouldn’t do. I know when to call in professionals. As a chemical engineer, I have the book knowledge to design a petroleum refinery, but I don’t have a clue how to change the oil in my car. I leave that to the professionals, who can also recycle the oil. I fully understand fluid dynamics, pipe sizing, friction factors, municipal waster and waster design, etc. However, I still use a professional plumber for tasks larger than changing o-rings or existing faucet heads, etc.
  • I am a natural blond.

So, while many might be able to learn something from this series of posts, before you attempt any type of home do-it-yourself (DIY) tasks, please try to figure out if you are in fact, a moron. Consider the follow questions:

  • Has anyone ever told you that you are a future Darwin award winner or that you almost won a Darwin award?
  • If you have an electric outlet with two holes, but your plug has three prongs, is your solution to cut the third prong off the plug?
  • Do you believe building codes are silly and not in the least useful?
  • Have you ever seen something you did or something very similar to something you did on There I Fixed It? Or are you confused as to why some things are on that site because they look perfectly fine to you?
  • Do you think that when a female is raped, her “body has a way to shut that whole thing down” to avoid getting pregnant?
  • Have you ever opened a box containing electronics or some other non-food item, found a little packet and thought “oh nice, it came with a snack,” only to be disappointed when it said “don’t eat”?

If you answered yes to any of the above questions, you might be a moron. If you are going to do anything more complicated than changing a light bulb in your home, you might want to consider calling in a professional. Actually, you may want to consider if you are even capable of changing a light bulb. After all, someone had to be the inspiration for all those “how many _____ does it take to change a light bulb” jokes. Please consider carefully. Your future self, and any future owners and occupants of your home will thank you for it.
There is the introduction. Stay tuned for tips based on the incredibly stupid things I have encountered in this house. Contact me if you have questions. Contact me if you have tips or photos of really stupid things done at your house that you would like to share with the morons out there as something not to do. I can promise that if you ask me a question, and I don’t know the answer, I will not make up an answer, but I may be able to refer you to some sites with actual valuable information.

Short Term Radon Test Results

Previously I wrote that I was testing my house for radon. I got the test results back this week, and the test results came back as an average radon level of 2.9 pCi/L. The good news is this is less than the 4 pCi/L action level. The bad news is this is still elevated above average house level of 1.3 pCi/L. This test involved collecting radon over four days. At work, I am currently working on a project that involves looking at the indoor air variability due to radon or volatile organic compounds intrusion from the soil and groundwater. Thus, I know better than most how variable indoor air concentrations can be. They can vary a lot. Therefore, before deciding what to do, I have considered the following items:

  • The test was done in winter under proper closed house conditions. Closed house conditions means keeping the doors and windows closed except for normal entering and exiting the house through the doors. This is not an issue in the winter because it is cold. This is also one of the reasons winter is one of the best time to perform the test, but it also means that the test will lead to higher results than if more open house conditions are maintained. When the weather is nice, I like to open the windows and doors, so that would generally mean at least during those times, the radon concentrations in my house should be much lower.
  • The test was performed over four days. As I stated, indoor air concentrations can vary a lot, and in terms of those fluctuations, four days is relatively short term. Even ignoring the seasonal effect of closed versus open house conditions, the long term average radon conditions could be much higher or lower than 2.9 pCi/L. The reasons are not fully understood, but exterior temperatures and precipitation can affect it. A long term test over several months or even better a year, will give a much better understanding of the average concentration. If the results had been 1.3 pCi/L or less, than given the conditions, I would probably not be at all worried that the long term concentrations would be higher.
  • The EPA recommends that the test be performed in lowest habitable portion of the house. As such, I placed the test in the guest room for that and other reasons stated previously. However, I am almost never in the guest room. I don’t have guests that often, and the door to that room remains shut most of the time. Thus the only air exchange in the room is via the ventilation ducts and a little underneath the door. Furthermore, my bedroom and all the common areas of the house (kitchen, living room, etc.) where I spend most of my time are upstairs and should have lower radon concentrations than the guest room. Therefore, even if the results from the guest room do accurately represent average radon concentrations, they are borderline for taking mitigation action and probably represent the highest levels in the house. While I don’t want to expose my guests to undue risks, especially since my guests are generally people I like or love, do I want to mitigate based on the results from this room?
  • Finally, I’m a scientist, and I believe in validation and replication. This was one test result, and home test kits are generally not considered the gold-standard of any type of test. There is no doubt at least of some amount of inaccuracy with it.

Therefore, I have decided to test the house again, but this time for a longer duration. I have also decided to run two tests simultaneously. I plan to place two testers in the house, one in the guest room again and one upstairs in my master bedroom. I have ordered a long term home test kit that can be used to test between 90 and 365 days. I plan to run the test over an entire year to get a much better indication of what the long term average radon concentrations are in the house. Also, by testing both the guest room and master bedroom, I can better understand what my average exposure is both in terms of the average annual concentration and in the rooms where I spend the vast majority of my time. I will also add that while the guest room is a guest room now, as it is bedroom, legally and real estate-wise speaking, and thus in the future it could be a normal bedroom if my life changes or if I sell the house. Therefore I still consider it important to know what the long term radon concentrations are.

Check back in a year, and I will let you know what happened and how I am proceeding.

Testing My House for Radon

I’m testing my house for radon, and you should also. Winter is the best time to test your house for radon, which is one of the reasons I am testing it now. What is radon, and why am I testing for it? Keep reading.

What is radon? It is an odorless, tasteless, invisible gas that also happens to be radioactive. It is produced naturally from the decay of uranium, which occurs naturally in soil across the United States, and other countries and continents. The United States Geological Survey (USGS) has this neat map showing uranium soil concentrations across the US. Due to its radioactivity, radon is a carcinogen. In fact, it is the second leading cause of lung cancer after smoking. Radon gas is pretty much everywhere, both outdoors and indoors. Like all carcinogens, there is no safe level of exposure. You can’t completely avoid exposure because it is naturally occurring, but it is best to avoid it if you know it is present.

The US EPA estimates that the average home has an indoor radon concentration of 1.3 pCi/L, this means pico Curies, a unit of radioactivity, per liter of air. If your indoor air is above 4 pCi/L, then they recommend you fix your home. I’ll get to what fixing your home means next. Finally if the indoor air concentration is between 2-4 pCi/L, then they recommend you consider fixing the house. It is in that range that the concentration starts to get high enough above background that you might want to take action.

What happens if the radon concentrations in your house are high? First, don’t panic, your house can be mitigated to reduce the radon concentrations. You can hire a professional to install a mitigation system in your house. A mitigation system can either prevent radon gas from entering the house, or it can remove it from the house once it gets in. For example, one type of system sucks or pulls gas from beneath the house and then pipes it safely above the house where it can disperse into the atmosphere. Mitigation systems can be very effective and will greatly reduce your risk of lung cancer due to radon exposure.

Is your house at risk? As shown in the USGS map, some areas have higher concentrations of uranium in the soil than others. Areas with higher soil uranium concentrations will generally lead to higher radon gas concentrations. Also, houses with a crawl space will generally have less radon infiltrating the house than houses built on a slab or with a basement. The crawl space can allow the radon to dissipate before rising into the house. Houses with cracks in their slab are more susceptible because the cracks serve as a pathway for the radon to rise into the house. Also, pipes and conduits such as for wires from the house to ground can also allow radon to enter if they are not properly sealed.

So how do you find out if elevated levels of radon exist in your house? It’s fairly easy. Many states regulate the testing of radon, so you may try contacting your state radon department if it has one. Most of the time, you can go to your local home improvement store and buy a test kit for about $20. That’s what I did. The test kit I bought included two little containers that detect radon. The test kit had certain specific directions for the test containers such as they needed to be at least three feet off the floor, at least three feet from an exterior wall, etc., and they needed to be open for four days. The test containers were supposed to be placed six inches from each other. I presume you get two that are supposed to be placed in the same location for replicability. So here are the high tech test kits.

Both radon detectors placed for testing

Both radon detectors placed for testing

Yes that is a tape measure in the photo because it said to place them six inches apart, and I’m an engineer. Now be quiet. The detectors should be placed in one of the lowest habitable rooms of the house. My house is built into a hill such that the front door on the first floor is ground level, and the back door of the second floor is also ground level. I chose to place the detectors in the guest room, which is on the first floor and in the back exterior corner of the house. The back wall and 3/4 of the side wall of the guest room are underground exterior walls, and thus this room would be one of the most susceptible to radon infiltration from the ground. The room that serves as my office and workout room is next to the guest in the front exterior corner of the house. Two of its walls are also exterior, but only about 1/3 of its side wall is actually underground. However, there is a crack in the slab about two feet long in the office, so I considered whether the test kits should be placed in this room. [Due to the extensive renovation I’ve been doing on this house, I know where all the cracks and openings are.] That crack could serve as a major route for radon to enter the house. However, I ultimately decided that the guest room would be more susceptible to radon infiltration because of the amount it is underground.

After choosing in which room to place the detectors, I then found a good location that was far enough away from an exterior wall and above the floor. I then proceeded with the testing protocol. I unscrewed the containers and let them sit for four days. Whew, that was exhausting. I deserved a drink after initiating that test. Here is one of the detectors unscrewed. It’s quite simple looking.

Radon detector open to run test

After I let them sit for four days, I screwed the caps back on, filled out the form that came with them, and mailed them into the lab. It cost $30 to have them tested, so with the cost of the kit, the entire thing cost me $50. I consider $50 a small price to pay to make sure I am not unknowingly breathing in a carcinogen everyday. I’m currently waiting for the results from the lab, and I will update my blog when I get the results.

One final note, I said at the beginning of this post that winter is the best time to test for radon. The reason for this is winter tends to be the time that the radon concentrations in a house would be at the highest. When the weather is nice, people tend to open windows  for ventilation instead of using the AC or heater, and people just tend to open doors more often to go outside for whatever reason. Thus in the winter, the house is more closed off, and radon concentrations can build up due to less exchange of the indoor air with the outdoor air. Where I used to live in south-eastern part of US, I probably had windows open more often in winter, as I constantly used the AC in the summer, so this might not hold true. That and the fact that indoor air concentrations can vary day to day, is why experts recommend that if you get high levels detected with a short term test, you consider doing a longer term test such as over several months, to determine what the longer term average is. The test kits do have false positives, especially at lower concentrations, so if you test your house, and it comes back high, once again, don’t panic. Test your house again, this time with a longer term test, and see what the longer term concentration is, and then determine if you need to take action. However, don’t remain ignorant about the risks. Test your house; it’s important and could save your life.

For more information:

Female Restroom Design Basics for Men

I am officially fed up with going into restrooms that have been obviously designed by men. Evidently the women of the world are going to need to take more drastic actions because this situation does not seem to be resolving itself as more women enter engineering, architecture, and construction. Building code covers a whole range of issues from structural to safety to just plain standardization. Clearly, proper female restroom design needs to be put into building code. Perhaps we also need a rule that just as all engineering designs must be certified by a Professional Engineer, all female restrooms deigns must be certified by a female, perhaps not a female engineer, but probably any female who has ever used a public restroom will do.

Men, yes I am aiming this post at men because honestly I find it very hard to believe that a woman would be capable of making such stupid design decisions for female restrooms. This is not to say a female is smarter than a male (that’s an argument for another day), but because any female who has used a public restrooms knows exactly that I am talking about and would not design it so stupidly. So men, I don’t know why you are so confused about what about what we do and don’t need in a restroom. I assume and hope that none of you have been in a restroom when the ladies are using it, but still I would think the things that we need and want would be pretty common sense. Perhaps I should not assume certain men to have common sense when it comes to the ladies though. This election season has taught me that there are men out there who think women have magical reproductive systems. Thus ladies, lady parts, and lady part business is clearly an utter mystery to some segment of the male population. Therefore, let me give you an education about what the ladies want and don’t want in a restroom. I promise there will be no discussion the lady parts of anything else that might make you squeamish.

  1. Probably the biggest complaint that I and many other women have is the length of the stalls. Here is how it is fellas, ladies like to do their business in stalls. We don’t use the urinals. Not only do we like to use stalls, but we like to have doors on said stalls to give us some privacy. No problem, you say, we always give you stalls with doors. Well, yes, you do, but here’s the thing, evidently you have never used a toilet in a stall with a door because if you had, then you would understand that the stall needs to be long enough that we can close the dang door without standing on the toilet or straddling the toilet. Seriously, the stall should be long enough that we can stand in front of the toilet and close the door at the same time. If you can’t imagine what I am talking about, I invite you to go to nearest toilet and stand in front of it, facing away from it (like you might sit down or something on it). Now look at the distance your body takes up in front of the toilet. We need at least that much space between the toilet and the swing area of the door. Since the swing area of the door is put onto building plans, you already know that distance, so just add a proper distance between the toilet and swing area so that you can stand there. Simple right? Makes sense?
  2. We need a coat hook or something like it on the back or the door or the side of the stall. You might be aware that many women carry purses. Sometimes we also carry jackets or backpacks or other items. We like to be able to hang them when we are in the stall, so we don’t have to put our stuff on the floor. See this stuff is really not complicated.
  3. We need a small trash can inside each and every stall. Some restrooms have those neat trash can and toilet roll hangers that fit in the wall between two stalls. Those are just fine, just as long every stall has a trash can that can be reached from the privacy of that stall. I realize you may be confused as to why on earth we would need a trash can in each stall. Let me just say that at certain times of the month, we need to carry certain, shall we say feminine hygiene products, into the stall, and we like to dispose of, shall we say used feminine hygiene products, in the privacy of the stall. If you want further information please go ask your wife, mother, middle school health teacher, or the internet.
  4. While I am sure it is obvious that the stall needs to have toilet paper in it, what does not always seem to be obvious is where to put it. To put it simply, 99.999% of women are not in fact contortionists, and I imagine even the 0.001% of women who are, don’t like to do contortions in order to reach the toilet paper. It should not hitting our leg. It should not be behind the toilet. It should be in an easy to reach location.
  5. One more thing about the stalls. I can only presume that someone somewhere at some point created some calculation as to how many stalls would be necessary based on the planned traffic in the bathroom based on the design occupancy of the building. Whoever they were that came up with this calculation, they were wrong. I don’t care how smart they were and what kind of glorious calculus and statistics they used. They were wrong. If you don’t believe me, I invite you to go stand outside any women’s restroom at any sports or performing arts venue, airport, dance club, or any other place where you can find large groups of women. There will be a line. However outside the men’s room, there will be no line, or there will be a line 1/10 the size of the women’s room line. So whatever your calculation says, throw in a large safety factor, maybe upwards of 1.5. We will call it the female safety factor. It is a safety factor both from the traditional engineering standpoint of being conservative in design but also from the standpoint of you may be in danger if us females find out who is responsible for these horrible restroom designs that never seem to improve.
  6. Enough talk about the stalls, now let’s discuss the sinks. In general, the time spent in the stall is the time limiting step in a women’s use of the restroom, so there does not need to be as many sinks as the stalls. However there should be an adequate number of sinks, and they should be placed such that traffic can easily flow to, away, and around them.
  7. Staying with the sinks, optimally there should be one soap dispenser per sink, however, if needed, this number can be reduced to as low as one dispenser per two sinks, if and only if, the dispenser if placed between the two sinks that share it. I’ve been to too many restrooms where there were three sinks and two soap dispensers at either end. Let’s think about this. Where the heck is the person using the middle sink supposed to get her soap. While I suppose some people may wash their hands differently, I and everyone I know, wets their hands, then puts soap on their hands, lathers, then washes with water. If the soap is not near the sink, are we supposed to get the hands wet, walk around someone else, get soap, and return to our sink, all while dripping water from our wet hands? Common sense. That is is that is really needed here. Also, if the reason for this stupidity in restroom design is due to restroom designers not being the type that wash their hands after the restroom, then gross, and wash your dang hands.
  8. Now that we have cleaned our hands, we need to dry them. Shocker. Similar to the sink discussion, there should be enough paper towel dispensers or hot air dryers, to keep traffic moving in the restroom. I don’t know the optimal number, but if there are ten sinks, then more than two towel dispensers would be a good idea.
  9. Next, we are back to trash cans. Yes, I know, I already stated that we need trash cans in each stall, but we also need them outside the stalls. After we use paper towels to dry are hands, we need to throw the used towels away. This is where the trash can comes in. Sometimes, we have something else we might like to throw away, who knows, so trash cans are good. Also, to get into more detail, big trash cans are good, and trash cans that we don’t have to touch to open are really necessary for hygiene reasons.
  10. The next item that is necessary is a baby changing area. However, I am not sexist; the men’s restroom should have this too. Daddies change diapers too nowadays. A space specially dedicated for changing babies is required.
  11. Now let’s discuss furniture. We don’t need it. I don’t know what you fellas think we do in restrooms, but in general, we do our business, wash our hands, and get out. Sometimes, a lady might want to freshen her makeup or do other personal tasks. Sometimes, if we are with a friend, we might chat. In general though, we don’t use the restroom as a living room. We don’t need couches. We don’t get the vapors and need to use the restroom to have a lie down. However we keep finding restrooms with couches in them. My theory is that the couches are there because the restroom is being used as a storage location for the couch. Look if the restroom is huge, then fine put a couch there, and if some women has a use for it, she can use it. However if the restroom is huge, go poll all the women you know, most of us would vote for more stalls, not a couch. [See number 5]
  12. Are you ready for advanced restroom design? I know you can handle it. For hygiene reasons, after you wash your hands, you should touch as little as possible. That is why some of the newer restrooms don’t have doors at the entrance, they just have a slightly torturous route from the opening to the restroom to provide privacy. These are great. If this is not possible, consider placing a trash can right by the door, that way we can open the door with a paper towel, then throw it away afterwards. Simple.

Edited to add the following three based on comments from others:

  1. No pedestal sinks. They are pretty and all, but just as we have stuff to bring into the stalls, we will still have that same stuff when we leave the stalls. Where do we put said stuff if there are no counters?
  2. Consider that humans are different heights. While toilets and sinks normally are at generally standard heights that does not always accommodate everyone, there is flexibility in the height of paper towel dispensers, hand dryers, mirrors, and a few other items. Try putting them at different heights, so short people can use the lower ones, and taller people can use the higher ones.
  3. I have been informed from a couple of males, that I may have assumed too much when I said the bad female restroom design reflects ignorance or unthinking on the part of men. I stand by my statement that the problem is probably men because statistically speaking most engineers, architects, and contractors are men. However, I have been informed by men that male’s restrooms have just as bad design as the female’s restroom. I have also been informed that there are bad design of urinals. I know nothing about urinals, so I will not comment on how to improve them, other than to say that improved fluid dynamics design may be needed.

This has been your basic introduction to proper female restroom design. Please consider it carefully because if not, we are going start coming after those responsible for bad female restroom design. You have been warned. Women, was there anything I forgot? Please feel free to add to this in the comments. For further amusing discussion on what both women and men want in a restroom, please see this Storify Twitter discussion.