Bottling Wine

I spent last Friday at the Philip Carter Winery, small winery in Hume, Virginia helping them bottle wine. A couple of times a year when the wine is ready to be bottled, they invite people who love their wine to come help them bottle it. They pay the volunteers for their help with lunch, wine, more wine, and then more (bottled) wine to take home. A friend invited me to join her with this bottling work. It sounded like a great deal to me, not to mention fun, but I didn’t realize how much I would geek out and have fun learning about the bottling operation. I learned that small wineries hire a bottling operation on wheels to come to their winery and bottle their wine when it is ready. An entire bottling operation fits on the back of medium sized truck. It is totally cool in my humble geeky opinion.

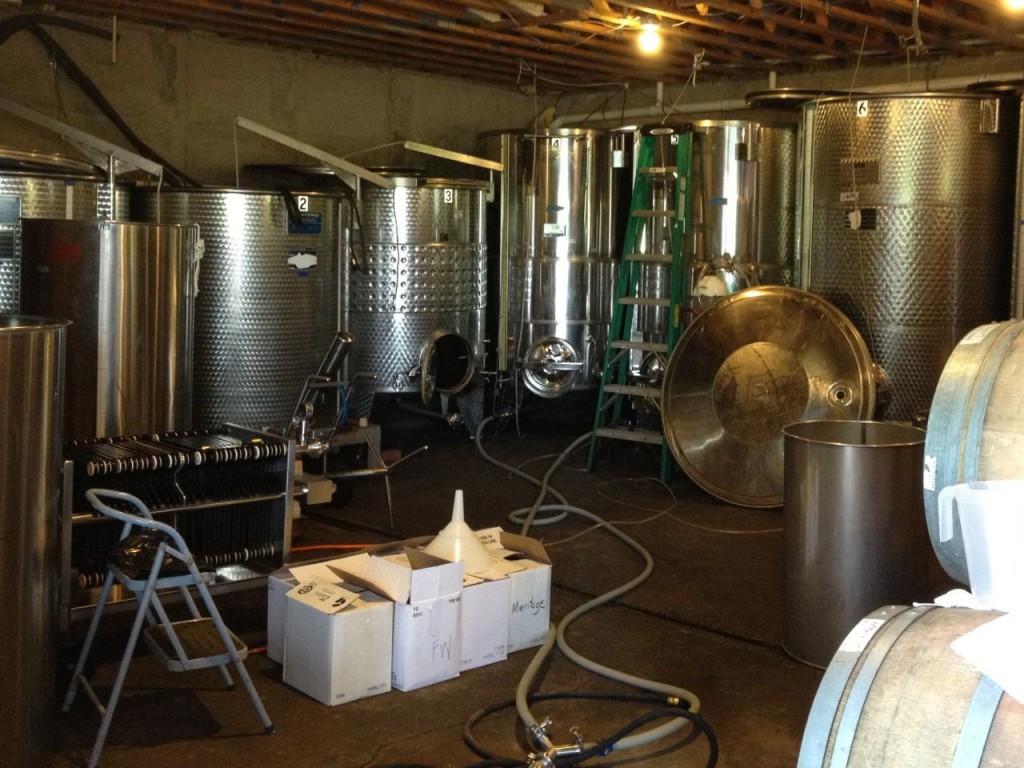
Like at all wineries, the wine is aged in barrels. It is later transferred to stainless steel vats.

vats

Vats of wine, the ones with the attached tubes are being drained to be bottled

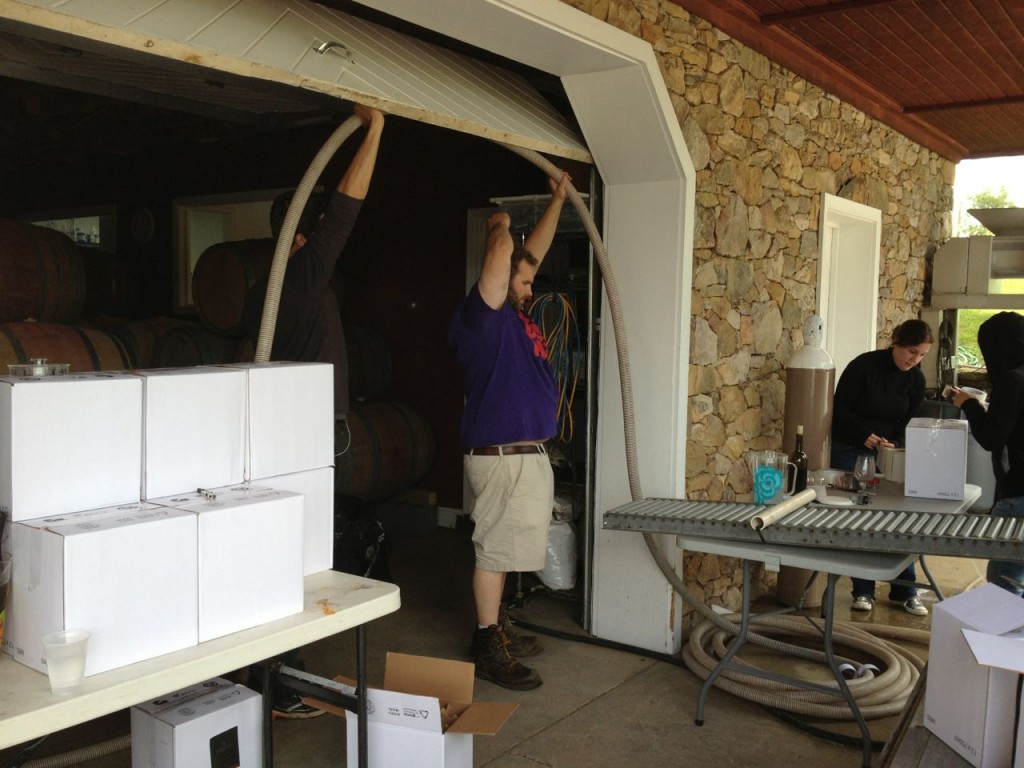
Four of these vats were bottled that day. In the morning, two vats of Chardonnay were bottled, and in the afternoon two vats of Cabernet Franc were bottled. When a vat is completely empty, workers make sure all wine makes it from the vat to the bottling operation through the tubing through a highly technical process called “walking the line.” This entails people lifting the tubing up and letting gravity move the final volume of wine towards the pump. “Walking the line” also involves everyone yelling down the line “walking the line” so that the person inside the bottling truck knows the final volume of wine is coming.

Winery employees "walking the line"

Winery employees “walking the line”

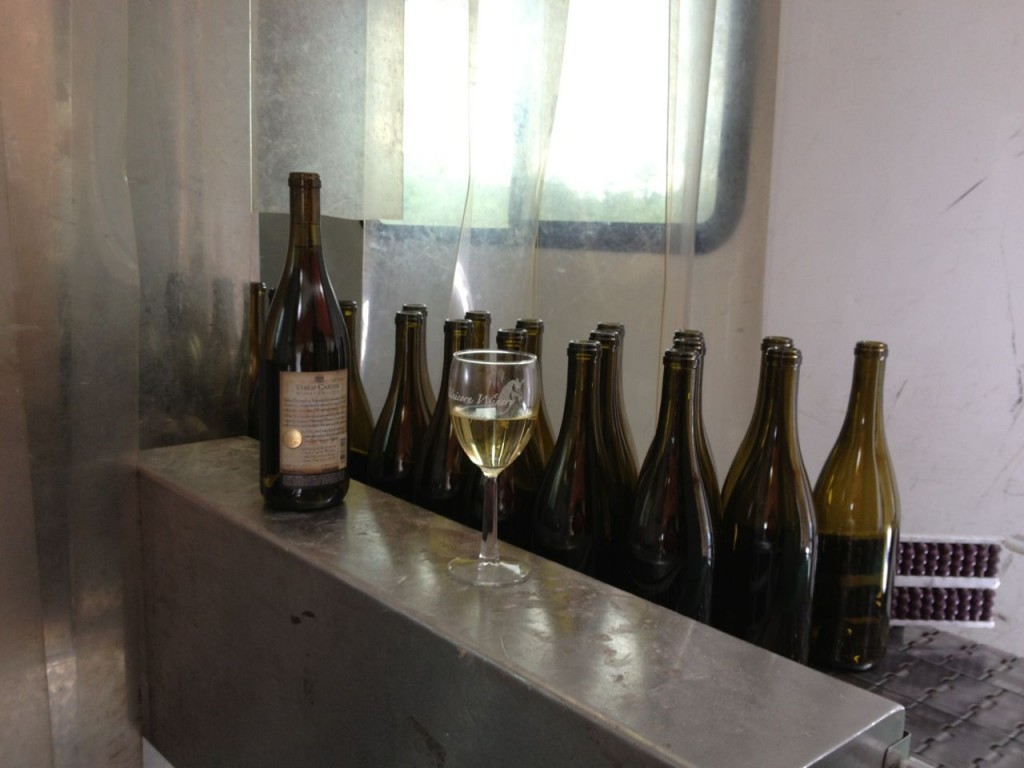
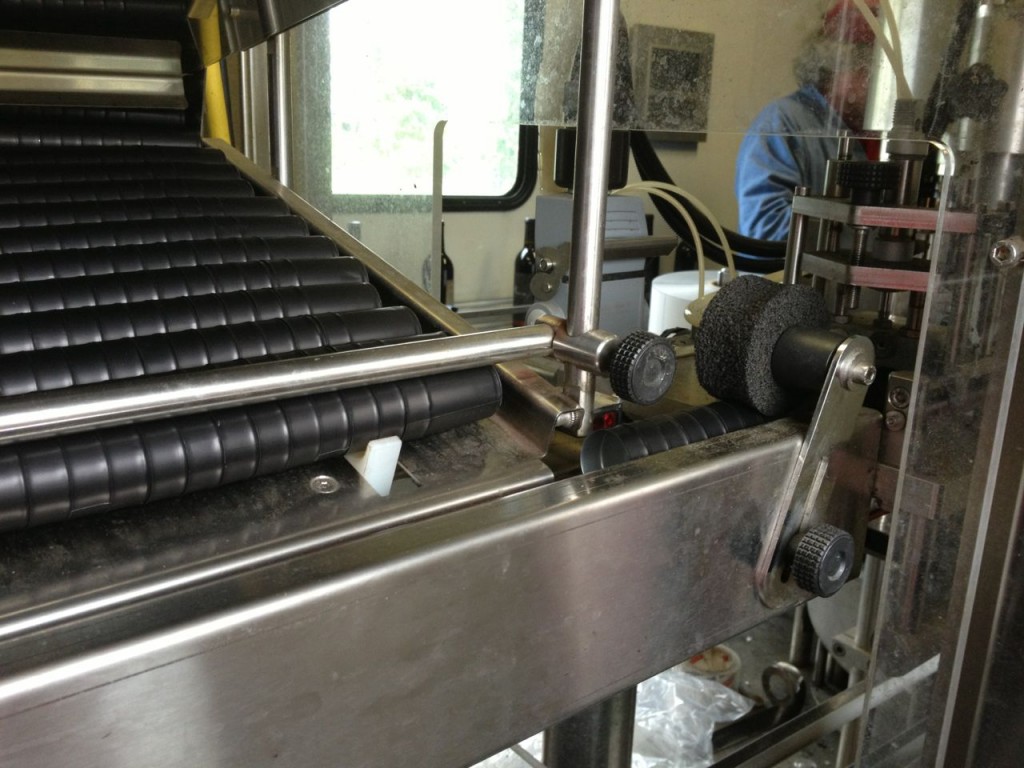
Empty bottles are loaded onto a conveyor belt on the right side of the back of the truck. The people loading the empty bottles generally enjoy drinking wine while working.

empty bottle start

Empty bottles on the conveyor belt to be filled with wine

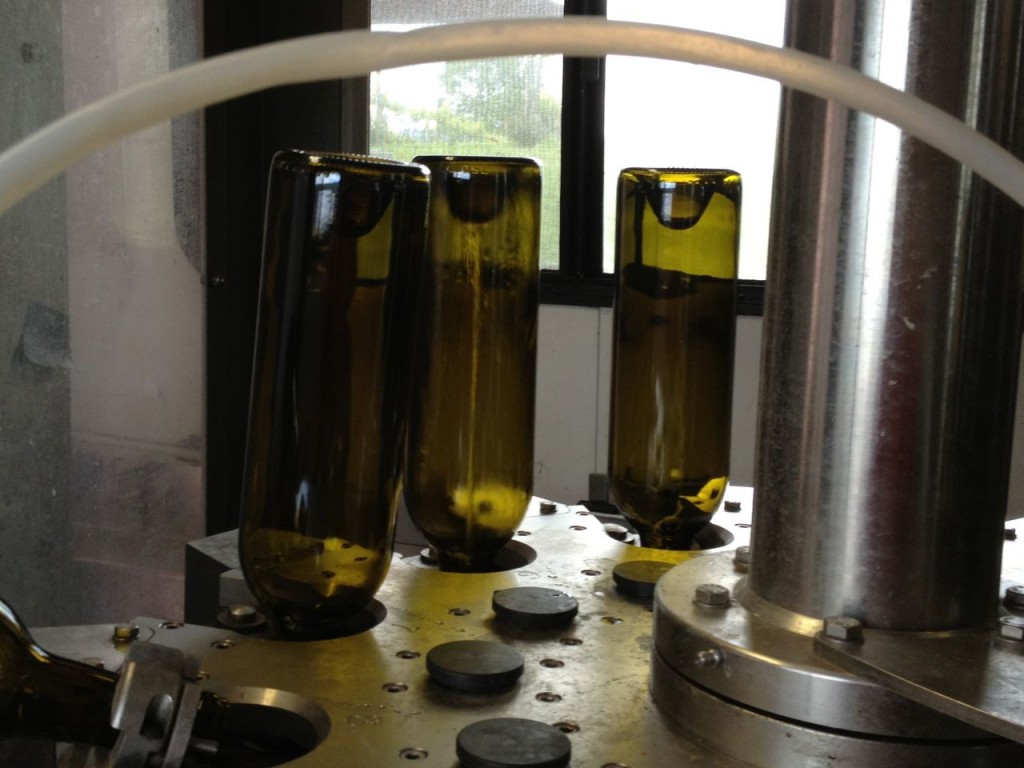
The bottles are first washed. A stream of water is squirted into the upside down bottle.

Water is squirted into the bottle in the middle

Water is squirted into the bottle in the middle

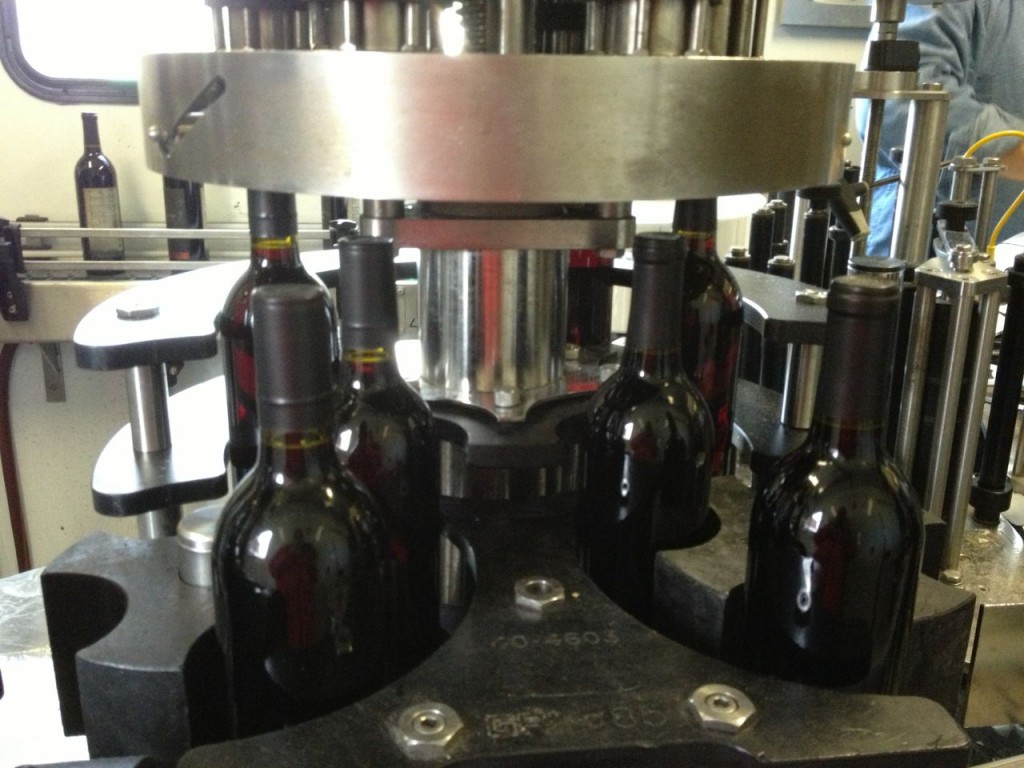
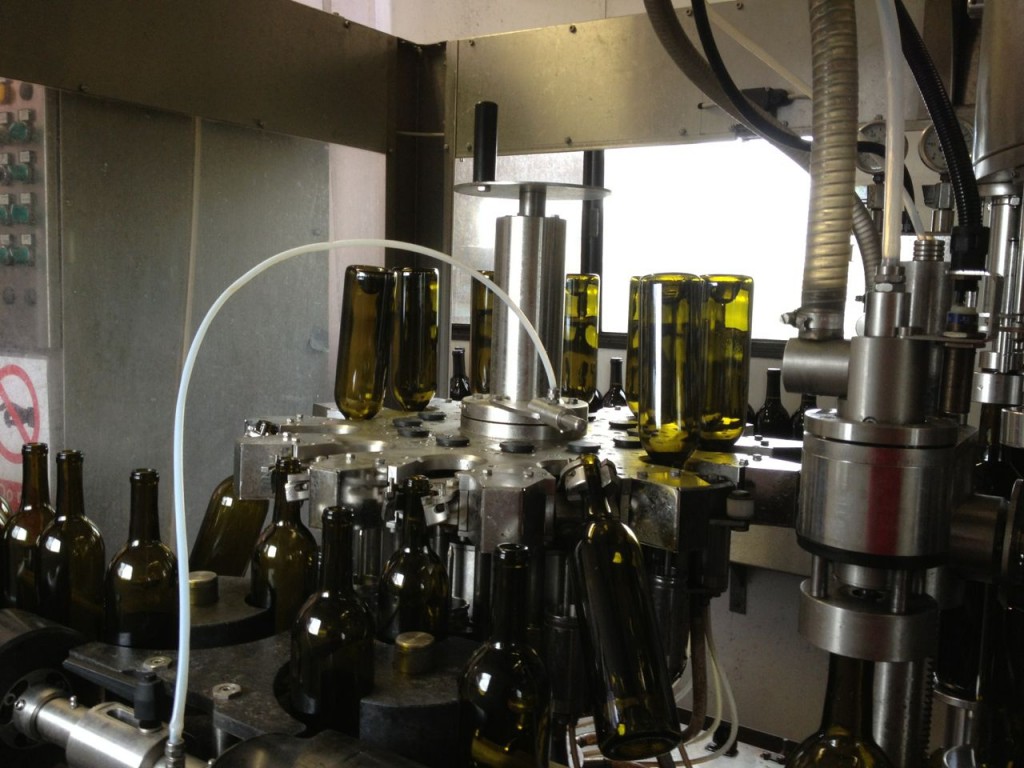
After the water drains, air is blown into the bottles to dry them. The bottles are then turned right-side up, and carbon dioxide is blown into them. Carbon dioxide is heavier than air, so carbon dioxide fills the bottle and forces air out of the bottle. This keeps the bottle free of oxygen before being filled with wine. Oxygen reacts with, or oxidizes, wine causing it to lose flavor.
bottle washer

The upside-down bottles on the left are being washed, and the upside-down bottles on the right are being dried by blown in air. On the far right, the right-side up bottle with the machinery attached to it, is being filled with carbon dioxide.

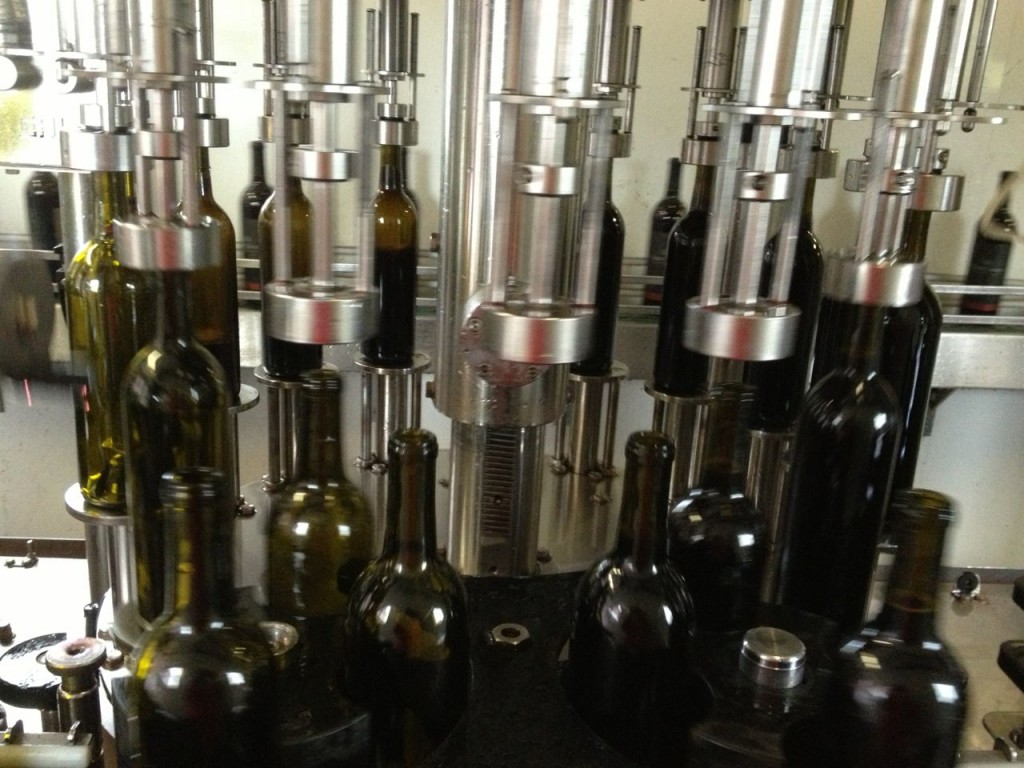
The bottles are then filled with wine. They are actually slightly overfilled.

Bottles being filled with wine

Bottles being filled with wine

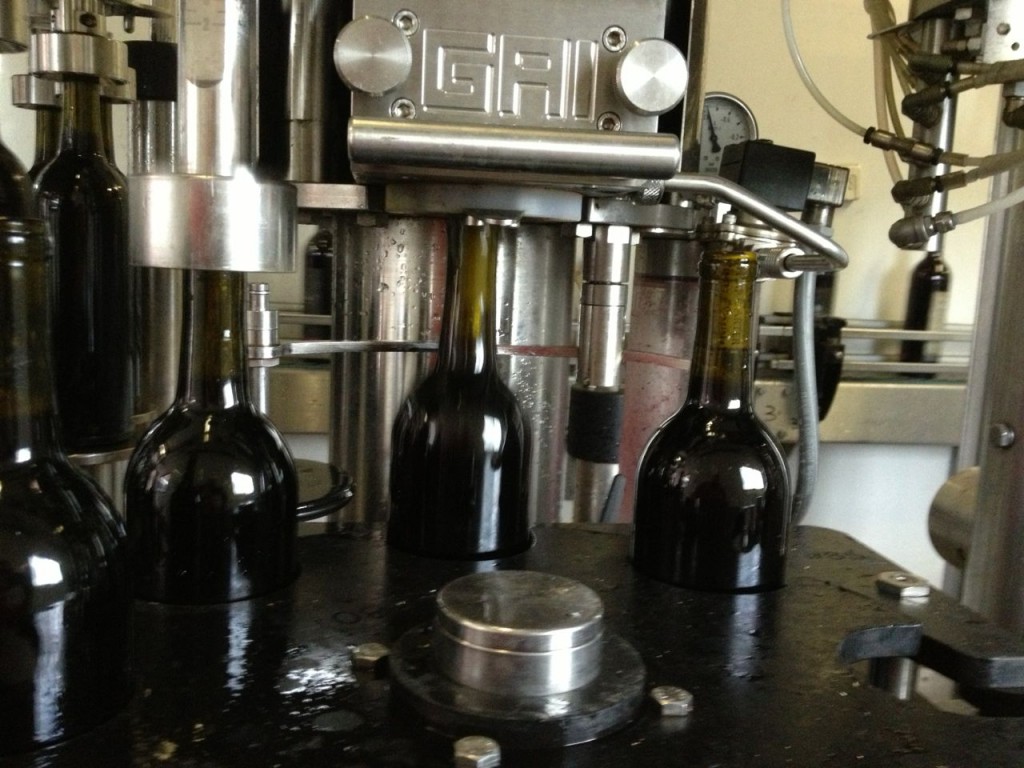
A small amount of wine is then removed from the bottle to make the wine volume exactly 750 ml. Evidently it is easier to make sure the correct amount is in the bottle by overfilling then removing the extra. Then the cork is pushed into the bottle.
Corks in the bin before being placed in the bottles

Corks in the bin before being placed in the bottles

The bottle on the left is having the excess wine removed, and the bottle in the middle is having the cork pushed into it.

The bottle on the left is having the excess wine removed, and the bottle in the middle is having the cork pushed into it.

A laser then checks that the cork is in the bottle, and then the seal is placed over the bottle.
Stacks of seals ready to be dispensed

Stacks of seals ready to be dispensed

A laser (the visible red dot) checks that a cork is in the bottle in the middle, and then a seal is placed over the bottle on the right.

A laser (the visible red dot) checks that a cork is in the bottle in the middle, and then a seal is placed over the bottle on the right.

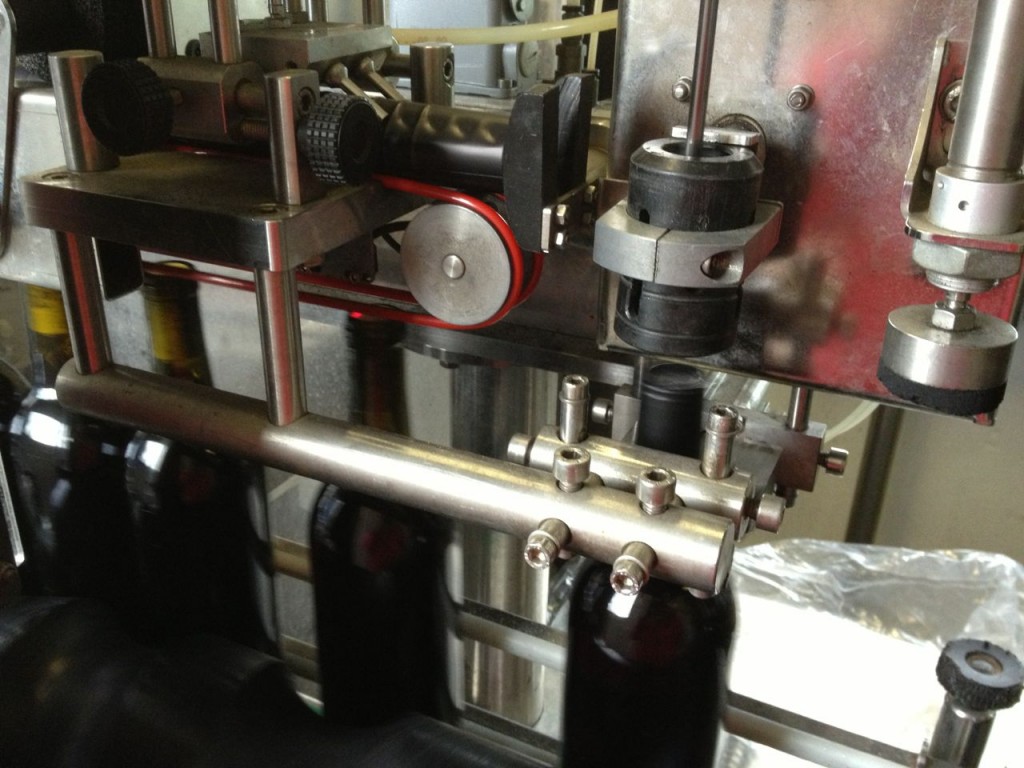
The seal is then pressed and stretched over the bottle to give a good seal.

Seals are stretched and pressed over the bottle.

Seals are stretched and pressed over the bottle.

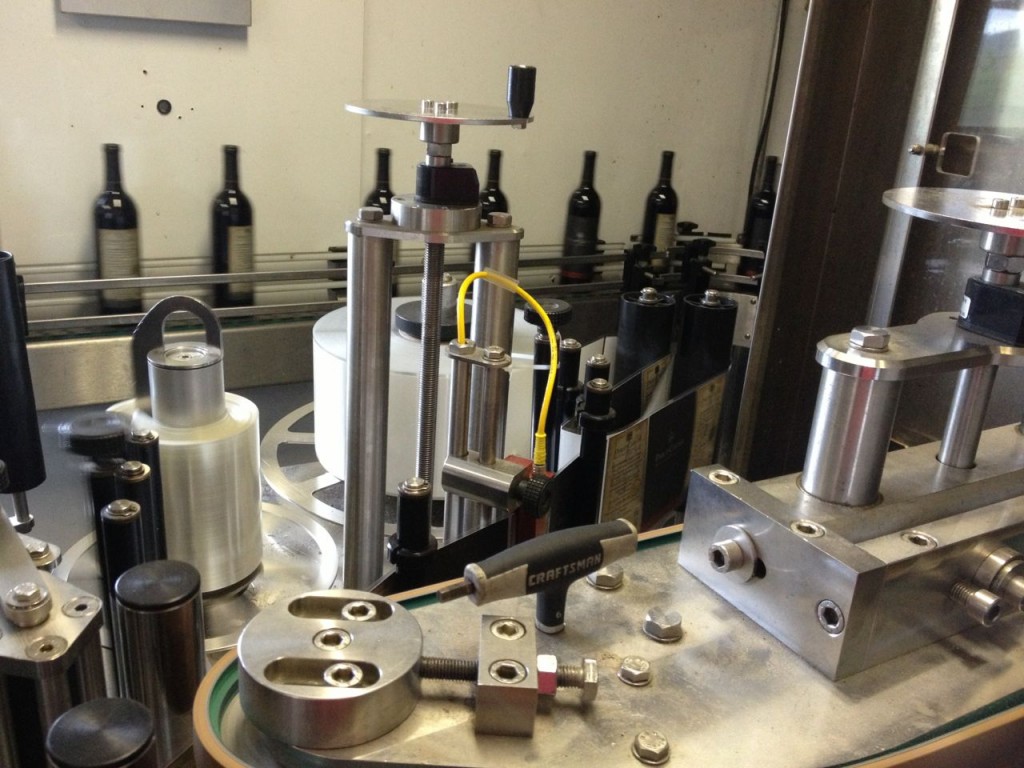
The front and back labels are then placed on the bottle. The front and back labels are on the same roll.

Labels being dispensed from roll

Labels being dispensed from roll

The whole bottling operation machinery is ridiculously compact.

Entire process, in the foreground is the sealer, behind it the corker, then the filler, then the washer in background

The entire process, in the foreground is the sealer, behind it the corker, then the filler, then the washer in background

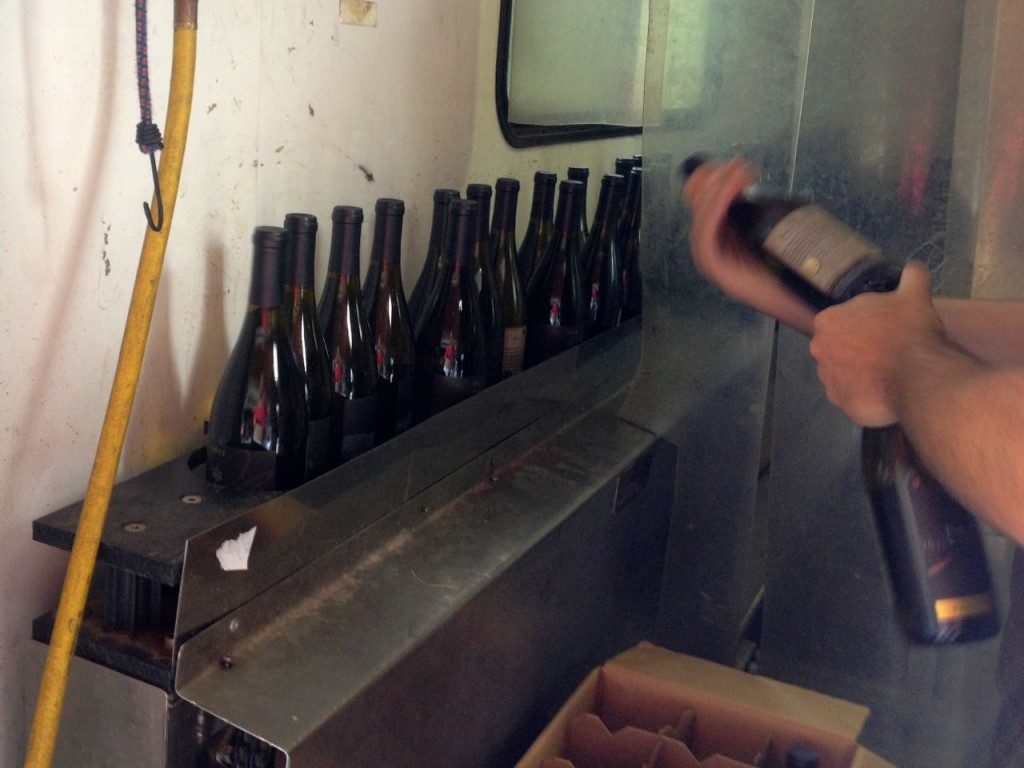
The finished bottles come out the back of the truck on the left side of the truck, five feet or so from where the empty bottles entered. They are checked by a person to make everything is perfect then put in a case.

Finished, filled bottles leave the bottling operation

Finished, filled bottles leave the bottling operation

The final product from the operation is delicious bottled wine. I want to thank the Philip Carter Winery for allowing me to help, a wonderful day, and all the delicious wine. Also, I would like to thank the operator of the bottling truck (whose name I am horribly sorry to say I don’t remember) for giving me a tour of the truck and explaining the whole process. It was great fun and incredibly interesting.

Two of the final products from that day and my reward for helping to bottle the wine

Two of the final products from that day and my reward for helping to bottle the wine

Gray Catbird: A Very Smart Bird

A gray catbird but not the one I saw today

A gray catbird but not the one I saw today

Today I was outside on my back patio doing a little bit of yard work. I swept a bunch of dead leaves and other yard debris and put them into a compost bag. In some places, these leaves had piled up, and I found earthworms underneath the leaves helpfully starting to decompose the leaves. Then I moved the compost bag, so I could work in another area, and I found more earthworms underneath the bag. [I honestly have no idea from where these earthworms come. Every time I sweep away leaves that have been there for a while, there is dirt and earthworms. Problem is, it is concrete patio surrounded by a brick retaining wall. How are these earthworms getting down the retaining wall and then getting across several feet of concrete patio?] I swept more leaves and put them in the compost bag. While I was doing this, I noticed a gray catbird (Dumetella carolinensis) land on the retaining wall then fly down to the patio near where the compost bag had originally been. This is slightly unusual because while I see a gray catbird almost everyday, I normally see it on the hanging suet feeder, not on the ground. Then I started pulling some invasive vines from my yard, and I noticed the catbird now land again on the patio, but now it landed in the second area that I had just swept right next to the compost bag. The second spot was about six feet or so from where I was standing pulling vines. I picked up the vines I had pulled and walk back to the compost bag to put them in it. By then the catbird had flown off, but while I was putting the vines in the compost bag, I looked back, and now the catbird was where I had just been pulling vines. I walked back to that same spot and swept the wooden steps that allow a path over the retaining wall. The catbird returned to the area near the compost bag. I then picked up the leaves and walked back to bag, and the catbird returned to the area where I had swept. This continued for a half hour or so. I would sweep or pull vines, and the catbird would watch me from the retaining wall. I would then take vines or leaves to the bag, and the catbird would return to where I had been working. The catbird was within about ten feet of me the entire time. I was actually quite honored that it would be that close to me. After quite a while, it finally dawned on me that the catbird was going to areas I disturbed to look for insects. I am not sure if it eats earthworms, but I was definitely unintentionally disturbing earthworms. I am fairly certain I was disturbing and revealing bugs. Thus, this very smart bird was letting me do the work of disturbing the ground to reveal insects, and the catbird would just come in my wake to look for the food. My new friend, the catbird, is a very smart bird.

Scrap Metal Recycling

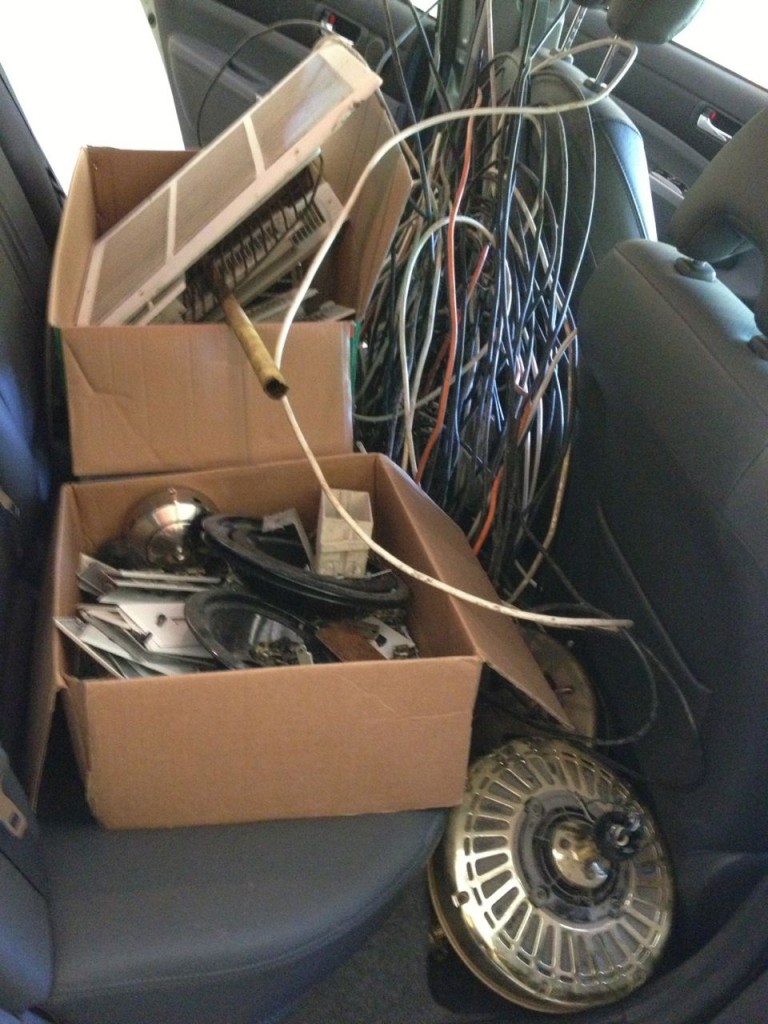
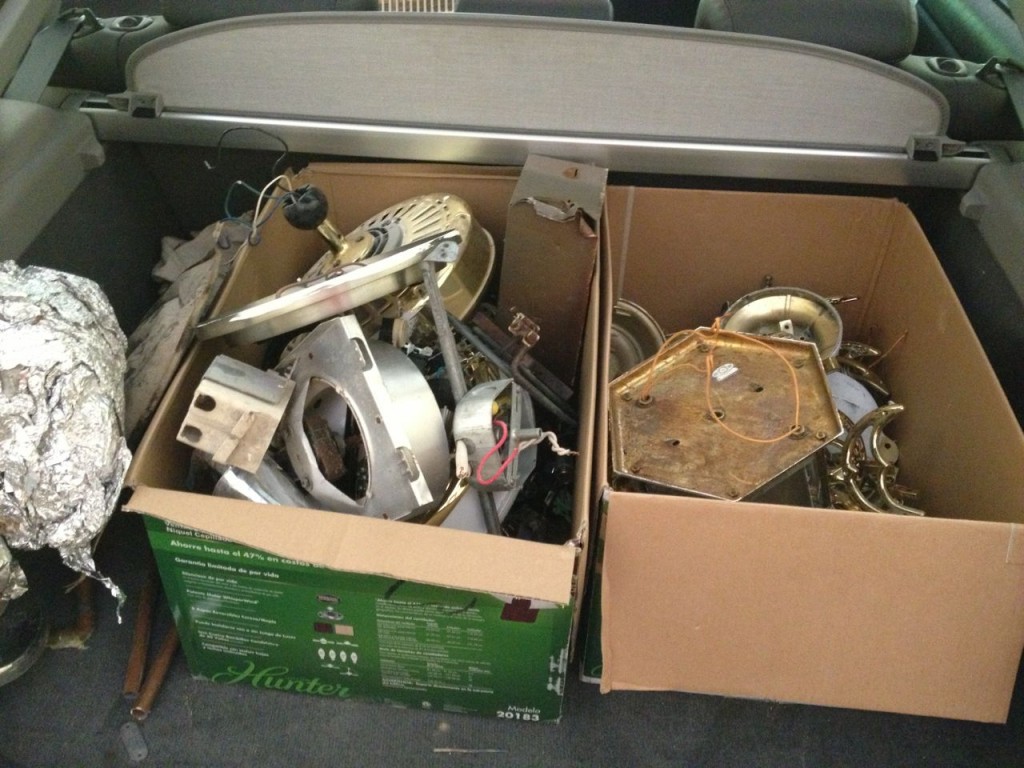
As I’ve been renovating my home, I’ve been saving all the metal to sell it for scrap. I had no idea how much money I could make, but for the sake of the environment and proper disposal, it should be recycled. Also, if I made $5 from the scrap metal, then that was $5 I didn’t have before. After saving all the metal from Phases I and II of my home renovation, this is what I had accumulated.

metal scrap metal scrapThe ferrous metal (magnetic) included all the nails from pulling out drywall and molding, various screws, electric outlet and light switch plates, vent covers, ceiling fan parts, appliance parts, and much more. I also had a bunch of brass doorknobs and light fixtures. I had copper from electrical wire, piping, and coaxial cable. Finally I had four overhead fans and various other metal parts.

What was the results of selling this metal? I made $76! I am really happy with this. The majority of the money came from the ceiling fans and the various brass parts. Clearly copper prices are still high.

I’m going to add this to the list of reasons why it’s great to do-it-yourself. I carefully saved all the metal, separated it, and then sold it. I have never seen contractors do this. At times, electricians and plumbers might save copper, but they will sell it for their own profit. My electricians actually tossed scrap copper wire into the trash, and I went back and pulled it out. [It was a clean trash bag.] It literally pays to do-it-yourself.


Ferdinand Eats an Apple Core

Almost everyday I eat an apple with lunch. Ferdinand loves apples, so every time I eat an apple, he sits there and drools until I am finished. When I finish, I break the apple core into bits so that I can remove the seeds. [Apple seeds have a small amount of cyanide in them, so I remove them just to be careful.] Then Ferdinand sits there patiently while I feed him apple bits. He really has a hard life. As you can see in the video, the poor dog has to lift his  head to eat his treat.

My First 5K Race

I ran my first 5K race yesterday. This was not the first time I have a 5K before, just the first time in an actual race. I have actually run more than a 5K non-stop. Thus far my maximum length running nonstop has been about 3.6 miles. My official time for this 5K was 40:51.3. There were many people walking or walking and running in the race, so I was not last. I was definitely one of the last nonstop runners though. I really don’t care how slow I was. Sure, I’d like to be faster, but running over three miles nonstop is a major personal achievement for me. I’m 40 years old, and for the first time in my life, I can run three miles nonstop. I have never been in good enough shape to do that. I exercise on my elliptical machine almost everyday for an hour. I’ve been exercising on my elliptical machine for years, although I have been getting more and more diligent about intensity and how often I exercise in recent years. However, road running is different from running on an elliptical machine. One of the reasons I like my elliptical machine is there is no impact. There is definitely impact with road running, and I have to be careful to not injure myself, especially my knees. However, for numerous reasons, a month or so ago, I realized I needed to increase and diversify my exercise routine, so I started road running once or twice a week. I started with short lengths: first a little over a mile, then next week, two miles, then the next week three miles. Since then I’ve been increasing it incrementally by adding a couple of tenths of mile. What was strange to me when I first started road running was realizing that my heart and lungs were perfectly fine during the run. Exercising on my elliptical machine had prepared my heart and lungs just fine for road running. It used to be that I could only run for short lengths before getting out of breath and have to switch to walking. Now as I have started running more what slows me down and to a certain extent hurts me is my legs not liking this whole impact thing. Therefore, I run slow, steadily, and within my capabilities. I run to improve my fitness, and I am slowly getting better at road running as I do it more.

I decided to enter a 5K race to have a goal and see how I compare with other runners. I also first decided to enter a 5K because it was Run or Dye, and it looks like a blast. That race is not until June though. Later I signed up for the race I ran yesterday, Arlington’s Turtle Trot, because it was within walking distance of my house, and it raises money for my local wildlife center’s turtle rehabilitation program. I had no delusions that I would win this or even be competitive. Again, I’m slow, and I am fine with that. What I learned today is that I am really slow, but I am slow and steady as I knew I was, and I am improving. I also learned that some runners and walkers have absolutely no knowledge of outdoor running etiquette.

The Turtle Trot was a very family friendly, small, community type race. There were many children running the race along with adults. There were some adults running with children in strollers and running with their also running children. There were adults running in a competitive manner and adults like me just running to say they did it. The race was on the Washington & Old Dominion (W&OD) trail, a very popular paved hike and bike trail that varies from about six to eight feet in width. This is where the problems arose (in my opinion). Participants just gathered at the start with little sorting. The people who were trying to be competitive did seem to gather more at the start, but the people who were planning to walk did not do that much sorting to stay at the back. I stood near the middle. I was trying to avoid the crush of real runners at the front. As the race started, I walked to the start line letting the pack get going first, and as the race was chip timed, it really didn’t matter that I was delayed in crossing the start line. For the first tenth of a mile or so, I tried to let real runners behind me easily pass, and I tried to quickly pass the walkers in front of me. Then after a few tenths of a mile as racers were still sorting themselves out, the race route went from Four Mile Run trail to the much more popular W&OD trail. As with any Saturday morning, the W&OD is populated with bikers, runners, walkers, and their dogs. This made for an even more crowded race route, and this is where my (and I would wager other participants’) problems really began.

On the W&OD, you need to be courteous and allow others to pass you when they are faster, stick to the right if possible especially when you are slow, and politely and quickly pass others being cognizant that someone else may want to pass you as you pass others. I walk (with and without my dog), run, and bike on the W&OD often. I’m used to these rules of shared space courtesy and happily accept it because I enjoy using this trail. Some of the participants in the Turtle Trot either do not accept these rules of common courtesy or are really obtuse. There were some participants and some people simply using the trail who made it difficult to pass them, especially some who were participating in groups of more than two and thus taking up the entire side and then some of the trail. There were two female participants who absolutely drove me crazy for the first half of the race. They were walking/running along side each other. They would run faster than me for a bit and pass me. Then they would walk, and I would have to pass them. As they were taking up the entire right side of the trail, I would have to pass them on the left side, which often meant waiting until it was free from opposing cyclist/pedestrian traffic. Then shortly after I pass them, evidently because I was running so slow, they would start running again, pass me, then start walking again. This nonsense went on every five or ten minutes or so, for almost the entire first half of the race, until finally, thankfully, they either stopped their running sprints or I as a steady, slow runner had gotten far enough ahead of them to avoid them. To be clear, I have absolutely no problem with walkers who do running sprints. I used to exercise like this before I was able to run nonstop. I think it is a great way to get your heart rate up while walking if you can’t yet run for extended periods. I wouldn’t even have a problem with them doing this in the race if they were not walking along side each other and had courtesy of others around them. If they were walking single file, it would have been much easier to pass them. There were others who did similar type things, which also got annoying, but they seem to pass me less, or it was one person not in a group, who could thus then pass me or allow me to pass him/her more easily. There were also children in the race, some not running alongside adults. Many of them were also walking then sprinting with some of them doing this in an unpredictable manner such that it became difficult to know if a child was going simply stop right in front of me causing me to have to quickly swerve around them. Some of the children also passed on the right or left in groups and just plain ran in unpredictable ways. I can forgive the children a lot easier. They’re children; they may not know better, and well, they were acting like children. All of this made for some serious frustrations during the race. I’m sure it doesn’t sound like it, but I actually like the diversity of people in the race. I like that there were children, walkers, and noncompetitive runners. Exercise is so important, and I think it’s great that people of all ages are out there exercising. Also, having other people in the race who had no anticipation of winning the race gives me as a slow runner encouragement to enter races to improve my personal time and to have fun, as fun runs should be.

Overall I enjoyed my first 5K. I am glad I did it, and I hope many turtles will be helped by my entry fee. I hope to keep improving in my fitness and running and perhaps run a few more races in the future simply as a goal to improve my time, especially when the entry fees help a cause I support. I just hope my future race organizers will better communicate to participants about race courtesy and most importantly that my future fellow participants will practice race and shared space courtesy.

What Not to do with Metal Covers

Geeky Girl Engineer’s Home DIY Tips for Morons

All houses have numerous cover plates for wall openings such as electrical outlets, light switches, and vents. The cover plates can be fancy or plain and come in various materials. Vent covers are normally metal, but specialty ones come in different materials. For two floor vent openings in my family room, I bought unstained white oak covers that I then had stained and sealed to match the hardwood floors in that room.

Wooden vent cover stained and sealed to match the hardwood floor

Wooden vent cover stained and sealed to match the hardwood floor

Light switch and electrical outlet covers are normally plastic but can also be various materials and colors. In my kitchen, I used stainless steel light switch and outlet covers to match the stainless steel tiles in the backsplash and the stainless steel appliances.

Stainless steel light switch/outlet cover which matched stainless steel tiles

Stainless steel light switch/outlet cover which matched stainless steel tiles

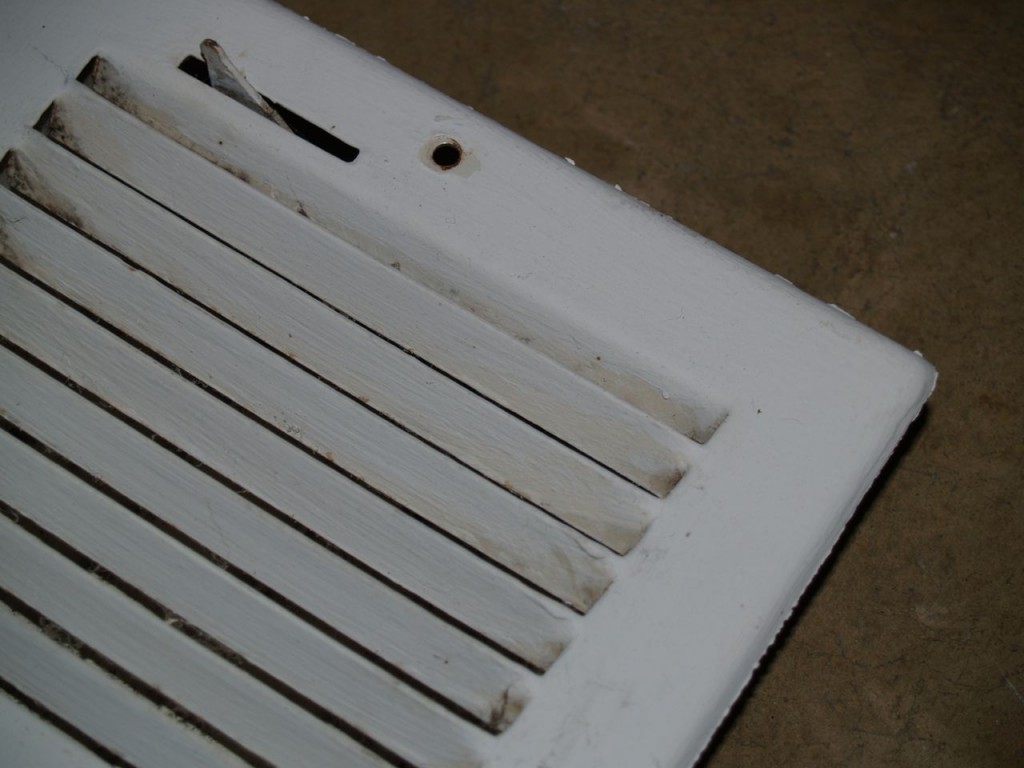
Thus, you don’t have to use the standard type covers. You can buy fancier ones to coordinate with your decor. You can also buy covers that are specially made to be painted or wallpapered so that they really match your walls. However, these are special ones. You can’t, or rather you shouldn’t, paint any metal cover. If you paint metal, it needs to be primed properly, and if you want the paint job to look nice, it needs to be applied carefully, preferably it should be sprayed on for a really nice, smooth coat. Otherwise, you get this:

Improperly painted vent cover

Improperly painted vent cover

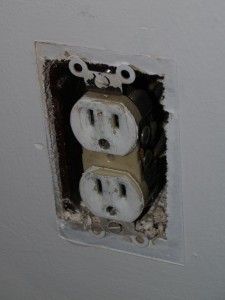
I’m not sure if the photo really shows how bad it looks. The paint is chipping all over. Brush marks can clearly be seen, and in some places, the paint pooled, making the coat very uneven. Most importantly, if you refuse to heed my advice on this, please, please, take the covers off before painting them. Don’t paint them while they are on the wall. If you paint them while on the while, this happens:

Outlet after cover that was painted while on wall was removed

Outlet after cover that was painted while on wall was removed

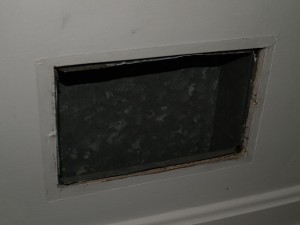
See the lovely lines where the cover was? That is due to a thinner coat of paint where the cover covered the wall. Here is a similar outcome with the vent cover.

Vent after cover that was painted while on wall was removed

Vent after cover that was painted while on wall was removed

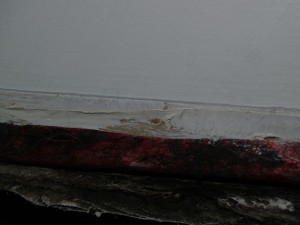
Closeup of vent after cover that was painted while on wall was removed

Closeup of vent after cover that was painted while on wall was removed

The very worst part was that the paint had flowed underneath the cover and essentially glued the cover to the wall. I had to use a flat-head screwdriver to pry the covers off the wall. In some places, it didn’t come off cleanly.

So please, don’t do this. Your house’s future owners thank you.

Orchids, Orchids, and More Orchids

Last weekend I went to see National Museum of Natural History’s 2013 Orchids of Latin America exhibit. The exhibit is now over, but it had an amazing variety of orchids. I love orchids. I think they are insanely beautiful, and I am amazed by the variety of them. Granted, some of that variety is due to humans breeding them. Below are photos of some of the orchids that were there.

Hacking a Chandelier

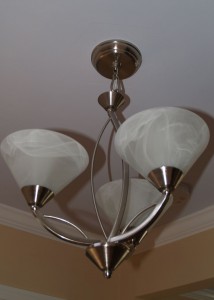
As part of my home renovations, I have been installing new light fixtures, including several from ELK Lighting’s Elysburg line. I wanted to use a three light chandelier in the downstairs foyer by the front door and at the second floor landing at the top of the stairs. The only problem is that they hang 22 inches from the ceiling (at their shortest), and since my house has 8 foot high ceiling, this means the chandelier is hanging a little low for an area where people are going to walk. As with all chandeliers, it came with chain to allow it to hang lower, but there is a limit how short it can be. Thus, I decided to hack the chandelier to make it even shorter. Here is the chandelier at its shortest as designed.

top of the chandelier before

top of the chandelier before

Chandelier before

Chandelier before


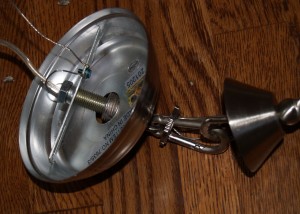
The way the chandelier connects to the outlet box is pretty standard.

Outlet box crossbar holds screw pipe

Outlet box crossbar holds screw pipe

Screw collar loop attaches to clip ring to canopy nut

Screw collar loop attaches to clip ring to canopy nut

The simplest way to shorten the fixture seemed to be to eliminate the screw collar loop, clip ring, and canopy nut by somehow connecting the light fixture screw directly to electrical box’s screw pipe. The problem of course is they are two different diameters and threading size. I considered using a bolt that was the same size as the fixture screw, in place of the screw pipe, then just connecting them using a coupling nut. However the light fixture screw is a M10 x 1.0, and after a half hour of internet searching, I couldn’t find a single vender for that size coupling nut. Another method that I thought of later, was to bring the light fixture screw directly to the box crossbar using a nut, then drill holes through the canopy and use screws through those holes to hold the whole fixture up. The problem with that is that I was a little weary of drilling holes in the canopy in case I messed up, and also, I would need decretive screw caps to cover the screws, and I didn’t know how to find those.

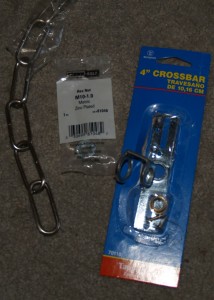
What I did, was searched to aisles of Home Depot in search of something I could use to connect the pieces somehow, and I finally came up with the following solution. These are the materials I used. I used the chain that came with the chandelier, a nut to fit the light fixture screw, and a crossbar adjustment kit I found in the electrical aisle. I bought the crossbar adjustment kit solely for the piece that in the photo is outside the package it came in. I have no idea what the piece is, but it looks like to two very strong washers held apart in a parallel manner by a bar.

Materials for chandelier hack

Materials for chandelier hack

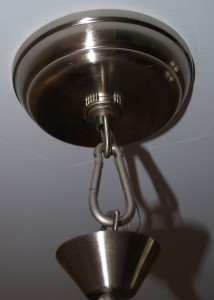
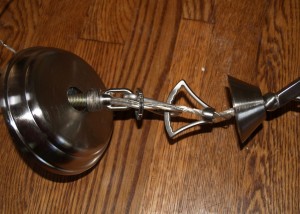
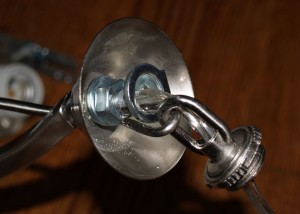
Here’s what I did. I put the parallel washer thingy piece on chandelier screw, then used the nut to hold it on. I then cut one of the chain links in half and used it to connect the top part of the parallel washer thingy to the chandelier’s screw cap. [You will note that as an engineer, I sometimes use highly technical terms like “thingy”.] I had to use a pipe wrench to bend the cut chain link into a closed loop. It’s rather strong.

My hacked way of connecting the light fixture to the screw cap.

My hacked way of connecting the chandelier to the screw cap.

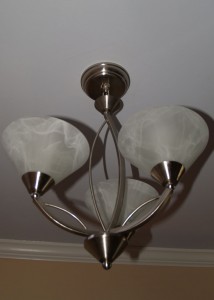
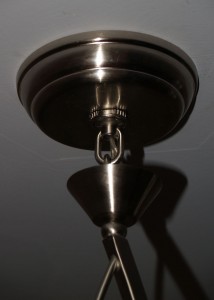
The finished chandelier now looks like this. I was able to shorten the entire chandelier by about two inches. Not that much, but enough that hopefully less people will hit their head.

Chandelier after

Chandelier after

Top of the chandelier after

Top of the chandelier after


So that’s how I hacked the chandelier. If anyone out there has any suggestions for a better way I could have done it, that does not involve welding, I would love to hear it. Please leave a comment with suggestions.

Cherry Blossom Time

I’ve lived in the DC area for two years now, and this is the first time I’ve visited the Tidal Basin to see the cherry blossoms. They were not quite in full bloom when I visited, but they were still quite pretty, and the DC monuments provide a nice backdrop for many of the photos. Here are a few of the photos I took.

Cherry blossoms

Cherry blossoms

Cherry blossoms

Cherry blossoms

Cherry blossoms

Cherry blossoms

Cherry tree with Potomac River and Arlington Memorial Bridge

Cherry tree with Potomac River and Arlington Memorial Bridge

Cherry trees blooming on Potomac River near the 365 bridge

Cherry trees blooming on Potomac River near the 365 bridge

Cherry blossoms on Tidal Basin with more cherry trees blooming on other side

Cherry blossoms on Tidal Basin with more cherry trees blooming on other side

The Jefferson Memorial provides a lovely backdrop for cherry blossom photos.

Cherry blossoms with the Jefferson Memorial

Cherry blossoms with the Jefferson Memorial

Cherry blossoms with the Jefferson Memorial

Cherry blossoms with the Jefferson Memorial

Cherry blossoms with the Jefferson Memorial

Cherry blossoms with the Jefferson Memorial

Cherry blossoms with the Jefferson Memorial

Cherry blossoms with the Jefferson Memorial

Other beautiful flowers are blooming near the Tidal Basin also, including one of my favorite flowers, saucer magnolias.

Saucer magnolia (Magnolia × soulangeana)

Saucer magnolia (Magnolia × soulangeana)

Saucer magnolia at the George Mason Memorial

Saucer magnolia at the George Mason Memorial

Saucer magnolia with the Washington Monument

Saucer magnolia with the Washington Monument

Also forsythia is in full bloom.

Forsythia at the George Mason Memorial

Forsythia at the George Mason Memorial

What not to do with drywall

Geeky Girl Engineer’s Home DIY Tips for Morons

This is freshly installed drywall.

Guest room after drywall and new window

Guest room after drywall and new window

Drywall is that stuff you paint and hang things on. It is also known as gypsum board because the interior of it has gypsum in it. In bathrooms, green board is used because it is moisture resistant, but it is not moisture proof. It is called green board because it is green. Yes, home buildings supplies have very creative names. It is seen below in my guest bathroom as I was tearing it out for renovations.

Downstairs bathroom deconstruction

Downstairs bathroom deconstruction

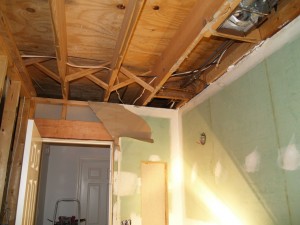
Drywall is screwed or nailed to studs. It covers up the insulation, studs, wires, pipes, and everything else that goes behind a wall. Fairly simple, right? Evidently not so much for the morons who “renovated” my house at one point before I bought it. Here is the room that is now my guest room when I was tearing things down to renovate.

guest room deconstruction

guest room deconstruction

Look at the wall on the right that still has the drywall. See the brown outline around the door? Here is an up close photo of it.

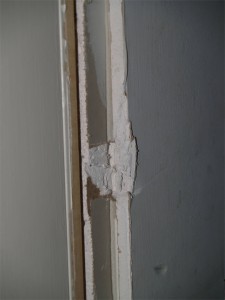
Guest room deconstruction. Two layers of drywall for unknown reasons.

Guest room deconstruction. Two layers of drywall for unknown reasons.

That outline is due to a second layer of drywall that was unpainted and revealed when the door trim was removed. Here is another look at it.

Guest room deconstruction. Two layers of drywall for unknown reasons.

Guest room deconstruction. Two layers of drywall for unknown reasons.

So let’s just be clear: there is absolutely no point to two layers of drywall on one side of a wall. One layer of drywall is all you need. In fact, if you add a second layer, then the electrical outlets and light switches don’t fit through properly. I have tried to come up with a logical reason for the two layers of drywall. Best I can come up with is that they noticed the mold on the drywall on another wall in the room and assumed it was from moisture from the adjoining bathroom. Therefore they decided to put up a second layer of drywall to stop the moisture. This makes no logical sense, and the drywall wouldn’t stop moisture from coming through the wall. Assuming this is the reason, they entirely missed the reason for the mold anyway. The mold was due to the fact that behind the drywall was furring strips on cinder blocks. The cinder blocks formed the exterior wall. The two exterior walls of this room are underground, hence the cinder blocks, and there was not enough moisture protection to prevent moisture from the ground coming through the cinder blocks which then would gets to the drywall.

However, I really don’t know why they put up a second layer of drywall. The mold is simply a guess. When I tore down both layers of drywall, I didn’t notice anything wrong with the covered layer of drywall that would explain why it was covered. The summary of this is, there is no reason for two layers of drywall. It is a waste of drywall, and it is stupid.